In this article we look at the process of how to epoxy garage floor with a focus on straightforward, achievable steps. You’ll learn what tools and materials are required, how to prepare the concrete, and the key techniques for application.
Be sure to check out our article on epoxy bathroom floors.
Points Of Note
- Epoxy garage floors offer superior durability, resistance to chemicals, stain and moisture, as well as enhanced aesthetic appeal with various colours and finishes.
- Proper preparation is key, requiring thorough cleaning, degreasing, and etching of the concrete surface, while ensuring personal safety with the use of protective equipment.
- DIY epoxy application involves assessing the floor condition, repairing imperfections, accurately mixing and evenly applying the epoxy, and allowing a sufficient curing time of around 7 days.
Below is an informative from Bunnings video of you’d rather note read the full article.
The Positives of Epoxy Garage Floors
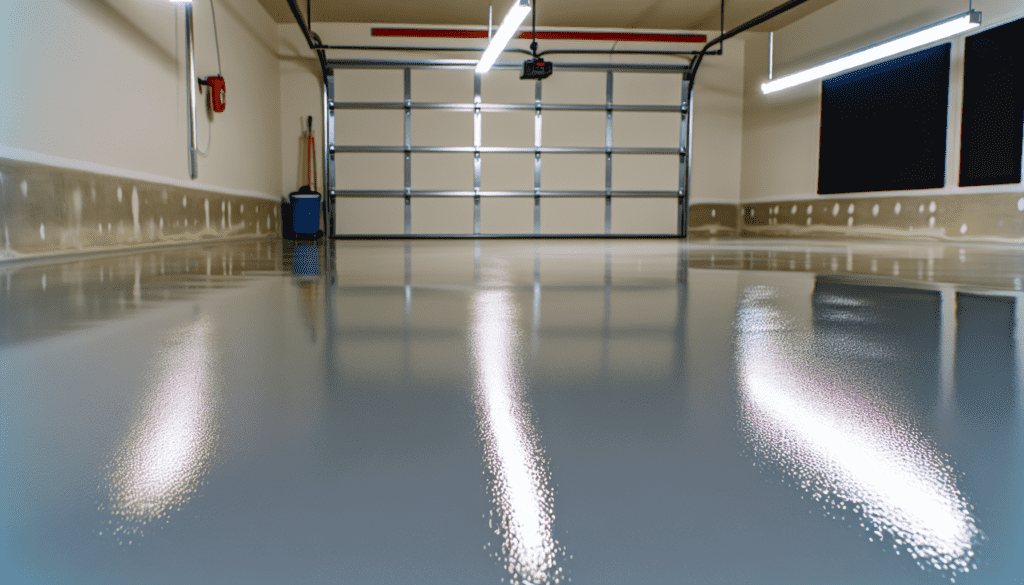
One of the key advantages of using epoxy for garage floors, as opposed to concrete flooring, is their strength and resilience. These floors are highly resistant to damage from vehicles, machinery and spills containing chemicals. They have properties that make them resistant to stains and moisture making them an ideal choice for garages which may be prone to various types of spillage.
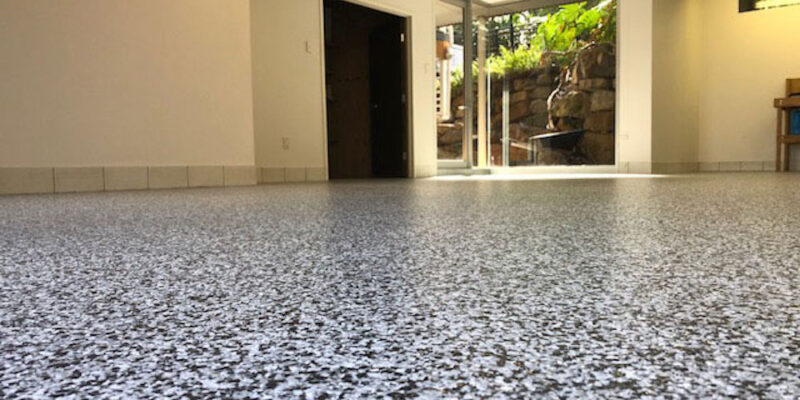
Aside from practical purposes, epoxy floors can greatly enhance the visual appeal of a garage space. With numerous colour options available along with different finishes such as glossy or matte surfaces, you can personalise your floor according to your unique style preferences. The smooth finish achieved by applying an epoxy coating on top gives off a professional look transforming any ordinary storage area into something more refined.
Preparing for Your DIY Epoxy Garage Floor Project
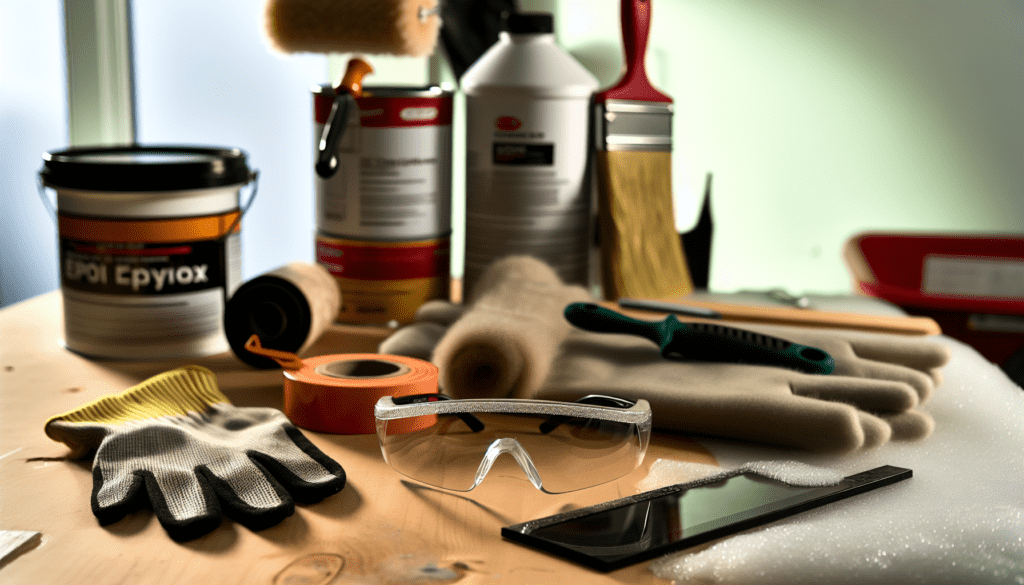
Before beginning the application of epoxy coating, it ‘s important to consider all the required materials and tools. These include: epoxy paint, TSP cleaner and degreaser, concrete etching solution, primer and polyurethane for preparation. As well as xylene solvent, epoxy flakes with pigments for colour options. And various tools like a vacuum or power washer along with scrub brush & roller.
There are also a number of off the shelf options available in Australia. An example of a product that is becoming quite popular is UCoat.
Safety measures should always be prioritised in any DIY project involving handling of chemicals such as epoxy resin during the coating process. It’s highly recommended to use safety glasses/goggles equipped with side shields while working on this type of projects for protection against potential eye injuries caused by dust particles/mist formation. Respiratory masks are also advised since they can prevent inhalation hazards associated with painting indoors.
In addition,care must be taken to protect hands using protective gloves from Epoxy Resin specifically. The selected devices could effectively minimise user exposure risks occurring throughout entire work duration.
Assessing Your Garage Floor’s Condition
It is important to evaluate the condition of your garage floor before beginning any epoxy application. Be on the lookout for indications such as existing coatings, including stubborn discoloration and stains that cannot be removed through scrubbing. Damage in the form of chipping, peeling, flaking or pitting. And discoloured concrete surfaces.
There are various types of coatings commonly found on garage floors. These may include oil-based paint, latex-based paint, epoxy floor coatings, and polyurethane.
Cleaning and Prepping the Concrete Surface
Preparing your garage floor properly is a vital step before applying an epoxy coating. This involves several key tasks such as clearing the area, degreasing the surface and etching the concrete for optimal adhesion. These steps are essential to ensure a smooth and even finish of the final epoxy layer on your garage floor.
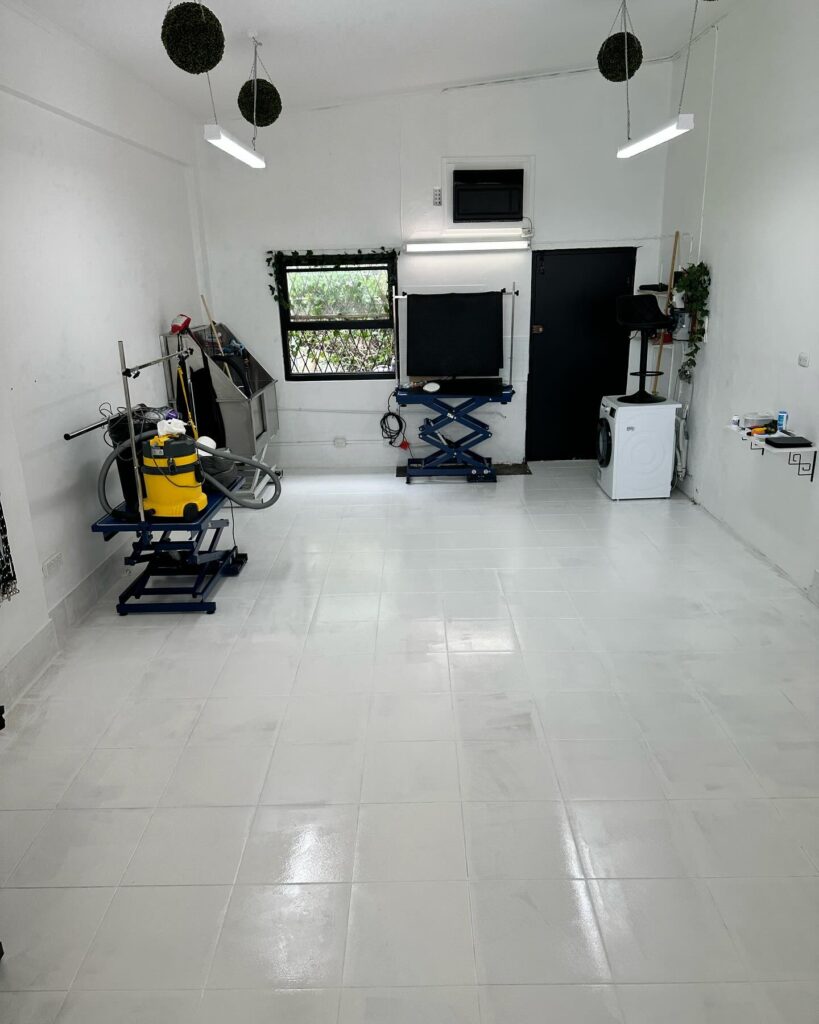
Clearing the Garage Space
To prepare for your epoxy project, the first step is to clear out your garage. This means removing all items from both the floor and the space itself, so that you have a clean area to work with. In order to efficiently organise and de-clutter your garage, it’s important to install open shelving units and categorise belongings for easier access.
Safety should be top priority when clearing out a garage for an epoxy project. Here are some guidelines:
- Sweep or vacuum thoroughly in order to remove any debris.
- Use warm water mixed with mild detergent while cleaning.
- Make sure there is proper ventilation in the workspace.
- Keep children and pets away during this process.
- For tougher stains or dirt, use gentle soap as needed.
Degreasing the Floor
Before applying epoxy, it is important to eliminate any typical oil and grease blemishes from garage floors. This can be accomplished with the use of a degreaser.
For safety purposes, make sure to wear proper protective gear such as gloves, face shields and goggles when using the degreaser in order to protect yourself against chemical splashes or fumes. Avoid mixing different cleaning products together as this could potentially result in harmful reactions.
Etching the Concrete Surface
The next step in preparing the concrete slab is to etch its surface after it has been degreased. Etching creates a rough and porous texture, which promotes better adhesion of epoxy to the concrete and ensures a durable bond.
To safely apply the etching solution according to manufacturer’s instructions, certain precautions should be taken into consideration.
- Avoid any direct contact between skin or eyes with the etching solution.
- Wear proper protective gear like safety glasses and work gloves.
- Use appropriate face masks while applying as dust may occur.
- Take necessary measures for protecting surrounding areas from exposure to the strong etching solution.
Repairing Cracks and Imperfections
Before applying epoxy, it is important to repair any cracks and imperfections on your garage floor. There are numerous products on the market to fill small crack or lines in concrete.
Once the repairs have been made, it is recommended to smooth out the surface for optimal results. You can achieve this by hand sanding with 80-100 grit sandpaper or using higher grade (200-400 grit) paper for a super smooth finish. For larger areas or very rough surfaces, you may even need to use a concrete grinder.
These are generally quilte expensive to purchase, so your best option is likely to hire from Kennards or Coastes for example.
Mixing and Applying the Epoxy Coating
With the garage floor properly prepped, it is now time to mix and administer the epoxy coating. This step demands careful attention in order to achieve an even application of the epoxy for optimal results on your garage floor.
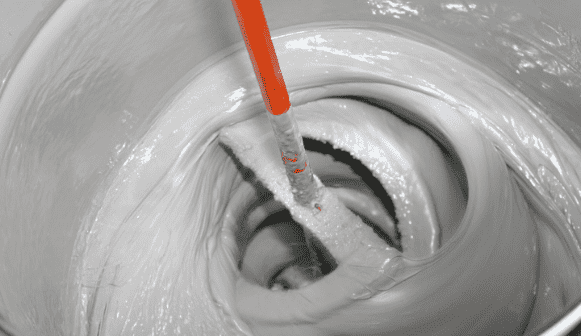
Mixing the Epoxy Components
The initial step in this process involves combining the components of epoxy. For garage floors, it is advised to follow a mix ratio of 1:1, 2:1, 3:1 or 5:1 when mixing resin and hardener. The end result may vary depending on individual preferences and product used as websites often rely on cookies and data to personalise content and ads.
To ensure a more comprehensive blend, using a variable-speed drill with a mixing blade is recommended although hand-mixing can also be done. It is suggested to mix the epoxy resin and hardener for at least three-four minutes until all components are uniformly combined.
Applying the Epoxy Coating
When it’s time to start applying epoxy coatings on the garage floor, make sure that you have mixed all the components together thoroughly as above or to the manufacturers instructions.. To begin with, use a brush to spread the mixture along edges and corners of your garage flooring.
You may need to tape the edges first so you don’t end of getting the resin on the walls or skirts.
Next step is using a roller for larger surface areas while evenly spreading thin layers at once. While doing so in smaller sections would ensure perfect coverage and proper adhesion across every part of your floor. Don’t forget to keep an eye on layer thickness and make sure there are no uneven spots when you apply the epoxy coating.
Enhancing Your Epoxy Floor with Colour Flakes
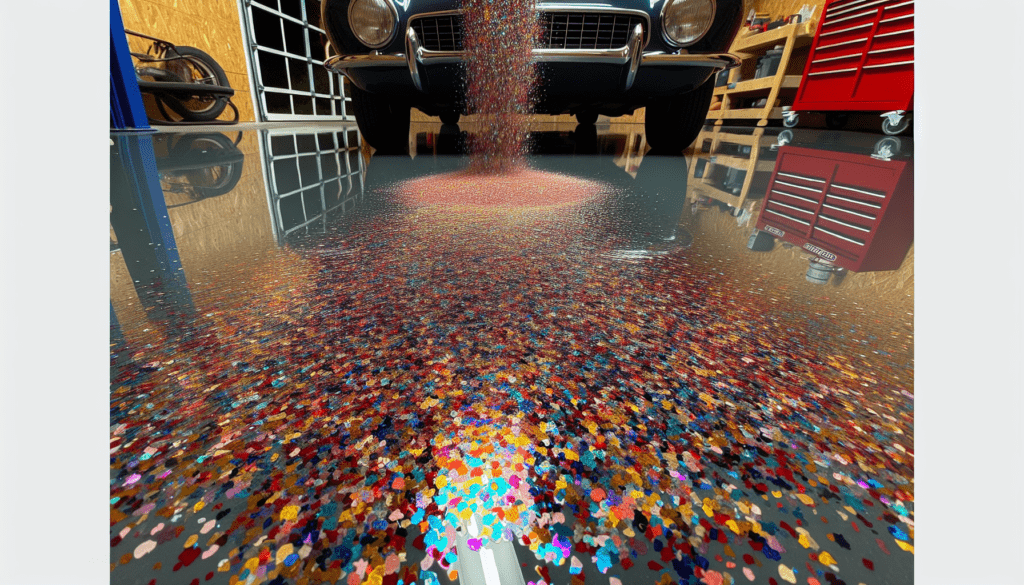
To add a personalised touch and camouflage any remaining flaws on your epoxy floor, consider incorporating colour flakes. These versatile elements are available in various shades to complement the style and ambience of your garage.
For optimal results, it is recommended to sprinkle the coloured flakes onto the wet and adhesive epoxy surface. This guarantees strong adhesion as well as a consistent appearance. The amount of flakes used can be adjusted according to desired coverage level for an even finish.
Curing Time and Post-Application Care
The curing process for epoxy garage floors, which involves applying both the epoxy and colour flakes, typically takes about a week. This time frame allows for adequate setting and hardening of the coating before it is safe to walk on.
There are various factors that can affect the duration of this cure period, such as type of product used and environmental conditions like temperature and humidity. For those in need of a quicker turnaround time, methods like using heat sources (e.g. hair dryer) or maintaining warmer temperatures may help expedite the process.
DIY vs. Hiring a Professional: Weighing the Pros and Cons
Deciding between tackling a DIY project or hiring a professional is an important factor to consider when it comes to garage floor coatings. While the cost for DIY epoxy garage floor coatings can be relatively low, typically under $2000 depending on the size, opting for a professional installation may set you back around $5500 or more, again depending on the size. Generally cost we will be determined by the squares metres to be covered.
It should be noted that choosing to have your epoxy floors installed by professionals often results in thicker and higher quality finishes compared to those achieved with standard DIY kits. Professionals possess expertise that allows them avoid common mistakes made during do-it-yourself projects such as improper preparation of the surface, incorrect mixing of epoxies and overlooking factors like temperature and humidity conditions.
Final Notes
To summarise, applying an epoxy coating to your garage floor can completely transform its appearance and functionality. This type of coating offers a long-lasting, resistant surface that is both visually pleasing and able to withstand the wear and tear of everyday use. While proper preparation is crucial for success in this project, whether you opt to tackle it yourself or hire a professional, the end result will be a durable and attractive garage floor that meets all your needs.
Popular Questions
Can I epoxy my garage floor myself?
Applying epoxy to your garage floor can be done by yourself with some dedication and willingness to learn. It is a suitable DIY project, even for those who have little experience. The process involves using epoxy on the floor of your garage and requires patience and time, but yields great results.
How do I prepare my garage floor for epoxy?
Before applying epoxy to your garage floor, it is important to properly prepare the surface. Start by clearing out all items from the floor and giving it a thorough cleaning. Next, use diamond grinding or shot blasting techniques to create texture on the concrete for better adhesion of the epoxy.
Once that step is completed, check for any cracks in the concrete and fill them before proceeding with application. Allow enough time for proper drying of both filling material and concrete prior to starting with layering epoxy onto your garage floor.
Is it worth putting epoxy on garage floor?
Using epoxy coatings on your garage floor is a worthwhile decision as it can effectively prolong the lifespan of your concrete flooring and enhance its strength, making it a valuable investment for any garage. There are various options of epoxy coatings available in terms of cost and durability to suit different needs.
There is no denying that adding an extra layer of protection through epoxy will greatly benefit the longevity and sturdiness of your garage’s concrete floor. You have plenty of choices when it comes to selecting an appropriate type of coating depending on your needs.
What is the downside to epoxy garage?
One drawback of using epoxy for garage floors is that they can become extremely slippery when coated with oil, which may pose a safety hazard. Areas where spills or water buildup occur frequently are not suitable for this type of flooring and it would be less ideal to use in garages as a result. It’s also can be more expensive than other coverings, and certainly more than raw concrete.
What is the recommended time for the epoxy coating on my garage floor to cure before walking on it?
It is suggested to give the epoxy coating on your garage floor about a week to dry before stepping or driving on it. This will allow sufficient time for the epoxy to fully cure and ensure its durability.