old to new building renovations

Adapting Old buildings to Modern Renovations

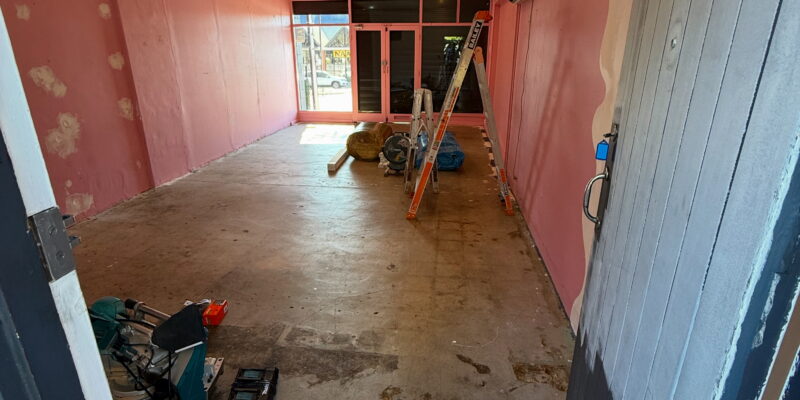
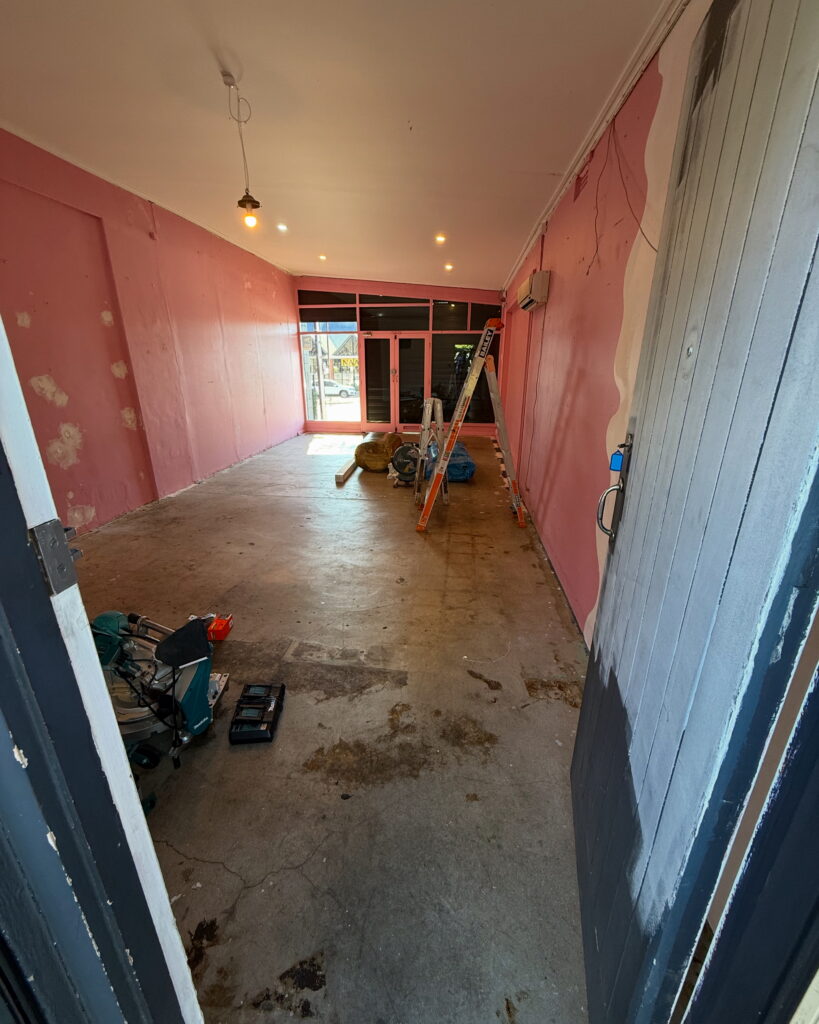
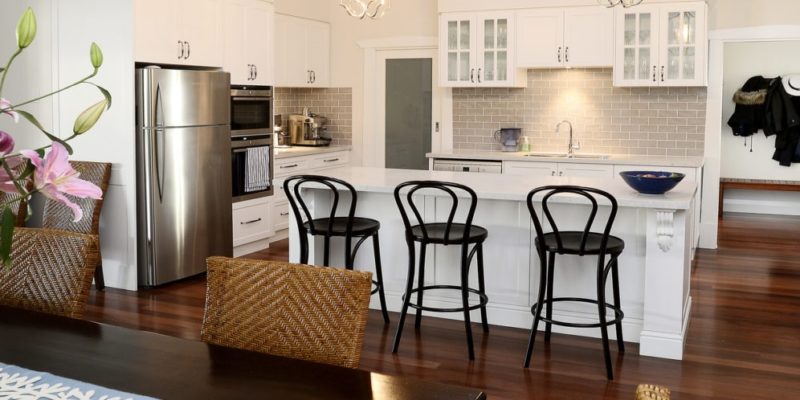
Many of our projects over the years have involved keeping the front part of an old home and adding a modern addition to the rear of the building.  Some of these projects have been in locations across South Australia in Tusmore, St. George’s, Aldgate, Rose Park, Maylands, Toorak Gardens, Port Elliot and our most recent project, currently under construction, is in Kingswood.

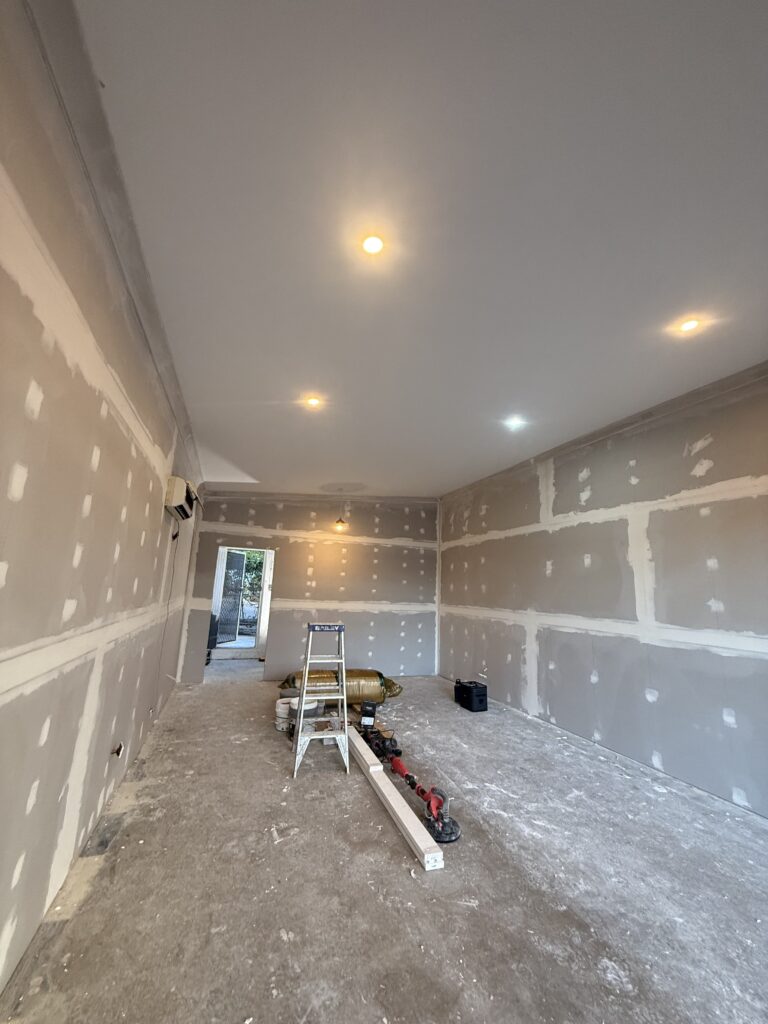
When we carefully remove the old part of the building (typically over 100 years old), we find that construction methods from the early 1900’s often were not built to the same standard as that which we practise today in the building industry to comply with the NCC and Australian Standards.

old to new building renovations

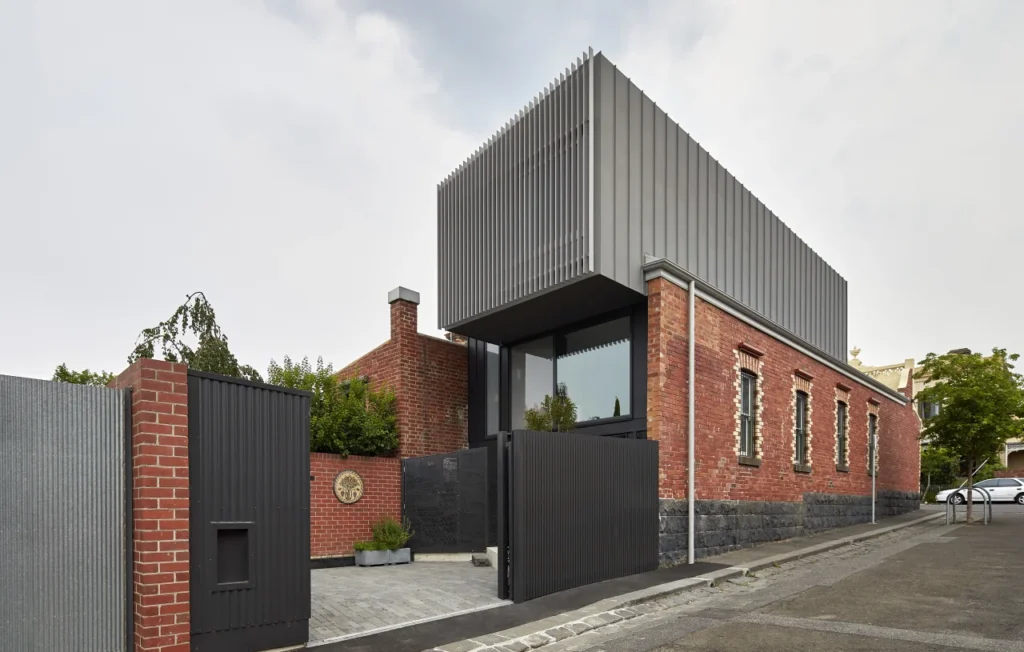
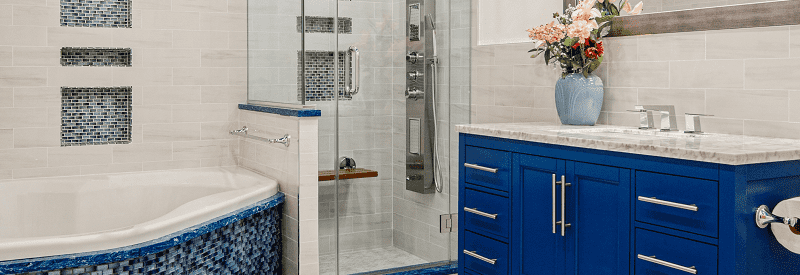
Joining the old to the new

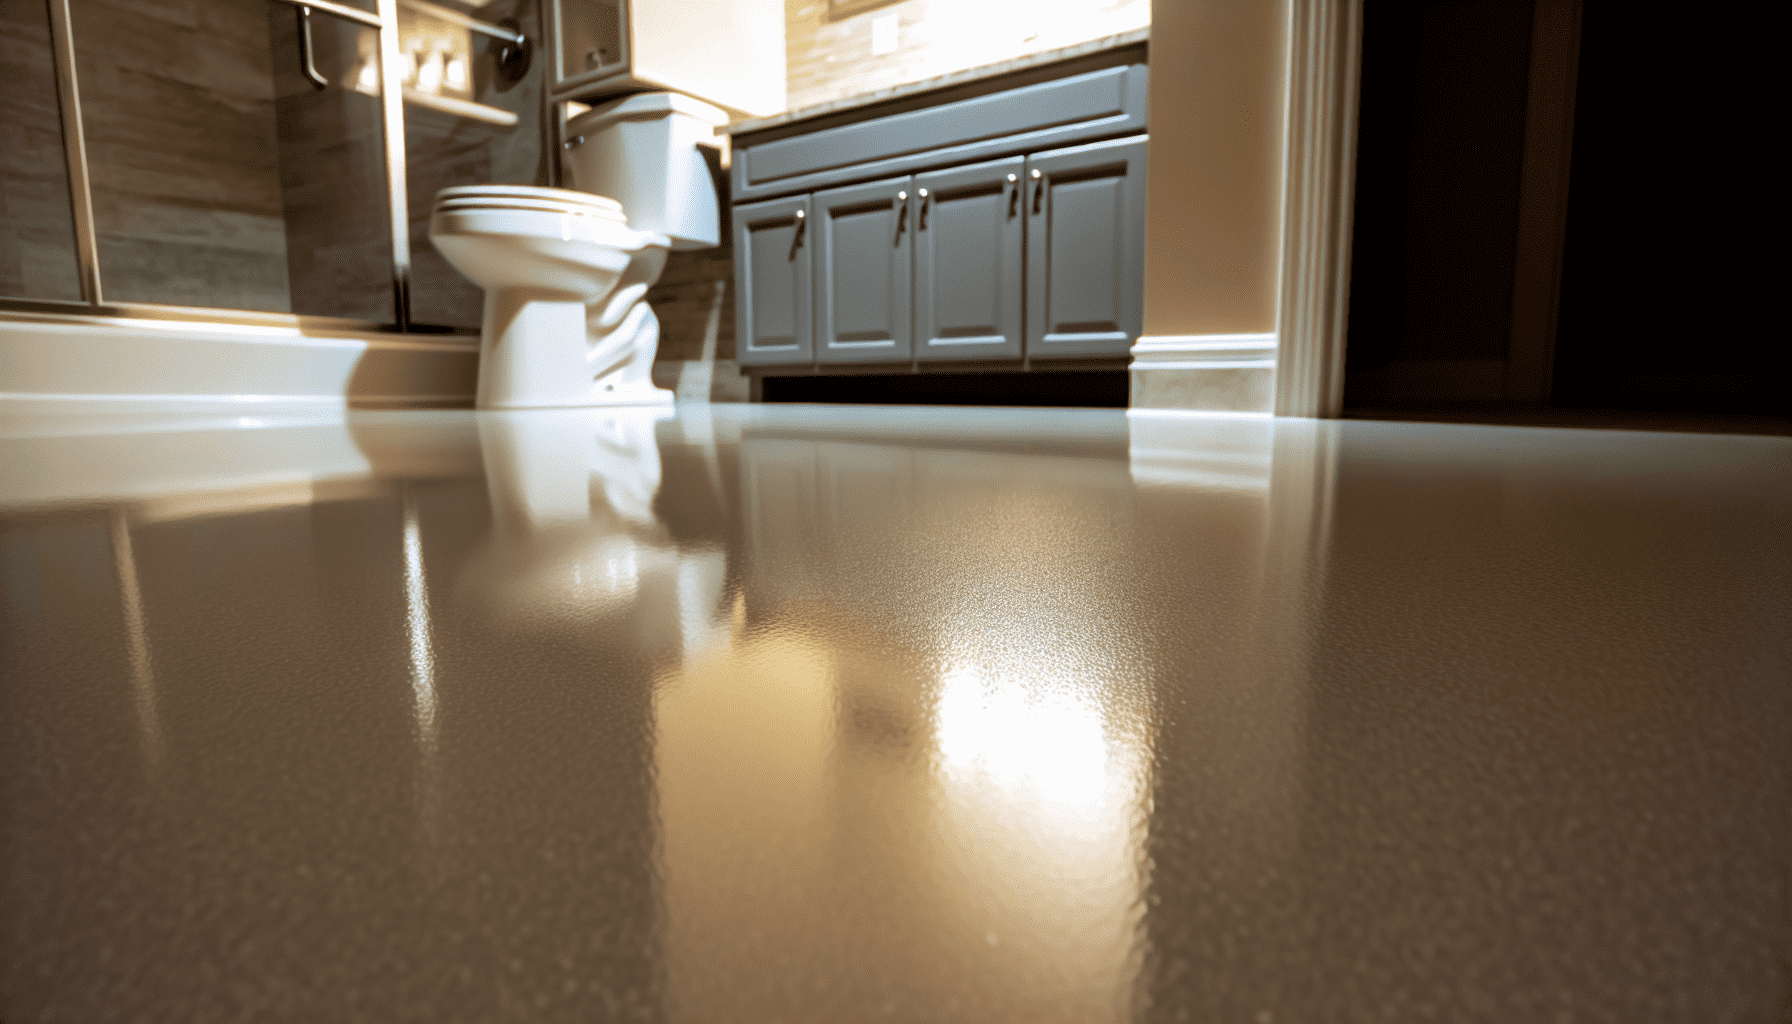
One of the first places in which the new building will join the old is the concrete slab.  Now, if, like most old buildings, the existing footings were made from slate or stone, they will not be suitable for dowelling, unlike concrete ones.

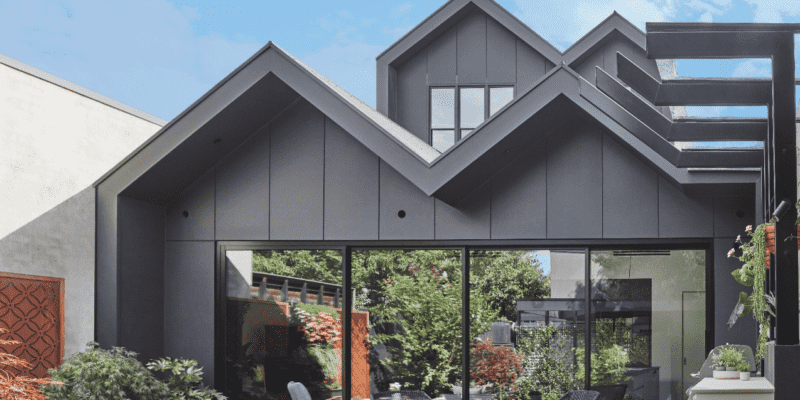
Marrying the old roof to the new roof.  This is another tricky area to deal with and can take some very carefully thought-out carpentry work to ensure we get the same roof pitches and fascia heights to complement the old with the new.

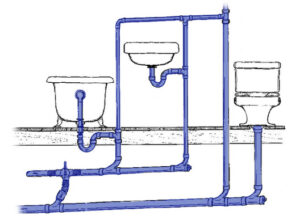
Adapting the old plumbing to the new.  It wasn’t until 1970 that Adelaide was using clay pipes for the sewer drainage system.  Depending on the location in South Australia, some homes were converted to PVC in the mid 70’s, with others in the late 70’s.  So in most cases we either find that the plumber needs to adapt to the Earthenware pipes or connect onto a brand new PVC connection supplied by SA Water (or there sub contractor BTR excavations).  Another area of plumbing is the water supply pipes

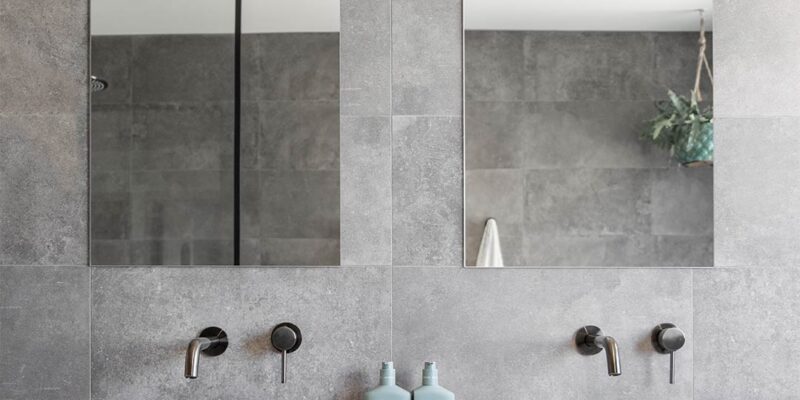
Upgrading the electrical supplies. Often, when we do a renovation, the electrical wiring will be renewed.  What we often find is the original bare earth, cotton sheathed cables still in use.  These older-style cables need to be replaced with new cables and often an upgraded switchboard.  Many of our clients are also opting for solar panels and batteries, so having an electrical system that can cope is very important.

Stormwater systems.  Many of the older properties we renovate either have no stormwater system in place or the stormwater system that is in place is neglected and no longer performing as it needs to.  Depending on the topography of the land today, we will install a storm water pumping chamber in the rear of the property to carefully manage the treatment of storm water back out to the water table on the street.

Reduce, Reuse and Recycle of building materials

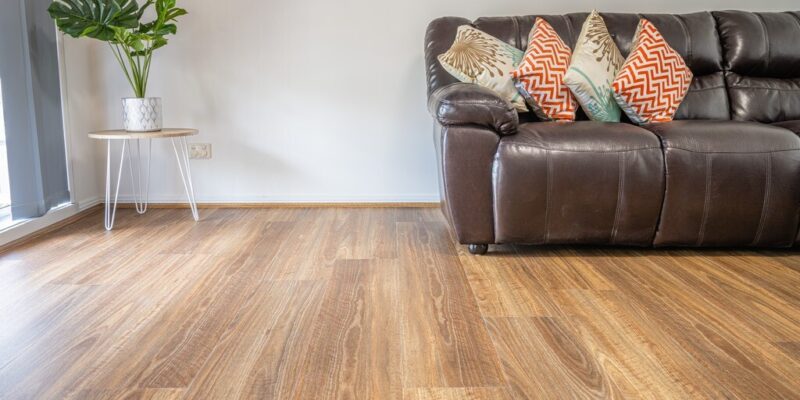
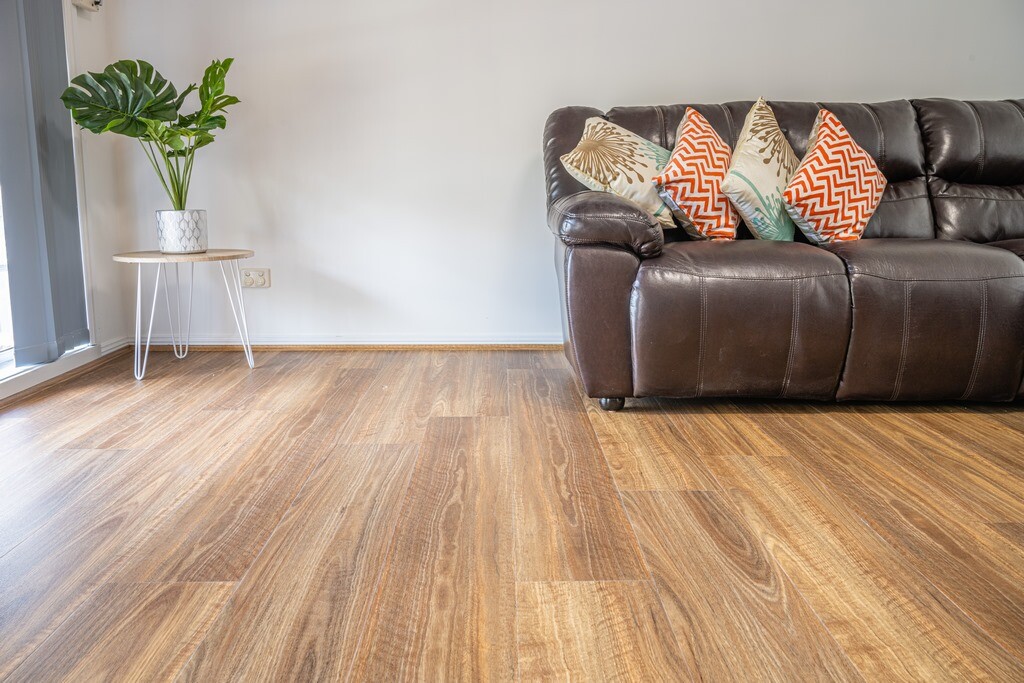
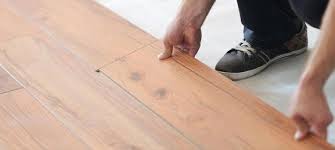
During the demolition phase of the building project, we will typically see items like roof tiles, timber flooring and bricks being salvaged for reuse later in the project or taken away to a salvage yard for future use on other projects across SA.  The positives of adopting the 3 R’s in a renovation of an older building is costs savings and also saving the environment in many ways.  Over the last 20 years, we have seen a growing trend towards recycling hardwood timber floors.  The trend has grown so much that on many of our projects, we are having to import it from interstate.

It is an exciting process adapting the old to the new and seeing the finished product where you can feel the transition between the 2 eras.  Although each project presents its challenges, the end result is always an amazing build for our clients.  Using the right trades always helps the renovation process, and it’s something we are well-known for in Adelaide.  If you are considering a renovation, reach out to our team and let us help you get the process started.

enclosed outdoor area

Enclosing Your Outdoor Space – Your Options

Enclose an outdoor area with screens to create a porch or use glass panels for a sunroom. You can construct a fence for total privacy. Plant dense hedges or shrubs to form a natural wall. For flexible options, install retractable awnings or hang heavy outdoor curtains to define the space.

You can screen in a patio, sure. Or use glass for a sunroom. Fences offer privacy, and hedges are a natural way to do it. For something less permanent, there are always retractable awnings or even heavy outdoor curtains. But that’s the ten-thousand-foot view. The reality of transforming an open deck or patio into a truly functional, enclosed area is a far more involved process.

What you’re really doing is expanding the livable footprint of your home. You’re creating a buffer zone, a protected environment where you can enjoy the outdoors without dealing with bugs, bad weather, or blistering sun. The decision on how to get there involves a serious look at materials, what your existing structure can actually support, your budget, and the climate you live in. There’s a huge spectrum of options, from a basic screen system to a fully climate-controlled four-season room that’s basically a home addition. This guide is designed to walk you through the methodologies, the materials science, and the critical thinking needed to plan and execute one of these projects correctly.

an enclosed outdoor area

Image source: https://www.apollopatios.com.au/patio-enclosure-options/

First Principles: What Exactly is an “Enclosed Patio”?

Fundamentally, an enclosed patio is a structure that turns an outdoor area, a deck, porch, or concrete slab, into a protected, usable room. It’s the architectural bridge between your living room and your backyard. Unlike an open patio that’s at the mercy of the elements, an enclosed space has walls (or screens, or windows) and a solid roof.

This isn’t just a minor tweak; it fundamentally alters how you interact with your property, potentially turning a spot you use three months a year into a year-round extension of your home. The level of “enclosure” is the key variable, ranging from a simple screen room that just keeps the mosquitoes out to a fully insulated sunroom that’s as comfortable as any other room in the house.

Defining the Space

At its heart, the goal is to create a controlled environment. You want the good parts of being outdoors, the light, the views, without the bad parts. The definition really hinges on having some kind of permanent or semi-permanent vertical barrier.

Key characteristics that really define it:

  • A Solid Roof Structure: This is your primary shield from sun and rain. No getting around this.
  • The perimeter walls or panels… this is where the variation comes in. Could be screen, vinyl, or full-on glass.
  • Controlled Access: It needs doors, connecting it to the house and the yard.
  • Architectural integration. A tacked-on box looks like a tacked-on box. The design has to feel like it belongs to the rest of the house.

This new space isn’t just a deck, but it’s not quite an interior room, either. It’s its own category of living space, and the materials you choose will dictate how much protection it offers and when you can actually use it.

Functional Classifications: More Than Just a “Sunroom”

The term “enclosed patio” gets thrown around a lot, but in practice, it covers several distinct types of structures. Knowing the difference is the first step. The choice really boils down to your climate, how you plan to use the space, and what you’re willing to spend.

  • Screen Room / Screened Porch: This is the entry-level option. It’s all about airflow and views while keeping bugs out. It provides some shade and protection from a light drizzle, but it does nothing for temperature. A great, cost-effective choice for moderate climates.
  • Three-Season Sunroom: A big leap from a screen room. Here you’re using single-pane glass or, more commonly these days, vinyl panel windows. This gives you real protection from rain, wind, and pollen, stretching its usability from spring through fall. But, and this is a big but, it has zero insulation. It’s not meant for the dead of winter.
  • Four-Season Sunroom: This is a true home extension. The engineering is completely different. We’re talking thermally engineered frames (with thermal breaks to stop heat transfer) and double-pane, insulated glass units (IGUs) with fancy Low-E coatings. This type of room is fully insulated and can be tied into your home’s HVAC, making it livable 365 days a year.
  • Solarium: A highly specialized version of a sunroom with a glass roof as well as glass walls. They look incredible and are amazing for growing plants, but they require very high-performance glass to manage solar heat gain, or you’ll have a beautiful oven in the summer.
  • Lanai: You hear this term a lot in places like Florida. It’s basically a ground-level patio under the home’s main roofline, enclosed with screens. Functionally, it’s a screen room, but it feels more integrated because it was part of the home’s original design.

Key Architectural and Structural Gotchas

This is where people get into trouble. Enclosing a patio is a real construction project, not a weekend DIY affair. You can’t just stick some walls on an old concrete slab and call it a day, because that slab was probably never designed to carry the weight—what we call the ‘dead load’—of a full roof and wall system.

A few things to obsess over:

  • Foundation Integrity: A four-season sunroom is heavy. The double-pane glass and insulated roof require a serious foundation, usually a monolithic concrete slab with frost-proof footings in colder climates. That existing 4-inch slab? It needs to be professionally assessed. A deck? It almost certainly needs more posts and bigger footings to handle the load.
  • Roof Design and Load: The new roof has to be engineered for your local snow and wind loads. This is non-negotiable. Whether it’s a single-slope “shed” roof or a gabled “A-frame,” the connection point to the house is a critical failure point. Improper flashing here means you’re funneling water directly into your house. A nightmare scenario.
  • Wall System Integration: The new walls have to be securely anchored to the foundation and the existing house. This connection provides stability and creates the weather-tight seal.
  • Building Codes and Permits: Most of these projects, and all sunrooms, are considered home additions and require building permits. Don’t skip this. The permit process is what forces you and your contractor to prove the design is safe and meets code for structural, electrical, and energy efficiency. Failing to get a permit can lead to fines, a tear-down order, and a massive headache when you try to sell the house.

The Real Payoff: Core Benefits of a Screened Enclosure

A screened enclosure is often the most popular and practical solution. It hits a sweet spot of cost and function. By stretching a high-quality screen across a sturdy frame, you create a space that feels open but is protected from the worst outdoor annoyances.

Enhanced Protection from the Elements

This is the most obvious win. It’s a barrier.

  • Insect Control: No more mosquitoes. This alone is worth the price of admission in many climates.
  • Debris Management: Forget sweeping leaves and pollen off the patio furniture every day. The screens catch most of it.
  • UV Reduction: This is an underrated benefit. You can get specialized solar screens that block up to 90% of harmful UV rays. This protects you, and it stops your outdoor furniture from fading and degrading.
  • Mild Weather Shield: It can take the edge off a stiff breeze or a light misting rain, making the space usable in marginal weather.

More Livable Space, Less Cost

You’re essentially adding a new room to your house for a fraction of what a conventional, stick-built addition would cost. This new room becomes a flexible, transitional zone. It can be your outdoor dining room, a safe play area for the kids, or just a quiet place for a morning coffee. You’re maximizing the utility of your property.

Increased Home Value and Curb Appeal

A professionally installed screened patio is a feature that buyers love. It screams “lifestyle.” It adds to the functional square footage and signals that the home is well-maintained. In many markets, you’ll see a significant return on your investment when you sell. Beyond the money, it just looks good. It adds structure and a finished look to the back of a house.

Preserving the Outdoor Experience

Here’s the key distinction between a screen room and a sunroom. Screens protect you without isolating you. You still get the breezes, the sounds of birds, and an unobstructed view of your yard. Modern high-visibility screens are designed to be almost invisible from a few feet away. For people who want to feel like they’re outside without the downsides… this is the perfect compromise. It’s the best of both worlds.

Options For Materials and Systems

The choice of materials is the single most important technical decision you’ll make. It dictates durability, maintenance, thermal performance, and cost. Let’s break down the core components.

The Skeleton: A Comparative Analysis of Framework Materials

The frame holds everything together. It has to be strong and stand up to whatever your climate throws at it.

Aluminum Frame Systems

Extruded aluminum is the industry standard for a reason. It’s incredibly strong for its weight and requires almost no maintenance.

  • The Material Itself: We’re talking about architectural aluminum alloy. It’s engineered for structural integrity and corrosion resistance.
  • The Finish is Everything: Raw aluminum oxidizes. So, these systems come with a factory-applied finish, usually a powder coat or baked-on enamel that conforms to Australian standards (look for AS/NZS 1866 or variations). This finish is the armor.
  • Smart Design: The extruded profiles are not solid; they have internal webbing for strength and channels for screws, making assembly clean and strong. For four-season rooms, they incorporate “thermal breaks”—a strip of non-conductive polymer that physically separates the inside and outside aluminum surfaces. Without this, the frame would be a thermal bridge, conducting cold straight into the room and causing condensation.
  • Maintenance: Hose it down. That’s about it. It won’t rot, warp, or get eaten by termites.

Wood and Timber Frames

Wood has a classic look that aluminum can’t always match. But it comes with a maintenance commitment.

  • Wood Species Matters: Pressure-treated pine is the budget option. For looks and natural rot resistance, you’d step up to cedar, redwood, or Douglas fir. For really long spans, you might need engineered lumber like LVL or glulam beams.
  • Protection is Mandatory: Wood needs to be sealed, stained, or painted. And this isn’t a one-and-done job. You’ll be re-applying that finish every few years to protect it from moisture and UV damage.
  • Structural Notes: Wood is heavy. It may require a more substantial foundation than a lightweight aluminum system.
outdoor kitchen with a roof

Vinyl and Composite Framing

Vinyl (PVC) and composites are the newer players, offering a low-maintenance alternative with great thermal properties.

  • The Science: Vinyl frames are natural insulators, they don’t conduct heat or cold well at all. This makes them a fantastic choice for sunrooms. They are often built with hollow, multi-chambered profiles for added strength and insulation.
  • Durability: Like aluminum, vinyl is impervious to rot and insects. The color is integral, so it can’t scratch off.
  • Limitations: Vinyl isn’t as rigid as aluminum. For large window openings or in high-wind areas, vinyl frames often need internal steel or aluminum reinforcement to keep them from flexing.

The “Walls”: From Screens to High-Performance Glass

The infill material defines what the room is.

  • Screen Materials:
    • Fiberglass Screen: The standard. It’s cheap, flexible, and easy to work with. Charcoal is the most popular color because your eye looks right through it.
    • Aluminum Screen: Stiffer and a bit more durable than fiberglass.
    • Pet-Resistant Screen: This is a vinyl-coated polyester mesh that’s about seven times stronger than standard fiberglass. If you have dogs or cats with claws, this is a must.
    • Solar Screen: A specialized mesh that blocks a huge percentage of solar heat gain. A game-changer in hot, sunny climates, though it does darken the room slightly.
  • Vinyl Panel Systems: You might hear this called “memory vinyl.” It’s a tough, flexible PVC film in a window frame. If it gets pushed or dented, the sun’s warmth makes it shrink back to its original shape. It’s a great three-season option that’s cheaper and lighter than glass.
  • Glass Systems (Single-Pane): The baseline for a three-season sunroom. It’s usually 1/8-inch tempered safety glass (which is required by code in doors and near the floor). It stops the wind and rain perfectly but has terrible insulating properties (think of an old window in a cabin).
  • Glass Systems (Double-Pane Insulated): This is what makes a four-season room possible. An Insulated Glass Unit (IGU) is two panes of glass hermetically sealed with a spacer, trapping air or an inert gas like Argon in between.
    • Low-E Coatings: The magic ingredient. A microscopically thin metallic coating is applied to one of the glass surfaces inside the IGU. It reflects infrared heat—keeping heat in during the winter and out during the summer.
    • Performance Metrics: The two numbers to care about are the U-factor (how well it prevents heat loss; lower is better) and the Solar Heat Gain Coefficient or SHGC (how much solar heat it lets through; lower is better in hot climates).

The Roof: Your Primary Shield

The roof does more than keep the rain out; it’s a huge part of the room’s thermal performance.

  • Solid Insulated Roof Panels: The best and most common choice for sunrooms. These are Structural Insulated Panels (SIPs), which are a core of foam insulation (usually EPS) sandwiched between two skins of aluminum. They are strong, lightweight, provide excellent insulation (R-15 to R-30+), and often have built-in channels for running electrical wiring for lights and fans.
  • Polycarbonate Roofing: A translucent plastic that lets in diffused natural light. It’s great for patio covers but less common for full sunrooms. Look for “multiwall” polycarbonate, which has internal chambers that give it better insulating properties than a solid sheet.
  • Tying into the Existing Roofline: This is the most architecturally seamless option, but also the most complex and expensive. It involves building a conventional stick-framed roof and matching your home’s existing shingles. The flashing and waterproofing work at the connection point has to be absolutely perfect. This is a job for a very good roofer, not just a sunroom installer.

Comparison of Patio & Outdoor Area Enclosure Methods

This table is a rough guide. Costs are highly variable based on location, contractor, and the specifics of your site. But it gives you a starting point for thinking about budget and performance.

Enclosure MethodTypical Cost (AUD per sq. m.)Protection from Weather & ElementsKey Benefits for HomeownersMaterial & Space Considerations
Screen Enclosure$8 – $20Great for bugs; some protection from sun/wind. Rain will get in.The most affordable way to make a space more usable. Keeps the outdoor feel.Aluminum or wood frames. Perfect for moderate climates where temperature isn’t the main issue.
Vinyl Panel Windows$15 – $35Good protection from rain, wind, pollen. Some UV blocking.Flexible three-season use. Lighter and often cheaper than glass.“Memory vinyl” is tough but not as clear as glass and can scratch. A solid mid-range option.
3-Season Sunroom$100 – $300Excellent protection from everything except the cold.Adds significant living space and value (ROI can be around 50%). Great for entertaining.Single-pane glass and non-thermally broken frames. Not meant for winter use in cold climates.
4-Season Sunroom$200 – $400+Total, year-round protection. A true extension of your home.A fully climate-controlled room that maximizes your home’s value and usability.This is a major construction project requiring double-pane insulated glass, thermal breaks, and a proper foundation.
Motorized Screens$40 – $100On-demand protection from bugs, sun, and light rain.The ultimate in flexibility. An open patio when you want it, a screen room when you need it.The hardware is more complex. High-end screens offer excellent UV blocking.
Australian ‘Alfresco’$70 – $200+Specifically engineered to handle intense sun, wind, and insects.Creates that seamless indoor-outdoor flow that’s central to the Australian lifestyle.Often uses specialized systems like Ziptrak® blinds or aluminum shutters designed for that climate.

Sources: Data compiled from Forbes Home, HomeAdvisor, Remodeling’s Cost vs. Value Report, and Australian outdoor living specialists.

Planning Your Project

A good outcome is the result of a good plan. Winging it is a recipe for disaster.

Phase 1: Assessment and Goal Setting

First, you need to understand the problem you’re trying to solve.

  • Define Primary Use: What is this room for? A dining area? A playroom? A home office? This drives decisions about everything from electrical outlets to door placement.
  • Analyze Your Climate: What are you fighting? Intense afternoon sun? Bugs? Wind? Frequent rain? The answer points you toward the right type of enclosure.
  • Evaluate the Existing Structure: Be brutally honest about your current deck or patio. Is the concrete cracked? Is the deck wobbly? Can it support a roof? Better to know now.
  • Set a Real Budget: Figure out what you can realistically spend, and then add 15% for a contingency fund. Something always comes up.

Phase 2: Design and Material Selection

Now you translate your goals into a concrete plan.

  • Choose the Enclosure Type: Based on Phase 1, decide if you need a screen room, a three-season, or a four-season room.
  • Select Materials: This is where you decide on aluminum vs. wood, screens vs. glass. Your climate and budget are the main drivers here.
  • Aesthetics: How will it look? It needs to complement your home’s existing style, color, and roofline. Don’t let it look like a cheap attachment.

Phase 3: Permits and Codes (The Boring But Critical Part)

Do not skip this phase.

  • Check Local Zoning: Your town has rules about setbacks (how close to the property line you can build) and lot coverage. Find out what they are before you design anything.
  • Get Council Approval: Almost any structure with a roof requires a building permit. Your contractor should handle this, but it’s your responsibility to make sure it happens. The permit application will require detailed plans showing that the structure is designed to be safe and code-compliant.

Phase 4: Contractor Selection and Execution

The person you hire will make or break this project.

  • Vet Your Candidates: Get at least three bids. Look for contractors who specialize in these structures. Check their license and insurance (both liability and worker’s comp). Ask for references and actually call them.
  • Compare Detailed Bids: A real bid breaks down costs for materials, labor, and permits. A price on a napkin is a red flag. Be suspicious of a bid that’s dramatically lower than the others; they’re cutting corners somewhere.
  • Sign a Comprehensive Contract: The contract should detail the scope of work, materials to be used, payment schedule, and a timeline. Get everything in writing.

Maintenance and Longevity

You’ve invested in this space; now you have to protect it. Routine maintenance is key.

  • Screens: Wash them gently with soap and water and a soft brush. High pressure from a hose can damage the mesh. Keep an eye on the rubber spline that holds the screen in; if it gets brittle, replace it.
  • Glass/Vinyl: Use the right cleaners. Ammonia-free for glass, and something specifically for vinyl so you don’t scratch it. Vacuum the window tracks regularly to keep them sliding smoothly. A little silicone spray on the rollers once a year works wonders.
  • Frame: Wash it. Inspect it for deep scratches in the finish that could lead to corrosion. Check the sealant joints and re-caulk any that are cracked or pulling away to keep it watertight.
  • Leaks: Water leaks are an emergency. Find the source immediately. It’s often failed sealant or a problem with the flashing where the roof meets the house. Fix it fast.

What’s Next: Trends and Innovations

This space is always evolving. The future is about smarter, more flexible enclosures.

  • Smart Home Integration: We’re moving beyond simple remotes. Think motorized screens tied to a wind sensor that automatically retract in a storm, or that lower on the west side of the house when a smart thermostat detects high heat gain.
  • Advances in Glass: Dynamic or “smart” glass that can tint on demand is getting more affordable. It eliminates the need for blinds. Self-cleaning coatings that use UV light and rain to wash away dirt are also becoming more common.
  • Flexibility is King: The biggest trend is the desire for convertible spaces. Systems of folding or sliding glass walls (like NanaWall) can completely disappear, erasing the line between inside and out. This gives you the protection of a sunroom with the openness of a patio, all in one.

Common Questions (FAQs)

View common questions we get asked about this topic.

What’s the best way to enclose a patio for the Australian climate but keep the views?

In the Aussie climate, you’re fighting intense sun, insects, and sometimes heavy rain. For an unobstructed view, the top contenders are either large glass panels (if you’re creating a sunroom) or a track-guided blind system using clear PVC. A lot of people also opt for high-visibility “alfresco” screens paired with motorized solar blinds. This gives you a hybrid solution: the screens handle the bugs 24/7, and the blinds can be deployed to manage the harsh sun when needed, then retracted to open up the view.

How does a sunroom really add value beyond just more space?

It adds functional value, which is what buyers pay for. A sunroom transforms a home’s relationship with its property. It creates a comfortable, all-weather space for relaxing and entertaining that feels connected to the outdoors. It’s a huge lifestyle upgrade. From a resale perspective, it increases the perceived and actual square footage and boosts curb (or backyard) appeal. It becomes a major selling feature that distinguishes your house from others on the market.

To protect my patio from both sun and rain, are screens enough?

No. Screens are fantastic for insects and for cutting down on direct sun (especially solar screens), but they won’t stop rain. A light mist might be deflected, but any real precipitation is coming through. For true all-weather protection from sun and rain, you need a solid covering. That means a solid roof combined with either vinyl panel windows or, for a more permanent solution, a proper glass sunroom. Screens solve the bug problem; solid panels solve the weather problem.

a bathroom that has been waterproofed

Waterproofing A Bathroom – How To

How to waterproof a bathroom is an important step in any bathroom renovation to prevent water damage, mold growth, and structural issues.

Failing to waterproof correctly can lead to expensive repairs and safety hazards. In this article we’ll explore the process of waterproofing your bathroom, discuss the necessary materials, and highlight areas that need special attention to ensure your bathroom remains water-resistant for years to come.

What Is Bathroom Waterproofing?

Bathroom waterproofing is the process of applying waterproof membranes and sealants to protect wet areas, such as the shower floor, walls, and entire bathroom floor, from water penetration. To effectively waterproof a bathroom, these methods form a barrier that prevents water from seeping into surfaces like tiles, concrete, and grout, protecting against mildew growth and structural damage.

Using the correct waterproofing product is important to ensure proper protection in areas like the shower walls and bathroom floor, where the most water exposure occurs. Waterproofing agents like liquid membranes or sheet membranes are commonly applied to these surfaces, providing a durable and long-lasting solution.

Why Bathroom Waterproofing is Necessary

Bathroom waterproofing is an important aspect of maintaining a safe and healthy living space. Water damage can lead to a range of issues, including structural decay, mold and mildew growth, and pest infestations. Inadequate bathroom waterproofing can also compromise the integrity of the building, leading to costly repairs and even safety hazards.

By waterproofing your bathroom, you can prevent water from seeping into the walls and floors, reducing the risk of damage and ensuring a safe and healthy environment for you and your family.

Key Areas in the Bathroom That Need Waterproofing

Proper bathroom waterproofing, including waterproofing a bathroom, targets wet areas such as the shower area, bathroom walls, and whole bathroom floor. Each of these areas is prone to water penetration and water damage if not properly sealed. In an average-sized bathroom, it is important to waterproof both the floor and walls thoroughly to meet Australian Standards.

Critical Areas Include: Shower Floor

  • Shower area: The shower floor and walls are the most vulnerable to water damage due to constant exposure to moisture. A wet room design, which lacks a separate shower enclosure, necessitates comprehensive waterproofing for the entire bathroom floor and walls to prevent water damage, highlighting its popularity in modern renovations and the importance of adhering to Australian standards.
  • Bathroom floor: Ensuring the entire floor is waterproofed prevents leaks from reaching the underlying structure, especially in a ground floor installation.
  • Bathtub edges: Water often seeps into the gaps around bathtubs if not properly sealed.
  • Plumbing fixtures: Leaks can occur around faucets, toilets, and drainage systems if not adequately waterproofed.

Materials Used for Bathroom Waterproofing

Getting your bathroom waterproofed is important for a long-lasting waterproofing job. The two main waterproofing methods are the use of liquid membranes and sheet membranes. Both have their advantages and can be used in combination, depending on the bathroom type and location.

Types of Waterproofing Membrane

  1. Liquid membranes: These are applied with a paint roller or brush to create a seamless barrier over the surface, such as an epoxy coating. A first coat followed by a second coat ensures complete coverage.
  2. Sheet membranes: Most sheet membranes are pre-formed and applied to the bathroom floor and walls, offering high durability. These membranes are often used in areas requiring extra reinforcement.

For example, liquid membranes are ideal for shower floors, while sheet membranes provide better coverage for larger areas like the whole bathroom floor.

epoxy bathroom floor

The Bathroom Waterproofing Process

Waterproofing a bathroom involves several key steps to ensure complete protection from water damage. To prevent moisture penetration, every layer of the bathroom must be properly sealed.

Step-by-Step Waterproofing:

  1. Surface preparation: Clean and prime all surfaces, including the bathroom floor, shower walls, and shower floor, to ensure a strong bond for the waterproofing product. Proper surface preparation is crucial when waterproofing a bathroom to prevent future water damage.
  2. Application of waterproof membranes: Apply a liquid membrane or sheet membrane to the bathroom’s surfaces. Ensure proper overlap of sheets if using sheet membranes.
  3. Sealing: Use silicone sealant around plumbing fixtures, joints, and the edges of the bathroom walls and floor.
  4. Testing for leaks: After waterproofing, perform a water leak test to ensure no gaps or weaknesses are present.

This process ensures that all areas of the bathroom, especially wet areas like the shower, are adequately protected. Proper waterproofing a bathroom is essential to comply with Australian standards and avoid costly future renovations due to water damage.

Common Bathroom Waterproofing Mistakes

Incorrect waterproofing can lead to significant water damage and waterproofing issues. Failing to follow building code requirements or skipping steps can result in leaks, mildew growth, and structural damage.

Avoid These Mistakes:

  • Inadequate surface preparation: Skipping cleaning and priming leads to weak adhesion of the waterproofing agent, increasing the risk of water penetration.
  • Incorrect material use: Using the wrong waterproof membrane or sealant for the surface type can result in failure over time.
  • Inconsistent application: Uneven or insufficient coating of liquid membranes can leave gaps in protection, allowing moisture to seep through.
  • Skipping corners and joints: Corners, joints, and plumbing fixtures are the most prone to leakage and must be sealed correctly with silicone or additional waterproofing agents.

Ensuring the whole bathroom floor and other wet areas are completely sealed is crucial for long-term protection.

Signs That Your Bathroom Waterproofing Has Failed

Knowing when your bathroom waterproofing has failed is crucial to avoiding further structural damage and health risks. Getting your bathroom waterproofed can prevent serious water damage. Common signs of waterproofing issues include visible water damage, mold growth, and cracks in the tiles.

Signs of Waterproofing Failure:

  • Water stains on walls or floors.
  • Mold or mildew growth along the edges of tiles and around plumbing fixtures.
  • Peeling paint or cracked tiles in the shower area.
  • Swollen walls or floors, particularly in older or improperly waterproofed bathrooms.
  • In a wet room, comprehensive waterproofing is crucial to prevent water damage to the entire bathroom floor and walls.

Immediate action is necessary to avoid worsening the damage. Hiring a licensed professional to assess and repair the waterproofing job can prevent costly renovations.

Maintenance and Upkeep

Ensuring Longevity:

To ensure the longevity of your bathroom waterproofing, regular maintenance and upkeep are essential. Here are some tips to help you keep your bathroom waterproofing in good condition:

  • Regularly inspect the bathroom for signs of water damage or leaks.
  • Check the condition of the waterproofing membrane and replace it if necessary.
  • Ensure that the bathroom is well-ventilated to prevent moisture buildup.
  • Avoid using harsh chemicals or abrasive cleaners that can damage the waterproofing membrane.
  • Regularly clean the bathroom, paying particular attention to areas around the shower and bathtub.

By following these tips, you can help extend the life of your bathroom waterproofing and prevent costly repairs.

Troubleshooting and Repair

Addressing Issues:

Despite regular maintenance and upkeep, issues can still arise with your bathroom waterproofing. Here are some common problems and solutions:

  • Leaks: If you notice water leaking from the shower or bathtub, check the condition of the waterproofing membrane and replace it if necessary. Ensure that the area is properly sealed and caulked.
  • Cracks: If you notice cracks in the walls or floors, check for signs of water damage and address the issue promptly. Apply a waterproofing agent to the affected area and seal with a liquid membrane.
  • Mold and mildew: If you notice mold or mildew growth in the bathroom, ensure that the area is well-ventilated and clean the affected area with a mild detergent. Apply a waterproofing agent to the affected area and seal with a liquid membrane.

By addressing issues promptly and taking preventative measures, you can help ensure the longevity of your bathroom waterproofing and prevent costly repairs.

Professional vs. DIY Bathroom Waterproofing

When deciding how to waterproof your bathroom, consider the complexity of the job and the potential risks of poor waterproofing. In areas like South Australia & New South Wales, waterproofing must meet specific minimum requirements set by building codes, making professional waterproofing essential for legal and safety reasons.

Pros and Cons:

  • DIY job: A DIY waterproofing job may save on labor costs, but risks include improper sealing and failure to meet the required Australian Standards.
  • Professional job: Hiring a skilled tradesperson or licensed professional ensures that all aspects of the job are completed according to regulations, with warranties provided on the work.

While a DIY job might seem more cost-effective upfront, professional waterproofing offers greater long-term protection and compliance with local laws.

Final Points

Bathroom waterproofing is essential for preventing water damage, mold growth, and structural issues. Properly waterproofing the shower area, bathroom floor, and bathroom walls with waterproof membranes like liquid membranes or sheet membranes protects your home from costly repairs in the future. Avoid common mistakes, understand when to call a licensed professional, and ensure your waterproofing meets local building codes to keep your bathroom in top condition.

Popular Questions

Below are common questions we’re asked about waterproofing a bathroom.

How long does bathroom waterproofing last?

A properly installed waterproofing membrane can last up to 10 years or more, depending on the quality of materials used and the conditions of the bathroom. Regular maintenance, like re-sealing joints and checking for signs of water damage, helps extend the lifespan.

Can I waterproof my bathroom myself?

Yes, DIY bathroom waterproofing is possible, but it requires strict adherence to the process and use of the correct waterproofing products. However, in places like New South Wales, bathroom waterproofing must meet building code standards, and hiring a licensed professional may be necessary to ensure compliance.

What are the signs of failed waterproofing in a bathroom?

Signs of failed bathroom waterproofing include visible water stains, mold growth, peeling paint, and cracks in tiles or grout. Swelling walls or floor damage also indicate water penetration and the need for immediate repair.

What is the most effective waterproofing method for bathrooms?

The most effective method combines liquid membranes for shower floors and walls, and sheet membranes for the entire bathroom floor. These materials offer durable, long-lasting protection against moisture and water damage in high-risk areas like the shower and wet rooms.

a shop fit out

Langley Real Estate – Shop Fit Out

We have recently been engaged by Langley Real Estate as the builder to fit out their brand new offices in the heart of Adelaide’s eastern suburbs in the city of Burnside, in the suburb of Hazelwood Park.

Langley Real Estate engaged us to create a boutique real estate office for them in the heart of the Eastern suburbs.  We took over the space as an empty shell and were given the brief to create a warm and inviting space for clients to feel welcome.

First Tasks

The first task was to build a wall with a doorway to separate the office from the staff room.  This was built out of 90 x 45 and 90 x 35 timber.  The wall was insulated using Bradford sound batts to keep the office quiet and peaceful for the staff.  After this was done, the walls were lined using 10mm Gyprock delivered from CSR at Mile End.  The two existing walls facing east and west were also lined with 10mm Gyprock and soundproofing as well to prevent external traffic noise from entering the building.

Painting & Fixtures

The entire tenancy was then painted in Dulux Natural White on the walls and Dulux ceiling white on the ceilings.  All the painting works were completed before luxury high-end timber floorboards from Solomon’s floor at Kensington were installed.  The rear of the offices has been fitted out with a new high-end custom kitchenette with stone bench tops complete with a rose gold ZIP G5 boiling, chilled and sparkling tap, Gaggenau appliances and Miele appliances.  The front of the office has received a brand-new Mitsubishi Heavy Industry split system’s to ensure year-round comfort and climate control.

With brand new sign writing installed and new lighting internally, this new fit-out is nearly complete.  With the delivery of furniture coming soon, we will be ready to hand this new fit-out over to Langley Real Estate and their staff members.

Are you planning a shop fit-out?  Contact Mayfair Building Group today and let’s start discussing your next project.

spotted gum hybrid floor in a home

Spotted Gum Hybrid Flooring: A Practical Guide for Residential and Commercial Spaces

Spotted gum hybrid flooring combines a durable composite core with a real or printed spotted gum surface layer. It offers the appearance of natural timber with enhanced water resistance, making it ideal for kitchens and high traffic areas. Most hybrid floors use a rigid core like SPC (stone polymer composite) for stability and easy installation.

What Is Spotted Gum Hybrid Flooring?

Spotted gum hybrid flooring is a rigid plank flooring that replicates the look of real hardwood while offering better water resistance and durability.

It uses a stone polymer composite (SPC) or wood polymer composite (WPC) core for strength and moisture protection. A printed or real wood veneer layer mimics the natural spotted gum grain and color variation. These planks click together using a locking system, allowing for quick floating floor installation.

Spotted gum hybrid flooring is ideal for residential and commercial spaces that require durability, style, and water resistance, such as kitchens, hallways, and retail stores. Its ease of installation and low maintenance make it a popular choice in SA, NSW, VIC, and QLD.

Why Choose Spotted Gum? Unique Timber Benefits

Spotted gum is one of Australia’s most durable native hardwoods, known for its strength, rich tones, and natural resistance to wear and termites.

Its Janka hardness rating (11.0 kN–14.0 kN) places it among the toughest timbers used in flooring. The varied grain patterns, knots, and natural gum veins give each board a unique appearance. This makes it ideal for homeowners seeking authentic hardwood aesthetics with modern performance.

Key Benefits:

  • Durability: High resistance to impact, scratches, and daily wear
  • Natural resistance: Resists termites and decay without needing harsh chemical treatments
  • Appearance: Features striking grain, rich color tones, and authentic gum patterns
  • Sustainability: Often sourced from managed forests in Australia
  • Versatility: Suitable for both residential and commercial flooring installations

Hybrid Flooring Construction: Layers That Matter

Hybrid flooring uses a multi-layer structure to enhance water resistance, wear protection, and comfort underfoot.

Each plank consists of:

  • UV-resistant wear layer to prevent surface fading
  • Decorative layer printed or veneered with spotted gum designs
  • Rigid SPC or WPC core that adds dimensional stability
  • Pre-attached acoustic underlay (usually IXPE foam) for sound absorption and comfort

This structure combines the visual appeal of hardwood with the durability of laminate and the water resistance of vinyl, making it ideal for high-traffic areas and wet zones.

Spotted Gum Hybrid Flooring Options

Brand/ModelPlank Size (mm)Thickness (mm)WarrantyKey FeaturesPrice (AUD)
Inspire Hybrid Flooring Spotted Gum181 x 12206.520 years residential, 10 years commercialEnvironmentally friendly, R11 slip resistance, high-definition textured surface$39.95
Complete Floors Supacore Hybrid180 x 15006.5 (5.5 + 1.5 IXPE)25 years residential, 10 years light commercialMicro bevel, limestone composite core, matte finishNot listed
Titan Hybrid Spotted Gum1500 x 180620 years residentialWater-resistant, integrated acoustic underlay, Uniclic joining systemNot listed
BestBuys Coastal Spotted Gum VinylNot listed3Not listedDurable vinyl planks$25.00

Aesthetic Appeal and Popular Design Styles

Spotted gum hybrid flooring offers a natural look with realistic wood grain, perfect for modern, rustic, or coastal home styles.

Its color range spans from pale creams to deep browns, with swirling grains and occasional gum veins. Planks are available in matte, textured, or embossed finishes to replicate real timber flooring.

Popular Styles:

  • Scandinavian interiors: Pair pale spotted gum tones with white walls
  • Rustic homes: Choose boards with deep knots and dark grain swirls
  • Modern renovations: Opt for wide planks and a low-gloss finish
  • Commercial spaces: Use high-slip-resistance ratings for safety

Designers and homeowners often install spotted gum flooring in open-plan living spaces to enhance the natural light and create visual warmth.

Installation: DIY or Professional?

Spotted gum hybrid flooring features a click-lock system, allowing most homeowners to install it without professional help.

Installation requires minimal tools: spacers, a tapping block, measuring tape, and a saw for trimming. Boards float above the subfloor without nails or glue, which speeds up the process and reduces cost.

Installation Process Overview:

  • Clean and level the subfloor
  • Roll out underlay (if not pre-attached)
  • Start from a corner and work row by row
  • Leave a 10mm expansion gap around all walls
  • Use a rubber mallet and tapping block for tight joints
  • Trim the final boards for a clean fit

Hybrid flooring works with most underfloor heating systems, but always check manufacturer specifications before starting the installation.

Where to Use It: Best Rooms for Hybrid Floors

Hybrid flooring is water-resistant and durable, making it suitable for nearly all indoor areas including kitchens, and high-traffic zones.

Unlike solid hardwood or some types of laminate, hybrid flooring handles moisture without swelling or warping. Its scratch-resistant wear layer makes it ideal for homes with pets or children.

Common Use Cases:

  • Hallways – High foot traffic areas
  • Living rooms and bedrooms: Offers natural timber warmth without upkeep
  • Retail shops and offices: Handles foot traffic and requires low maintenance

In SA, NSW, VIC, and QLD, hybrid flooring has become a standard choice in new builds and renovations due to its cost-efficiency and fast installation time.

Cost, Value, and Price Comparison

Spotted gum hybrid flooring is more affordable than solid timber, offering better durability and lower maintenance over time.

While solid spotted gum hardwood can cost $80–$120 AUD per m², hybrid options range from $25–$45 AUD per m² depending on thickness, wear layer, and brand. It also saves on installation and upkeep costs.

Price Breakdown:

  • Budget range: $25–$30 AUD/m² (thin vinyl or entry-level hybrid)
  • Mid-range hybrid: $35–$45 AUD/m² (6.5mm with acoustic backing)
  • Premium: $45+ AUD/m² (real veneer layer, commercial grade)

Hybrid flooring provides high ROI by reducing long-term costs tied to maintenance, sanding, or replacement. It also adds value to properties due to its modern look and water resistance.

Common Questions

Below are common questions about this topic..

How does Spotted Gum hybrid flooring compare to solid timber in terms of maintenance?

Hybrid flooring requires less maintenance than solid timber. It is scratch-resistant and does not need sanding or polishing. Regular sweeping and damp mopping are sufficient for upkeep.

Is Spotted Gum hybrid flooring environmentally friendly?

Yes, many hybrid flooring options use sustainable materials like limestone composite cores and are free from harmful substances such as formaldehyde. Check the product specifications for eco-certifications.

Can underfloor heating be used with Spotted Gum hybrid flooring?

Most hybrid floors are compatible with underfloor heating systems, but it’s essential to confirm with the manufacturer to ensure safe installation and warranty compliance.

Final Thoughts

Spotted gum hybrid flooring offers a practical, stylish, and cost-effective alternative to solid hardwood floors. It’s built for durability, water resistance, and visual appeal, making it ideal for homes, offices, and commercial spaces across Australia. With a wide range of sizes, finishes, and brands in stock, it suits every project — from small room updates to full-scale renovations.

For more details or to request a quote, visit your local flooring supplier, call customer service, or send an email with your project specs. Make sure to check stock availability, warranty terms, and qty per box when placing your order.

St Georges Renovation Project – Adelaide

St Georges in Adelaide’s eastern suburbs is well known for its wide leafy streets that travel from Port Rush Road to Sunnyside Drive.  Highfield Avenue and Wootoona Terrace and the other two major roads that border St Georges, before crossing into Linden Park and Glen Osmond. 

On average, many houses sit on large blocks of land, around 850 square metres.  The frontages of these properties are typically 18 metres wide and meet the Burnside Council requirements for sub-division.  The Burnside Council usually want a minimum of 9 metres of frontage per home and an overall block size of 400 square metres to allow a sub-division to occur.

However, not every homeowner wants to split their block, and the cost of selling a home and stamp duty has changed many homeowners’ minds, and they are opting to stay put and renovate their homes instead (source Karen Stewart – Langley Real Estate).

We were recently engaged by a client in St Georges to renovate their home.  The project involved the following:

The project was designed to not affect the client’s living circumstances and avoid them having to move out during the project.  The fact the client had 2 bathrooms made this process a lot smoother as we could do one at a time and not need the use of a temporary ensuite.

Market trends for 2025 in bathrooms

The bathroom renovation market changes each year and as we now look into 2025 we are starting to see a lot more trends already popping up:

  • In wall toilet cisterns (pictured)
  • Wall-mounted mixer tapware (in the picture from Phoenix Tapware)
  • Introduction of various colour schemes in tap ware, fixtures and hardware
  • Feature walls with small kit-kat style tiles
  • Induction cooktops
  • Stone benchtops throughout all rooms
  • Integrated fridges and dishwashers
  • Scallop board walls
  • Freestanding baths

As a Luxury Bathroom renovation company in Adelaide, it is our priority to bring all our clients the latest options for their bathrooms to ensure their selections remain on trend for many years to come and don’t age quickly. We use some of Adelaide’s leading Architects and Interior Designers to get the perfect result every time.

Creating the St Georges Renovation Project

After the design and selection process has been performed it is time to implement this onsite.  A typical bathroom renovation will take between 5 to 6 weeks to perform this allows for the site measure and installation of shower glass and any custom mirrors.

The kitchen is a little more straight forward.  Once the old kitchen has been ripped out the services such as plumbing and electrical can be performed and the final site measure performed.  Once the kitchen cupboards and overheads have been installed the stone benches can be measured and the lead time on these is then between 2 to 4 weeks.

A typical laundry will also follow the same processes as the kitchen, provided there are no structural modifications to be performed.

History of Mayfair Building Group

Mayfair Building Group is made up of a combined industry experience of exceedingly well over 50 years of building works across Australia and Overseas.  Our knowledge and experience are what we are proud to offer to our new and existing clients across all of Adelaide.  We are based in Burnside and have a strong presence in the eastern suburbs, such as Rose Park and Kensington, but we also perform many projects in locations such as Wattle Park, Toorak Gardens, Erindale and Rosslyn Park.

a new kitchen renovatoin

Kitchen Renovations Can Be Costly – Why The Expense?

They say that the kitchen is the heart of the home, a place where memories are made and delicious meals are created. But if you’ve ever considered renovating your kitchen, you might have been taken aback by one thing – the cost. Kitchen renovations can be expensive, but there are reasons behind it.

As the adage goes, “You get what you pay for,” and this couldn’t be truer when it comes to kitchen renovations. The expense lies in the high-quality materials required to transform your space into a modern culinary haven. From durable flooring to sleek countertops, these top-notch materials come with a price tag.

Labor charges also contribute to the overall cost of kitchen renovations. Skilled professionals who possess expertise in plumbing and electrical work ensure that everything functions seamlessly and safely. Their knowledge and attention to detail don’t come cheap.

Custom cabinets, countertops and splashbacks add another layer of expense. These bespoke elements elevate your kitchen’s aesthetic appeal but require meticulous craftsmanship, driving up costs further.

Let’s not forget about high-end appliances such as a quality rangehood that bring innovation into your cooking experience. Cutting-edge technology often comes at a premium price.

Lastly, unexpected costs and overruns can arise during any renovation project. Addressing unforeseen issues like hidden water damage, council approval costs for renovations, or outdated wiring can increase expenses beyond initial estimates. Material costs can also fluctuate such as cement sheet and plasterboard.

While kitchen renovations may seem costly, remember that investing in quality materials, expert labor, innovative appliances, and custom features will ultimately enhance both functionality and value in your home.


a brand new kitchen renovation project completed in Adelaide

Key Takeaways

  • Custom cabinets and countertops contribute significantly to the overall cost of a kitchen remodel.
  • Skilled professionals are necessary for flawless execution of the project.
  • Investing in quality materials, expert labor, and innovative appliances enhances functionality and value in the home.
  • Unexpected costs and overruns are common in kitchen renovations.

The Cost of High-Quality Materials

The reason kitchen renovations can be so pricey is because of the high cost of top-notch materials. This is particularly pertinent with inflation in Australia still on the rise. When it comes to transforming your kitchen into a modern and innovative space, you want nothing but the best. High-quality materials are essential for achieving that desired look and functionality. From custom cabinets to state-of-the-art appliances, every element plays a crucial role in creating a kitchen that stands out.

Custom cabinets, in particular, contribute significantly to the overall cost of a kitchen remodel. These cabinets are designed specifically for your space, ensuring a perfect fit and maximizing storage capacity. However, their craftsmanship and attention to detail come at a price. High-quality cabinets made from durable materials such as solid wood can be quite expensive.

In fact, kitchen renovation costs are often driven up by the expense of these high-quality cabinets and other premium materials. While it may seem like an unnecessary splurge at first glance, investing in top-notch materials ensures longevity and durability in your kitchen.

Transitioning into the next section about labor charges for expertise: Now that we’ve discussed the investment required for high-quality materials, let’s explore another significant factor contributing to why kitchen renovations can be costly – labor charges for expertise.

Labor Charges for Expertise

Hiring skilled professionals such as the team at Mayfair can be pricey, but it’s worth it when you witness their expertise firsthand. When it comes to kitchen renovations, labor charges for expertise can contribute significantly to the overall cost. Experienced contractors and tradespeople bring a wealth of knowledge and skills to the table, ensuring that your kitchen remodeling project is executed flawlessly.

These professionals have spent years honing their craft, perfecting techniques and staying up-to-date with the latest trends in kitchen design. Their expertise allows them to tackle complex tasks efficiently and deliver high-quality results. From demolition to installation, they know how to navigate every step of the process with precision.

Labor costs are influenced by several factors including the size of your kitchen remodel, the complexity of the project, and regional variations in wages. Additionally, specialized tasks such as custom cabinetry or countertop installation may require niche expertise which can further drive up labor charges.

While labor charges for expertise may seem expensive at first glance, they ultimately ensure that your kitchen renovation is done right the first time. By investing in skilled professionals, you minimize the risk of costly mistakes or rework down the line.

Transitioning into the next section about plumbing and electrical work: As important as skilled labor is for a successful kitchen remodels other critical aspects like plumbing and electrical work also play a significant role in both functionality and aesthetics…

Plumbing and Electrical Work

Imagine the satisfaction of having a professional handle your plumbing and electrical work, ensuring that everything functions flawlessly – but did you know how crucial these aspects are for both functionality and aesthetics? When it comes to kitchen renovations, plumbing and electrical work play a vital role in creating a space that not only looks amazing but also operates efficiently. Here’s why these two elements are worth every penny:

  • Plumbing: Updating your kitchen often involves relocating plumbing lines to accommodate new fixtures or appliances. This requires expert knowledge to ensure proper connections and prevent leaks or water damage. Additionally, experienced plumbers can help optimize water flow and pressure, enhancing the performance of your sink, dishwasher, and other appliances.
  • Electrical Work: Modern kitchens require adequate electrical outlets to power various gadgets and appliances. A skilled electrician can strategically plan the placement of outlets to maximize convenience while maintaining safety standards. They can also install task lighting, under-cabinet lighting, or other innovative solutions that add ambiance and functionality to your space.

By investing in professional plumbing and electrical work during your kitchen remodel, you guarantee seamless operation of existing appliances as well as efficient use of new ones. Now let’s move on to another essential aspect of kitchen renovations: custom cabinets and countertops…

Custom Cabinets and Countertops

Get ready to experience the ultimate in style and functionality with custom cabinets and countertops for your dream kitchen! When it comes to kitchen renovations, custom cabinetry can significantly enhance the overall aesthetic appeal of your space while maximizing storage options. With custom-made cabinets, you have the freedom to choose the materials, finishes, and design that perfectly match your personal taste and needs.

In addition to providing ample storage space, custom cabinets also offer a range of organizational features such as built-in spice racks, pull-out shelves, and soft-closing drawers. This attention to detail ensures that every inch of your kitchen is utilized efficiently, making meal preparation a breeze. Not only do these cabinets provide functional benefits, but they also add value to your home.

To further elevate the look of your kitchen, consider investing in high-quality countertops. From granite and quartz to marble and butcher block, there are countless options available that can transform your kitchen into a luxurious space. These durable surfaces not only provide ample counter space for meal preparation but also serve as a focal point for the entire room.

When planning your kitchen remodel budget, keep in mind that custom cabinets and countertops can be on the higher end of the cost range due to their customization options and premium materials. However, their long-lasting durability and timeless appeal make them a worthwhile investment.


kitchen countertop in a new kitchen renovation


As we move on to discussing high-end appliances in our next section…

High-End Appliances

When it comes to upgrading your culinary experience, you’ll love the luxurious convenience that high-end appliances bring to your dream kitchen. These top-of-the-line appliances not only enhance the aesthetics of your space but also provide you with advanced features and functionality that make cooking a breeze. Investing in high-end appliances is a key factor contributing to the overall cost of kitchen remodeling.

To give you a deeper understanding of why high-end appliances can impact your budget, consider the following:

  • Energy Efficiency: High-end appliances are designed with energy-saving technology, which not only helps reduce your carbon footprint but also lowers your utility bills in the long run.
  • Increased Lifespan: Unlike their standard counterparts, high-end appliances are built using durable materials and superior craftsmanship, ensuring they last for years without needing frequent repairs or replacements.
  • Enhanced Performance: These appliances offer innovative features like precise temperature control, faster cooking times, and customizable settings that elevate your cooking experience to new heights.
  • Design Integration: High-end appliances seamlessly blend into your kitchen design and add a touch of sophistication. They come in various finishes such as stainless steel or custom paneling options that match your cabinets and countertops perfectly.
  • Resale Value: Upgrading to high-end appliances can significantly increase the resale value of your home, making it an investment worth considering.

Now that you understand how high-end appliances impact kitchen remodeling costs let’s delve into another important aspect – unexpected costs and overruns.

Unexpected Costs and Overruns

Prepare yourself for the possibility of unexpected costs and overruns during your kitchen remodel. While kitchen renovations can be an exciting project, they often come with a hefty price tag. One reason why kitchen renovations are so expensive is because of the unexpected costs that can arise throughout the process.

One area where unexpected costs can occur is with stock cabinets. While they may seem like a more affordable option, there can be additional expenses associated with their installation. For example, if your kitchen has unique dimensions or requires customizations, it may require extra work and materials which can increase the overall cost.

Another potential source of unexpected costs is the square meterage of your kitchen. Larger kitchens often require more materials and labor to complete, which can drive up the price. Additionally, if your remodeling plans involve relocating plumbing or electrical outlets, this can add to both the time and expense of the project.

Appliance installation and light fixtures are also areas where unexpected costs can arise. High-end appliances typically require professional installation, which adds to the overall budget. Similarly, installing new light fixtures or upgrading electrical wiring may necessitate hiring an electrician.

Unforeseen expenses are a common occurrence in kitchen renovations due to factors such as stock cabinets, square footage considerations, appliance installation requirements, and additional budgetary demands for light fixtures and electrical work. Being aware of these potential costs upfront will help you better plan for them and ensure that you stay within your desired budget while still achieving your innovative design goals.

Frequently Asked Questions

How long does a kitchen renovation usually take?

Kitchen renovations usually take around 4-8 weeks, depending on the complexity. This includes designing, demolition, installation of new fixtures and appliances, and finishing touches. Hiring a professional team ensures efficiency and quality workmanship for your innovative kitchen transformation.

What are some common mistakes to avoid during a kitchen renovation?

To avoid common mistakes during a kitchen renovation, carefully plan the layout and functionality, choose high-quality materials, hire experienced professionals, and stick to your budget. Innovation in design choices can create a unique and efficient space.

Are there any specific permits or licenses required for a kitchen renovation?

Yes, there are specific permits and licenses required for a kitchen renovation. These include building permits, electrical permits, plumbing permits, and sometimes even zoning or environmental permits. It’s important to ensure compliance to avoid legal issues and ensure the safety of your project.

Can I save money by doing some of the work myself?

Yes, you can save money by doing some of the work yourself. Consider tasks like painting, installing fixtures, or even demo work. However, be aware of your limitations and hire professionals for complex tasks to ensure quality and safety.

Are there any alternative options to a full kitchen renovation that can still update the space?

Why spend a fortune on a full kitchen reno when you can opt for budget-friendly alternatives? Try painting cabinets, replacing hardware, or adding new lighting to give your space a fresh look without breaking the bank.

Conclusion

In conclusion, kitchen renovations can be exorbitantly expensive due to a multitude of factors. The cost of high-quality materials, labor charges for expertise, plumbing and electrical work, custom cabinets and countertops, as well as high-end appliances all contribute to the overall price tag. Additionally, unexpected costs and overruns can further inflate the budget. Therefore, when embarking on a kitchen renovation project, it is crucial to meticulously plan and budget accordingly to avoid any financial setbacks or surprises along the way.


cleaning your bathroom after a renovation

Just Finished A Bathroom Reno? – Here’s How To Ensure It’s Clean To Use

I’m here to guide you through the daunting task of cleaning up after a bathroom renovation.

I’ve been there, dust and debris everywhere, feeling overwhelmed. But don’t worry! With the right approach and tools, I promise you can turn that construction zone into a sparkling sanctuary.

I’ll share my years of experience and personal tips and tricks, from dusting to deep cleaning, ensuring your newly renovated bathroom is free of remnants and ready for family use.

Always keep in mind that depending on the type of renovation and or cost, you may need council approval.

Let’s dive in!

Key Takeaways

  • Clean and disinfect all surfaces, including the toilet, bathtub, sink, and vanity area.
  • Remove any debris or construction materials from the bathroom before cleaning.
  • Pay attention to detail and thoroughly clean hard-to-reach areas, such as corners and crevices.
  • Replace shower curtains or liners if necessary to ensure a fresh and clean appearance.

Also see the video below on entire home cleaning after a renovation.


The Initial Clean-Up: Removing Large Debris

Before I can really get into the nitty-gritty of cleaning, I’ve got to remove any large debris that’s been left behind. This initial step in post renovation cleanup is crucial because it paves the way for a thorough and effective renovation cleaning.

I usually start by identifying the larger pieces of construction debris, like leftover building materials, chunks of plaster, and any tools or equipment left behind after the renovation project. Using heavy-duty gloves for protection, I carefully gather these items and dispose of them properly. This not only clears the space for detailed cleaning, but also eliminates potential safety hazards.


cleaning up debris and dust from a bathroom with dustpan and broom

Essential Cleaning Supplies for Post-Renovation

I’ve found that having the right cleaning supplies is crucial for an efficient post-renovation cleanup.

My renovation cleaning checklist begins with microfiber cloths for dusting and scrubbing brushes for stubborn grime.

A good mop and bucket are essential for keeping floors clean. Cleaning solutions specific to the materials in your home, such as wood or tile, are also necessary.

Don’t forget the squeegee for keeping those newly installed windows sparkling.

For the bathroom, I keep a separate set of supplies. Strong disinfectants, a toilet brush, and a solution for keeping the taps and faucets clean are a must.

Though it’s a challenging task, if you’re feeling overwhelmed, don’t hesitate to bring in professional cleaners. They’ll have the job done in no time.

Tactics for Dusting and Vacuuming Post-Renovation

In post-renovation cleanups, it’s essential that one pays special attention to dusting and vacuuming, as these steps help to ensure any lingering dust and debris are thoroughly removed. I always start with a thorough dusting, focusing on high surfaces as fine dust tends to settle there. Next, I use my vacuum cleaner to pick up any dust that has fallen to the floor. This is a crucial step in my post-renovation cleaning checklist.


Task Importance Tips
Dusting Removes fine dust Use a microfiber cloth
Vacuuming Collects larger debris Use attachments for hard-to-reach areas
Deep Clean Ensures cleanliness Use appropriate cleaning products
Empty Vacuum Maintains efficiency Do this regularly
Repeat Catch any missed dust Do this until no more dust appears

Techniques for Cleaning Walls and Ceilings

While I’m scrubbing the walls, it’s important to remember that ceiling cleaning shouldn’t be overlooked, as dust and debris often collect there too. During the renovation process, ceilings, especially around ceiling fans, become a hotspot for dust accumulation. The cleaning process should hence, start from the top.

Firstly, I gently clean the ceiling fans using a damp cloth, ensuring not to damage any fixtures.

Secondly, I wipe the ceiling with a soft cloth, reaching every corner to ensure a thorough clean.

Lastly, I scrub the walls from top to bottom, paying attention to corners and edges.

Post-Renovation Window and Mirror Cleaning

After tackling the walls and ceilings, I’ve now got dozens of windows and mirrors to clean, but I’m well prepared with my streak-free glass cleaner and microfiber cloths.

My first step in post construction cleaning is to use a dry cloth to wipe off any residual dust from the glass surfaces. Then, I spray a generous amount of window cleaner on the surface and wipe it clean with a microfiber cloth. It’s important to use circular motions to avoid streaks.

For mirrors, it’s pretty much the same process. But remember, post construction cleaning isn’t like regular cleaning. It’s more detailed and time-consuming. So take your time, be thorough, and your windows and mirrors will be spotless and streak-free in no time.

Deep Cleaning Floors After Renovation

I’ve got both tile and hardwood floors throughout my house, and each requires a different method for deep cleaning after renovation. Post-construction cleanup is essential to remove construction dust and restore my floors to their original beauty.

Here’s my method for cleaning tiles:

  • I start by mixing hot water with a mild detergent.
  • Then, I gently mop the floors using the solution.
  • For stubborn grout stains, I use a soft brush to scrub them away.

And here’s my method for cleaning hardwood floors:

  • First, I sweep the floors to remove any dust and debris.
  • Then, I use a wood-friendly cleaner and a microfiber mop to clean the hardwood.

Post-renovation, the sense of accomplishment is immense. But remember, deep cleaning is vital. It not only enhances your renovated space but also ensures the health and safety of your family. It’s like the cherry on top of your renovation project!

How to Clean Renovated Bathroom Fixtures

In cleaning my renovated bathroom fixtures, I’m using a mild, non-abrasive cleaner for the metal parts. I’m making sure to rinse them thoroughly to prevent residue build-up.

It’s crucial to give them a thorough clean, especially the light fixtures which can collect a lot of dust. I’m careful to remove all remaining dirt, paying close attention to detail.

For the post construction clean, I’ve found it’s best to follow up with a professional cleaning service. They have the expertise to ensure every nook and cranny is spotless.

Their thoroughness gives me peace of mind that my renovated bathroom isn’t just visually appealing, but hygienically clean as well. It’s a process, but the sparkling end result is worth it.


new bathroom renovations

Sanitizing Bathroom Surfaces: A Step-by-Step Guide

I’m about to dive into the step-by-step process of sanitizing bathroom surfaces to ensure a healthy and germ-free environment. As part of a deep post construction clean, the bathroom is one area that needs meticulous attention. After the initial clean up of dust and other debris, we need to get down to the nitty-gritty.

  • Scrubbing the tiles with a strong, but non-abrasive cleaner
  • Disinfecting the sink, shower, and tub
  • Thoroughly cleaning the toilet, both inside and out

Each of these steps is crucial in the post construction cleaning checklist to ensure all surfaces aren’t just visibly clean, but also sanitized. It’s not just about creating a shiny appearance, but more about securing a safe, hygienic space for all.

Tips for Cleaning Bathroom Furniture After Renovation

After you’ve scrubbed tiles and disinfected surfaces, it’s essential to pay attention to bathroom furniture as well, as these items can often harbor dust and debris from the renovation process.

Post construction cleans are a time-consuming process, but they’re necessary. Start with a dry microfiber cloth to remove the fine particles. Use this on shelves, cabinets, and mirrors.

Next, a slightly damp cloth will help you pick up stubborn dust. Don’t forget to clean underneath and behind the furniture. If your furniture has any metal parts, use a suitable cleaner to prevent rust.

Regularly shake out and change your cleaning cloths to avoid spreading dust around. Remember, the construction process can leave behind more mess than you’d think, so don’t rush this step.

Light Fixtures and Outlet Cleaning Post-Renovation

I’ve got quite a few light fixtures and outlets to clean post-renovation, and it’s critical to ensure they’re dust-free and safe to use. As part of post-construction cleanup, it’s important to take precautions to handle dust particles and debris effectively.

The mere thought of a newly renovated space filled with dust and grime is so unsettling.

The idea of a spark from an outlet clogged with dust is downright dangerous.

The vision of clean, sparkling light fixtures and outlets, ready for use, is satisfying.

Start by turning off the power for safety. Using a soft microfiber cloth, gently clean the dust from light fixtures. For outlet cleaning, a small brush can get into crevices. Remember, the post-renovation cleanup is just as important as the renovation itself.

How to Disinfect and Deodorize the Renovated Bathroom

It’s crucial to properly disinfect and deodorize the renovated bathroom to ensure a clean and pleasant environment.

I start by donning my personal protective equipment to keep safe.

I then use a high efficiency particulate air vacuum to remove as much dust as possible from all surfaces.

Next, I focus on cleaning air vents, knowing how they can harbor dust and contribute to odors if not properly cleaned.

A mixture of warm water and mild detergent does the trick, followed by a thorough rinse.

To ensure the air is clean, I replace the air filter with a new one.

Lastly, I use a high-quality disinfectant to wipe down all surfaces, following this up with a deodorizing spray.

With this, I’m confident my renovated bathroom isn’t just visually appealing, but truly clean and fresh.

Guidance for Final Inspection After Cleaning

I’m preparing for the final inspection after cleaning, and I’ll be focusing on ensuring every nook and corner is spotless. This task is a critical final step in the renovation process, after a bustling construction site has transformed into a renovated space.

Here’s my plan:

  • First, I’ll revisit the cabinet doors. I’ll make sure they’re free from dust and grime both inside and out.
  • Next, I’ll scrutinize the door frames. These often overlooked areas can collect dust and need careful cleaning.
  • Finally, I’ll vacuum the carpets (if any). Out comes the heavy-duty vacuum cleaner for one last run.

Throughout this process, I’ll strategically use drop cloths to prevent any dislodged dust from resettling. It’s a meticulous process, but the end result – a spotlessly clean renovated space – will be worth it.

The Role of Professional Cleaners in Post-Renovation Cleaning

In my experience, hiring professional cleaners after a renovation can save countless hours of cleanup and they’ll often catch those easily overlooked spots. They’re well-equipped to handle the daunting task of cleaning up drywall dust, a notorious nuisance that finds its way into the tiniest nooks and crannies. It’s worth adding them to your bathroom renovation budget.

They’ll expertly clean your air con system and air ducts, preventing the dust from circulating in your home. You don’t realize the importance of this until you’re sneezing from the dust kicked up by your heating system! They also take care of removing the plastic sheeting used to protect your furniture and ensure all your air vents are dust-free.

I can’t stress enough how much easier it’s to let the pros handle the post-renovation cleanup.

Safety Measures During Post-Renovation Cleaning

While someone might think post-renovation cleaning is a breeze, I’ve found that ensuring safety measures are followed is just as important as the cleaning process itself. It’s not just about wiping all the dust off the soft surfaces, but it’s also about ensuring you’re protected while doing so.

  • Always wear a mask and gloves to prevent inhaling loose dust or getting cut by broken glass.
  • It’s crucial to wait until the dust settles before attempting to clean; rushing can stir up particles, making them more dangerous.
  • Lastly, never underestimate the importance of proper disposal. You don’t want to leave any potential hazards lying around.

In the end, safety is just as important as a clean, dust-free home.

The Importance of Regular Maintenance After Renovation

Even though the renovation’s done and everything looks brand new, it’s crucial that I don’t neglect regular maintenance to keep it all in top shape. I’ve created a simple, effective routine that keeps my space looking its best. The ceiling fan, a usual dust gatherer, gets a weekly wipe down. For flat surfaces, a quick daily dusting does wonders in maintaining their sheen.


Maintenance Task Frequency
Cleaning Ceiling Fan Weekly
Dusting Flat Surfaces Daily
Deep Cleaning Monthly
Maintenance Check Quarterly


This routine is fundamental for identifying issues early on, preventing unnecessary wear and tear. It ensures that my renovated space will age gracefully, retaining its charm and appeal for years to come. Regular maintenance – it’s a small commitment for a lasting reward.

Popular Questions

How Do I Clean Grout Between Tiles After Renovation?

To clean grout between tiles after a renovation, I’d start by vacuuming to remove loose debris. I’d then make a paste of baking soda and water, apply it to the grout, and scrub it clean.

What Precautions Should I Take When Cleaning Newly Installed Bathroom Appliances?

When cleaning newly installed bathroom appliances, I’m careful not to scratch or damage them. I use soft cloths and non-abrasive cleaners. I also ensure they’re dry after cleaning to prevent water spots or damage.

How Do I Remove Paint or Adhesive Stains From Surfaces After Renovation?

To remove paint or adhesive stains after renovation, I’d first identify the type of surface. Then, I’d gently scrape off excess residue before applying a suitable cleaning solution. Always test on a hidden area first.

How Often Should I Clean the Bathroom After a Renovation to Keep It in Optimal Condition?

I’d suggest cleaning your renovated bathroom thoroughly once after completion, then maintaining it with weekly cleans. This ensures it stays in prime condition and any renovation dust or debris is regularly cleared.

Are There Any Specific Cleaning Products Recommended for Post-Renovation Cleaning in Bathrooms?

Yes, for post-renovation bathroom cleaning, I’d recommend a multi-surface cleaner for general surfaces, a non-abrasive cleaner for delicate areas, and a mold/mildew remover for damp areas. Always read labels for specific usage instructions.

Final Notes

In conclusion, cleaning your bathroom after renovation can feel like a daunting task, but it’s doable with a systematic approach and the right tools. Remember, patience and diligence will get the job done.

Don’t rush; take the time to ensure each area is thoroughly cleaned. If it feels too overwhelming, professional cleaners are always an option.

And finally, establish a regular cleaning routine to keep your renovated bathroom sparkling clean and inviting.

a bathroom renovation build on a budget

Saving Money On A Bathroom Renovation – Our Tips

Navigating a bathroom renovation while remaining cost-effective can feel daunting. This comprehensive guide offers practical, detail-oriented strategies to achieve a stylish bathroom refresh without breaking the bank.

From DIY tips, choosing cost-effective materials, reworking existing plumbing to considering prefab options, we provide a roadmap to significant savings.

Learn how to manage your project, plan, and budget effectively, ensuring your dream bathroom becomes a reality, irrespective of financial constraints. Also see our article on renovating to sell.

Also make sure you contact our council before starting to understand if you need approval.

Key Takeaways

  • DIY and cost-saving measures can help save money on bathroom renovation, such as doing the demo yourself and using basic tools.
  • Getting quotes and shopping around is crucial to compare prices and find value for money options for bathroom products.
  • Working with existing plumbing and avoiding unnecessary changes can help save on expensive plumbing costs.
  • Being savvy with tile selection and considering alternatives, such as VJ Board walls, can save money while still achieving a stylish look.

This might an American video, however it has some great tips.


DIY and Cost-Saving Measures

Implementing DIY strategies and cost-saving measures can significantly reduce the financial burden of a bathroom renovation. The key is to approach the process with a well-structured plan, keeping in mind that every decision made can impact the overall renovation budget.

Opting to do part of the work yourself, such as the initial demolition or painting, can result in considerable savings. DIY, however, should be carefully balanced with professional help, especially when it comes to complex tasks that require a skilled hand.

Shopping around for materials and fixtures, comparing prices, and leveraging discounts can also help save money. Maximizing the existing layout, particularly the plumbing, can further minimize costs.

Getting Quotes and Shopping Around

A crucial aspect of budgeting for a bathroom renovation is obtaining at least three different quotes from professional bathroom renovators to ensure a comprehensive understanding of the potential costs involved. This will give you a better perspective on your bathroom renovation budget.

While getting quotes, always remember to shop around. Different suppliers and retailers offer varied prices for the same products, so spending a little extra time comparing prices can result in significant savings.


Step Tips
Getting quotes Don’t just settle for the first quote you get.
Shopping around Compare prices from different suppliers.
Understanding your needs Ensure the renovators can meet your specific requirements.
Checking reviews and references This can give you an idea of the quality of work to expect.

Working With Existing Plumbing

Moving on from comparing quotes and shopping around, it’s essential to take into account your existing bathroom plumbing when planning your renovation to potentially save on costs. For a full bathroom renovation, it might seem tempting to completely redesign the layout, but remember that moving plumbing can significantly inflate your bathroom budget.

  • Keep the existing plumbing layout: It’s cost-effective and minimizes the need for extensive plumbing changes.
  • Reuse current fixtures where possible: This can drastically reduce renovation expenses.
  • Inspect existing plumbing: Ensure it’s in good condition to avoid unforeseen costs later.
  • Assess the feasibility of desired changes: Some alterations may prove too costly due to the existing plumbing.
  • Consult with professionals: They can provide valuable insights about making the most of your current layout.


existing bathroom plumbing

Tile Selection and Alternatives

In choosing tiles for your bathroom renovation, it’s essential to balance aesthetics with budget considerations, and exploring cost-effective alternatives can significantly reduce your expenditure.

Tile selection is crucial as it often contributes to the bulk of the tiling costs. By opting for a less expensive tile, yet maintaining a high-quality look, you can save money substantially.

Additionally, consider tiling only areas exposed to water and humidity, and explore alternatives like waterproof paint or vinyl wall panels for the rest.

Remember, your dream tile may have a look-alike with a friendlier price tag. Shopping around and comparing prices can also lead to significant savings.

Ultimately, a smart tile selection strategy can help you achieve a stylish bathroom renovation without breaking the bank.

Vanity and Floor Waste Options

Considering vanity and floor waste options can significantly influence the overall cost of your bathroom renovation. If you’re not planning a complete overhaul of your bathroom design, you can save a considerable amount by opting for stock standard vanity instead of a custom-made one.

A wall hung vanity can add a touch of class without breaking the bank.

Stock standard vanity units are not only cost-effective but also available in various designs.

In bathroom design, remember that functionality should precede aesthetics. A well-designed vanity can offer ample storage space.

For floor waste, grates are usually cheaper and easier to install than other waste systems.

Always choose the right bathroom fixtures that align with your budget and design preferences.

These options can help you renovate your bathroom affordably without compromising on style.

Keeping the Existing Layout

With respect to the existing layout, retaining it during a bathroom renovation can significantly reduce costs associated with plumbing and construction work. This approach can help you save a considerable portion of your budget as rerouting plumbing lines or changing the position of fixtures can escalate costs.

When planning to renovate, evaluate the functionality and efficiency of the current layout. If it meets your needs and can accommodate any updates you wish to make, it would be wise to keep it. Remember, a successful renovation does not necessarily mean a complete overhaul. Working with what you have can still result in a refreshed, modern bathroom.

In essence, making strategic decisions on layout in your renovation project can ensure you stay within budget, while still achieving the desired outcome.

Demolishing the Bathroom Yourself

An effective cost-saving measure, after deciding to maintain the existing layout, involves undertaking the demolition of your bathroom yourself. Doing your own demolition work can significantly cut down the costs associated with a bathroom renovation. However, this process requires careful planning and execution to avoid damaging any vital parts of your house.

Start by removing small bathroom items like mirrors, towel racks, and shower curtains.

Proceed to larger fixtures like sinks and toilets.

Safely disconnect any electrical wiring.

Remove drywall and flooring carefully to avoid damaging underlying structures.

Lastly, dispose of the demolition waste responsibly.

Hiring a Professional Bathroom Renovator

Despite the potential for cost savings through DIY, enlisting the services of a professional bathroom renovator can offer significant advantages in terms of project management and quality control. A professional possesses the expertise to identify potential challenges in the bathroom renovation process and can provide solutions that are not only cost effective but also ensure superior quality.

Moreover, hiring a professional bathroom renovator can save money in the long run by avoiding costly mistakes that may arise from inexperienced DIY efforts.

So, how do you find such a professional? Seek multiple quotes, read online reviews, and check their portfolio to ensure they can deliver the quality you desire.

Opting for Middle Range Fixtures

Consider choosing middle-range fixtures for your bathroom renovation as they offer an excellent balance between quality and cost. These fixtures can significantly reduce your renovation expenses without sacrificing quality. On a tight budget, it’s all about smart choices, and middle-range fixtures are one of them.

  • Affordability: Middle range fixtures are significantly less expensive than their high-end counterparts, helping you save money.
  • Quality: Despite their affordability, these fixtures don’t compromise on quality.
  • Variety: They come in a wide range of styles and designs to suit any bathroom decor.
  • Durability: Middle range fixtures are typically sturdy and long-lasting.
  • Ease of Installation: They are often easier and cheaper to install than high-end fixtures, reducing labor costs.

Opting for middle-range fixtures is a practical decision that allows for a stylish bathroom renovation without breaking the bank.

Avoiding Custom Made Vanities

One significant way to further cut costs during your bathroom renovation is by avoiding custom-made vanities. Custom made vanities often come with a hefty price tag due to the labor and materials involved. Instead, consider standard vanities available in various designs and sizes to suit your bathroom’s aesthetic. These are often much more cost-effective and can still provide a high-quality finish.

Remember, the goal of your bathroom renovation is to improve functionality and aesthetic appeal while saving money. If a custom vanity isn’t necessary for achieving this, it’s best to avoid the expense.

Planning and Budgeting for Renovation

Effective planning and budgeting play a pivotal role in saving money on a bathroom renovation. To avoid unnecessary expenses during a full renovation, create a comprehensive plan that includes all potential costs.

First, determine the scope of your renovation. Knowing what you want to change in your bathrooms will help you estimate the cost.

Second, prioritize tasks based on your budget.

Third, obtain multiple quotes from different contractors to ensure you are getting a fair price.

Fourth, consider the cost-saving options such as reusing existing fixtures or choosing less expensive materials.

Finally, always factor in a contingency budget for unexpected costs.

With careful planning and budgeting for renovation, you can achieve a refreshed bathroom while maintaining control over your expenses.

Choosing Bathroom Fixtures and Fittings

In line with your budgeting and planning strategy, the selection of bathroom fixtures and fittings is a crucial aspect where significant savings can be achieved. It’s essential to focus on quality, durability, and the price of items such as a new faucet, sink, toilet roll holder, and robe hooks.

Consider the following table when making your choices:


Fixture Cost Tips
New Faucet $$ Opt for mid-range options
Sink $$$ Consider your space and usage
Toilet Roll Holder $ Functional, affordable options exist
Robe Hooks $ Opt for hooks that match other fixtures
Bathroom Fixtures $$$ Balance between quality and budget

Saving Money on Bathroom Tiling

A significant portion of your renovation budget can be allocated to bathroom tiling, hence strategizing on how to save in this area is a prudent move. When planning a bathroom renovation, it’s important to consider the cost of tiling as it can quickly add up.

  • Shop around: Prices for tiles vary significantly between suppliers. Spend time comparing prices to ensure you’re getting the best deal.
  • Do it yourself: If you’re confident in your skills, consider doing the tiling yourself.
  • Choose cost-effective tiles: Ceramic tiles can be a more affordable option than porcelain or stone.
  • Limit tiling: Rather than tiling the entire bathroom, limit it to high-impact areas.
  • Reuse tiles: If possible, clean and reuse existing tiles.

These tips can help in saving money on bathroom tiling while still achieving a high-quality finish.

Importance of Quality Plumbing

Substantial savings on a bathroom renovation should not compromise the quality of plumbing, as it forms a critical aspect of the project’s long-term viability. Quality plumbing ensures efficiency and durability, protecting your home from potential water damage.

To save money, opt for high-quality fixtures that offer longevity and avoid frequent replacements. Retaining your current installation layout significantly reduces costs associated with re-routing. However, if modifications are necessary, hire a reputable professional to guarantee a proper installation. While the upfront cost may be higher, this decision safeguards against future expenses stemming from faulty plumbing.

Prioritizing quality plumbing in your bathroom renovation is an investment that pays off in the long run, ensuring both the functionality and value of your home.

Budgeting for Electricals in Renovation

Following the investment in quality plumbing, it’s crucial to prudently budget for electrical components during your bathroom renovation. Electricals, although not the most conspicuous part of a renovation, play a pivotal role in creating a functional and comfortable space.

  • Lighting: Invest in efficient LED lights and consider dimmer switches for mood lighting.
  • Ventilation: An exhaust fan is essential in preventing mold and maintaining air quality.
  • Heating: Consider underfloor heating or heated towel rails for added luxury.
  • Power Points: Ensure enough outlets are included for appliances like hair dryers and electric razors.
  • Safety: Ground Fault Circuit Interrupters (GFCIs) are required for outlets near water sources.

Space-Saving Strategies

In the realm of bathroom renovations, implementing space-saving strategies can significantly reduce costs while maximizing the utility of the room. By effectively utilizing bathroom space, homeowners can achieve a functional and aesthetically pleasing design without overspending.

Consulting an interior designer can provide innovative space-saving strategies that are cost-effective and practical. For instance, installing recessed or vertical storage options can create additional space without necessitating a larger footprint. Additionally, opting for multipurpose furniture, such as a vanity with built-in storage, can also free up space.

When remodeling, consider keeping the existing layout to minimize construction costs.

Maximizing Light

With regard to lighting in a bathroom renovation, it is essential to maximize natural and artificial light sources to create an illusion of a larger space while saving on energy costs.

To achieve this, consider the following:

  • Select the right paint color: Light hues for the walls and ceiling can reflect light, making the room appear more spacious and brighter.
  • Install mirrors strategically: Mirrors can reflect natural light, enhancing the overall light in the room.
  • Choose a minimalist style: A clutter-free space can create a more open, light-filled environment.
  • Opt for translucent window coverings: These allow natural light to filter in, while still maintaining privacy.
  • Use LED lights: These energy-efficient lights can brighten up your bathroom without increasing your electricity bill.

Refreshing the Bathroom Without Overhaul

Undergoing a complete bathroom renovation can be costly, so consider refreshing your existing bathroom features for a more budget-friendly makeover. A simple paint job can do wonders for your bathroom, transforming it into a brand new space without the hefty price tag of renovating.


Strategy Cost Saving Potential
Repainting the bathroom High, especially if you do the job yourself
Re-grouting the tiles Moderate, depending on the size of your bathroom
Updating fixtures Varies, but potential savings if you choose mid-range options
Using prefabricated elements High, as they can save on labor and material costs

Considering Prefab Options

One significant way to cut costs during a bathroom renovation is by considering the use of prefabricated options. Prefabricated showers and other bathroom products can drastically reduce the overall cost of a remodel.

Prefabricated items offer several advantages:

  • Cost Savings: Prefab products are generally less expensive than their custom-built counterparts.
  • Time Savings: Prefabricated options require less installation time, further reducing labor costs.
  • Quality Assurance: Prefab bathroom products often come with warranties, ensuring their durability and functionality.
  • Variety: There’s a wide range of designs and styles available, catering to different tastes and budgets.
  • Ease of Installation: Prefab options are designed for easy installation, reducing the chance of errors and additional costs.

Considering prefab options can turn your bathroom remodel into a more manageable, budget-friendly project.

Final Notes

In conclusion, cost-effective bathroom renovation is attainable through strategic planning and smart choices. By opting for DIY methods, getting competitive quotes, and working with existing plumbing, significant savings can be achieved.

Additionally, careful tile selection, efficient use of space, and consideration of prefab options can further reduce costs.

In essence, a stylish and refreshed bathroom need not be a financial burden, but a testament to cost-effective, thoughtful design and execution.

a house with cement sheeting on the outside

Choosing Cement Sheet Or Plasterboard For Your Renovation

As a homeowner or contractor, it’s important to understand the differences between cement sheet and plasterboard when considering a building or renovation project.

These two materials vary in terms of durability, installation process, price, and other factors.

This article will explain the basic material properties, evaluate their longevity and durability, compare installation processes and prices, as well as discuss how to tailor your choice of material to specific project needs.

With this information you’ll be able to make an informed decision about which material is best for your particular project.


Key Takeaways


  • Fiber cement board is a composite material made of fibre cement reinforced with cellulose fibers, while gypsum board is a panel made off friable gypsum powder core pressed between two sheets of paper.
  • Fiber cement board is more durable and impact-resistant than gypsum board, making it suitable for exterior applications and areas that require increased strength.
  • Gypsum board (Gyprock) is lighter and cheaper than fiber cement board, and it provides a smoother surface and nicer touch on the edge joints between the boards.
  • Fiber cement board can be water-resistant or waterproof, making it suitable for wet areas like bathrooms and kitchens, while gypsum board is only water-resistant and not suitable for wet applications or as tiling adhere boards.


a plasterboard renovation


Understanding Basic Material Properties


When considering the differences between cement sheet and plasterboard, it’s important to understand their basic material properties. This includes water resistance, strength, and purpose, which will help you make an informed decision.

Cement sheet is made of cement reinforced with cellulose fibers, while gypsum board is a panel of gypsum plaster pressed between two thick sheets of paper. Both materials have different levels of moisture resistance. Cement sheet is more water-resistant than gypsum board, making it suitable for wet areas like bathrooms and kitchens where there is a risk of mold or mildew. On the other hand, gypsum board can be easily damaged if not handled with care.

In terms of weight and handling, fiber cement board tends to be heavier than its counterpart due to its composite material. This makes installation more difficult but also adds extra strength when installed correctly. Gypsum board, on the other hand, is lighter weight and requires less effort in terms of handling but lacks in strength when compared to fiber cement boards.

When it comes to aesthetics and finishing options, both materials offer different advantages. Fiber cement boards provide a rougher texture than that provided by gypsum boards, giving them an edge for certain design applications. On the other hand, gypsum boards offer a smoother surface, providing a nicer touch on the edge joints between the boards. Also, both materials accept paint or primer, allowing for further customization depending on the desired look.

Considering all these factors carefully will ensure you get the best material for your application needs, whether you choose fiber cement or gypsum board. Paying attention to detail from material composition up until aesthetics will help you determine which option works best for your project.


Evaluating Durability and Longevity


You must decide between two materials for your project – fiber cement board and gypsum board – that have different levels of durability and longevity. Fiber cement board is more resistant to moisture, impact, and fire than gypsum board. It also requires minimal maintenance compared to its counterpart as it’s made from a composite material reinforced with cellulose fibers and often waterproof or water-resistant. Fiber cement also provides better environmental sustainability due to its resistance against UV rays, strong winds, rain, and other weather conditions.

On the other hand, although gypsum board is lightweight and easier to install with a utility knife than fiber cement boards, which require a circular saw with a heavy-duty blade for cutting, it doesn’t have the same level of resistance against moisture or fire. It shouldn’t be used in wet areas such as bathrooms or kitchens since it’s only water-resistant but not waterproof. In addition, plasterboard liner needs to be applied on both sides of the panel for increased strength and durability.

Therefore, when evaluating durability and longevity of materials, you must consider their respective properties such as resistance to moisture, impact resistance, resistance to fire along with their maintenance requirements and environmental sustainability before making your choice.


Installation Process and Complexity


Installing fiber cement board is more complex than gypsum board, as it requires a circular saw with a heavy-duty blade for cutting and needs to be secured with decking screens or roofing nails. These installation techniques require additional time and effort compared to the ease of cutting gypsum board with a utility knife.

Moisture resistance is another factor that should be considered when deciding between the two boards. Fiber cement board can be water-resistant or waterproof, making it suitable for areas where moisture levels may fluctuate.

Additionally, weight considerations must also be taken into account. While both are relatively lightweight, fiber cement board is heavier than gypsum board and may require additional support for larger installations.

In terms of finishing options, both boards accept paint and primer but gypsum board has a smoother surface which provides a nice touch on the edge joints between the boards. Fiber cement board has rough sides which can be overlayed with textiles or plastered directly onto interior walls or ceilings.

Overall, when it comes to installation process and complexity, fiber cement has several advantages over traditional drywall due to its increased durability and moisture resistance properties. However, these advantages come at the cost of added time and effort in terms of installation techniques as well as weight considerations during construction.

Also see our article on how to use a stud finder on plasterboard walls.


Price Comparison


When it comes to price, gypsum board is a more affordable option than fiber cement board. Cost difference depends on the type and quantity of material purchased. Budget considerations should include installation costs and future maintenance, which may be higher for fiber cement boards. Below is a price comparison at the time of writing:


  • Plasterboard current price (1200 x 10mm) – $22.21 at Bunnings
  • Cement Sheet current price (1200 x 6mm) – $31.56 at Bunnings

Tailoring to Specific Project Needs


No matter the project, it’s important to consider both fiber cement board and gypsum board to determine which is best suited for your particular needs. Installation techniques are a major factor in choosing either board, as each has its own unique requirements.

Fiber cement boards require heavy-duty cutting tools like circular saws with a heavy-duty blade while gypsum boards only need a utility knife. Maintenance requirements also differ between the two materials; fiber cement boards require decking screens or roofing nails to stay in place, while gypsum boards can be secured with taper-head drywall screws.

Aesthetic considerations should also be taken into account when selecting either type of board. While both types accept paint and primer, fiber cement board has a rougher surface (but a smoother surface on one side) that may provide an interesting touch on the edge joints between boards whereas gypsum boards have smoother sides for a cleaner look. However, cement sheets can certainly finish very well if prepared correctly and attention to detail is take for painting and finishing.

The environmental impact of using one material over another should also be considered. Fiber cement board is more durable than gypsum and can withstand long exposure to UV rays and harsh weather conditions such as strong winds and rain, making it better for exterior applications or in your workshop or shed.  Acoustic properties are yet another way the two materials differ; due to its greater thickness, fiber cement board provides better noise reduction compared to drywall.


Conclusion


Comparing cement sheet and plasterboard, it’s clear that each has its own unique benefits. Fiber cement board is more durable and impact-resistant, waterproof and water-resistant, making it a better choice for exterior applications.

Gypsum board is not suitable for wet areas, but its low cost makes it a great option for interior walls and ceilings. Ultimately, the right material will depend on your project needs and budget constraints.

The important thing is to weigh all factors carefully before making a decision.