finished epoxy floor in Adelaide

Revamp Your Space: The Ultimate Guide to Epoxy Bathroom Floor Installation & Care

Are you considering an epoxy bathroom floor for its toughness and design freedom? This guide provides clear, no-nonsense insights on the benefits, installation, and upkeep of epoxy flooring.

Learn about its superior water resistance, design versatility, ease of cleaning, and how you can achieve this modern flooring in your own bathroom. Also see our article on garage epoxy floors.

Also see our article on paining concrete floors.

Main Points To Note

  • Epoxy bathroom flooring offers durability, resistance to moisture and chemicals, easy maintenance, and design flexibility, allowing for a range of colours, patterns, and finishes.
  • Proper floor preparation is crucial for successful epoxy flooring installation, requiring assessment of the existing surface and thorough cleaning and roughening for optimal epoxy adhesion.
  • Ongoing care for epoxy flooring is straightforward, involving regular cleaning with mild solutions, addressing minor repairs promptly, and considering potential long-term savings due to its durability and low maintenance needs.

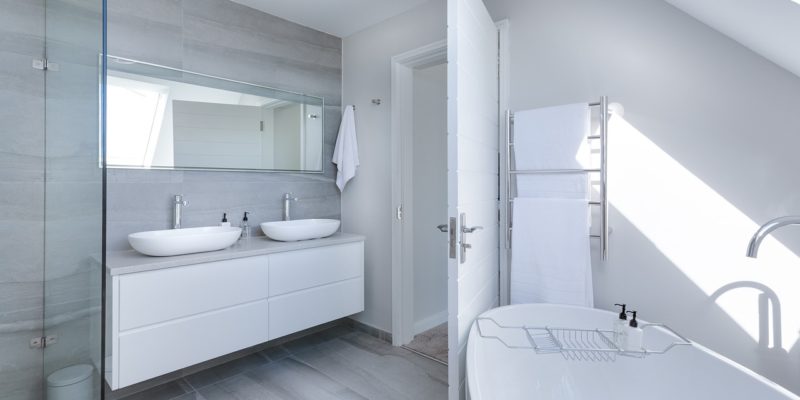
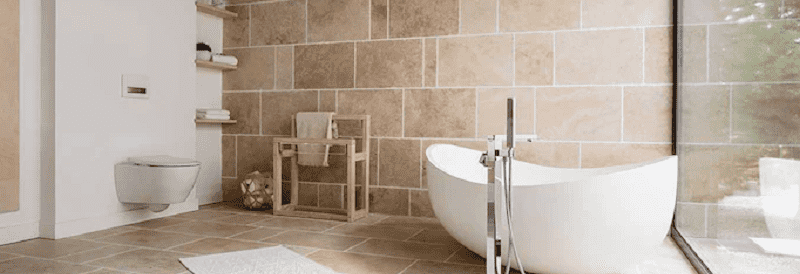
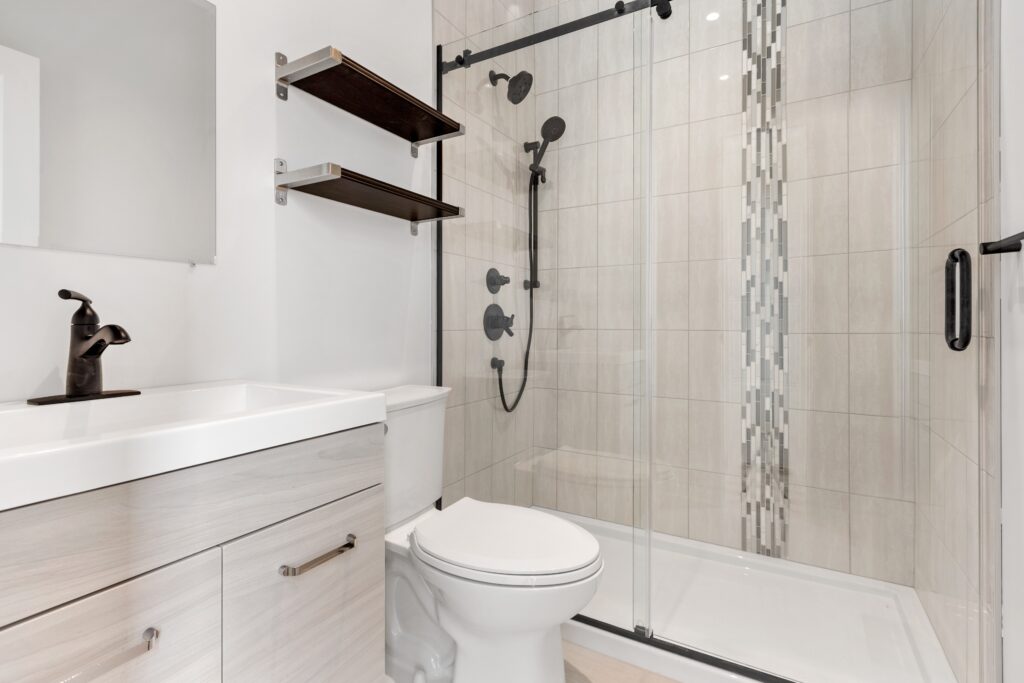
Why Choose Epoxy Flooring for Your Bathroom?

Epoxy bathroom floor with seamless and grout-free surface

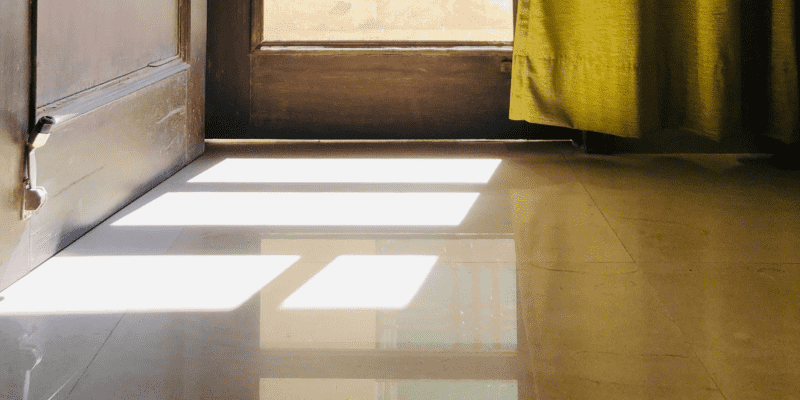
Epoxy is becoming a go-to flooring option for bathrooms due to the range of advantages it offers. It not only looks great, but can also be used in residential and commercial spaces alike. Its strength makes maintenance easy while offering an abundance of design possibilities too, creating seamless finishes perfect for any setting. Epoxy coatings give added protection against wear and tear as well as extending the lifespan of your bathroom’s flooring system significantly.

Durability and Resistance

Epoxy flooring stands head and shoulders above the rest when it comes to durability, as well as its resistance. Its remarkable strength is what makes epoxy a top pick for bathrooms that will be under considerable use regularly.

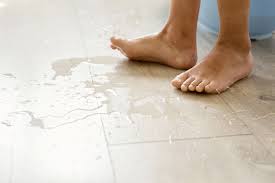
Showers taken multiple times daily or occasional liquid spills are handled with ease by this type of flooring solution. It also has superb immunity against various chemical compounds including common household cleaning products and urine – making it ideal in wet areas such as bathrooms due to its impermeable surface against water damage caused by moisture buildup other floors (for example near drains) may warp/discolour easily against.

Easy Maintenance and Cleaning

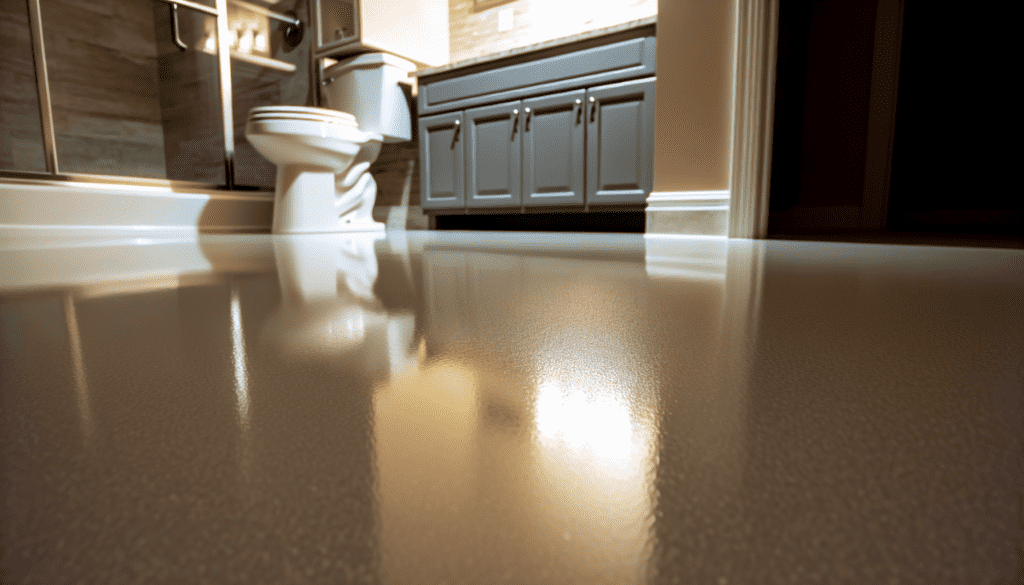
The incredible durability and resistance offered by epoxy flooring, as well as its low maintenance requirements, have made it a popular choice for bathroom floors. Its seamless surface ensures there are no grout lines where dirt or mold can accumulate– something that is common with tiled floors.

The glossy finish of this type of floor makes dirt and stains clearly visible so they can be addressed quickly. Basic cleaning involves using warm water mixed in detergent every two to four weeks together with immediate action against spills, much simpler than scrubbing constantly like some other types of surfaces would require! This ease-of-use turns maintaining your bathroom’s epoxy floor from a chore into an enjoyable task.

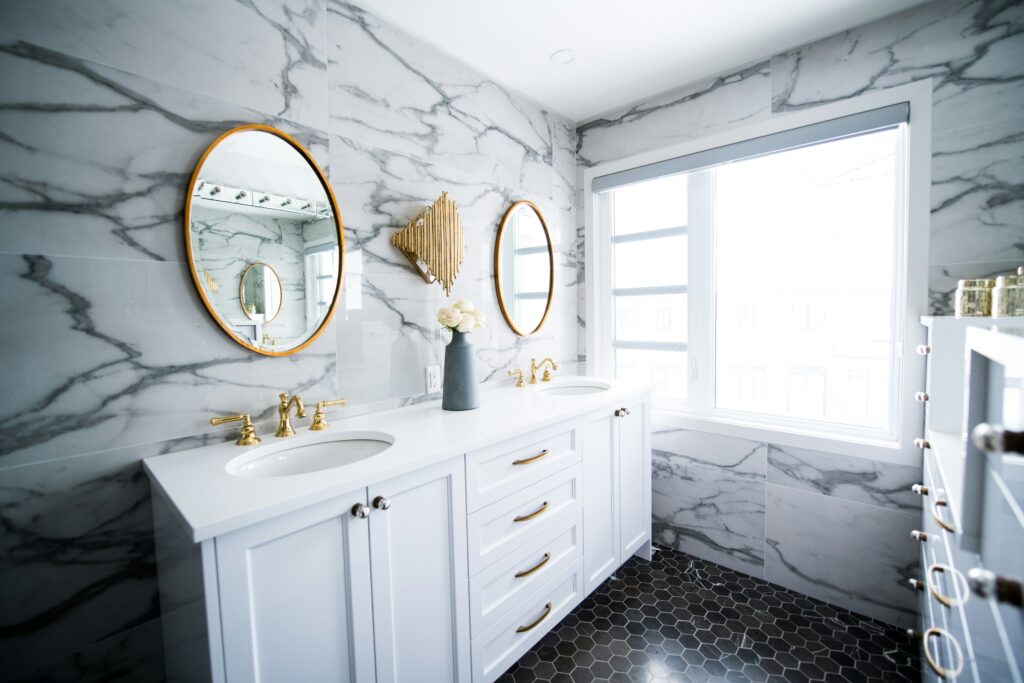
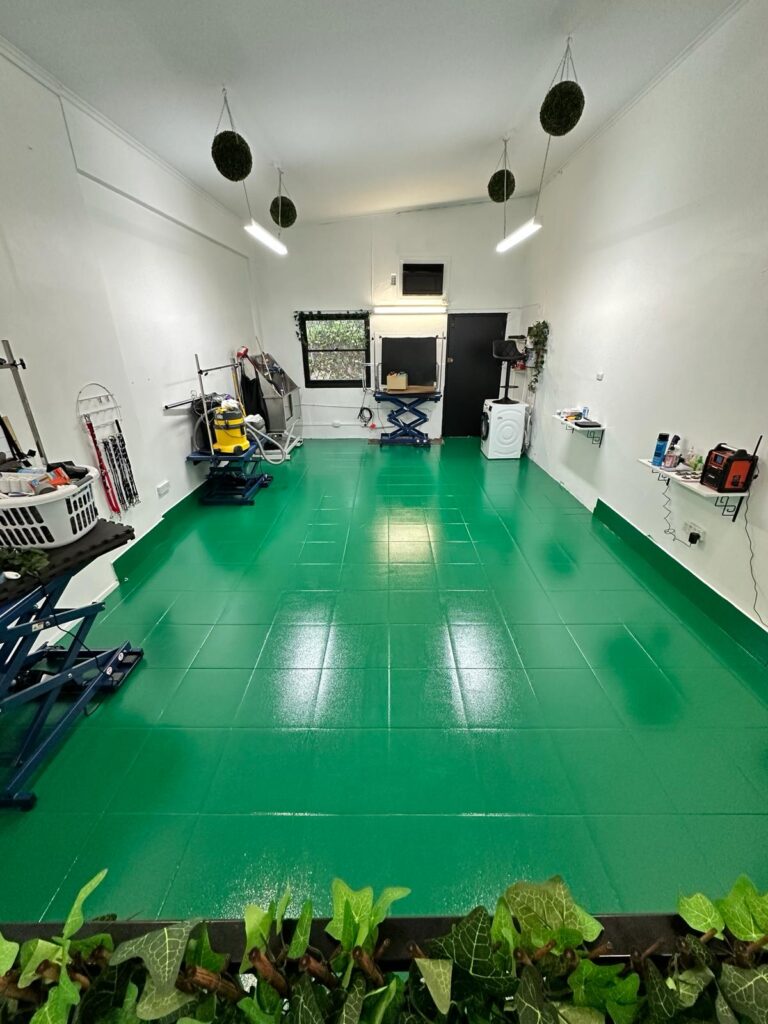
Customisation and Design Flexibility

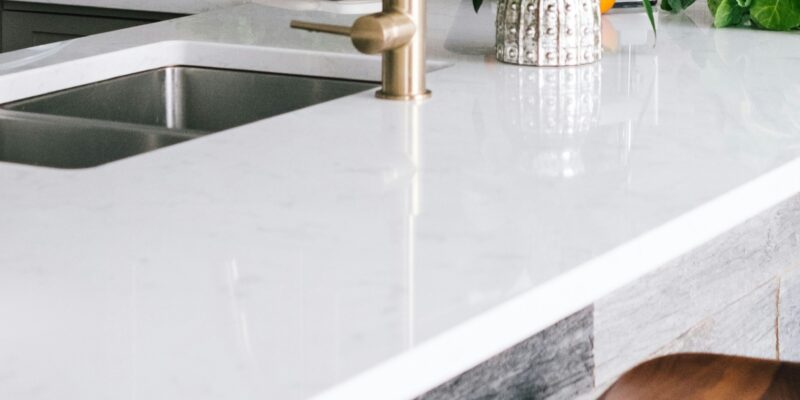
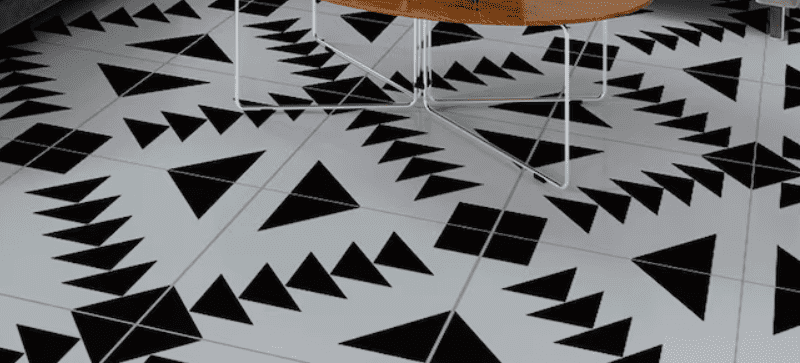
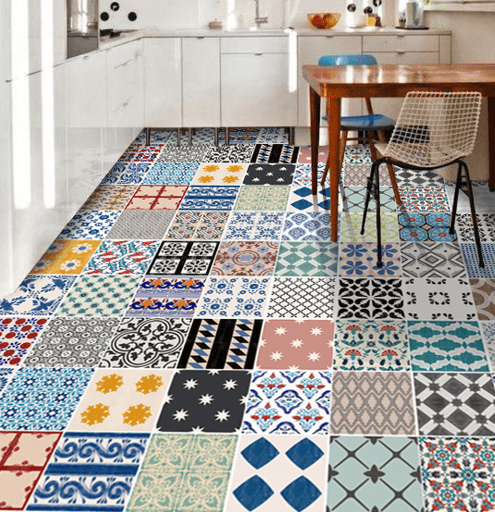
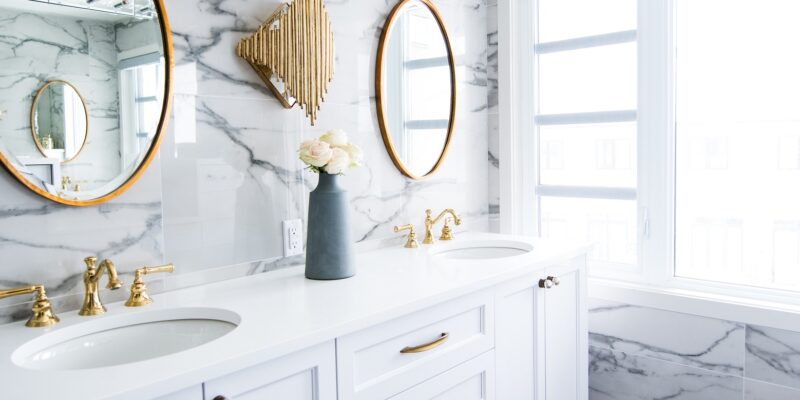
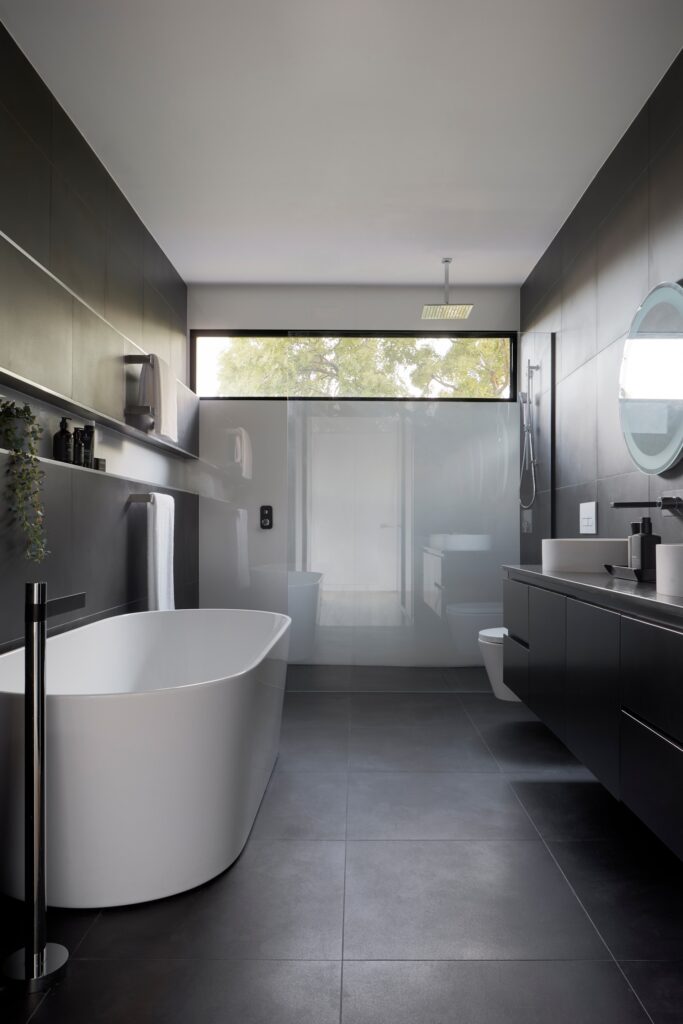
Epoxy flooring offers not just practicality, but it’s also an effective way to make a bathroom that suits your style. With all of the different shades, patterns and finishes available, you can find something unique for yourself. Achieve a luxurious finish with its mirror-like shine or fashion intricate designs, anything is achievable!

You even have access to getting marble/granite looks at an affordable price point compared to installing real materials. Epoxy allows you full control in creating the ideal restroom which meets both needs: visually pleasing yet still functional space that serves its purpose best while standing out from the rest as uniquely yours.

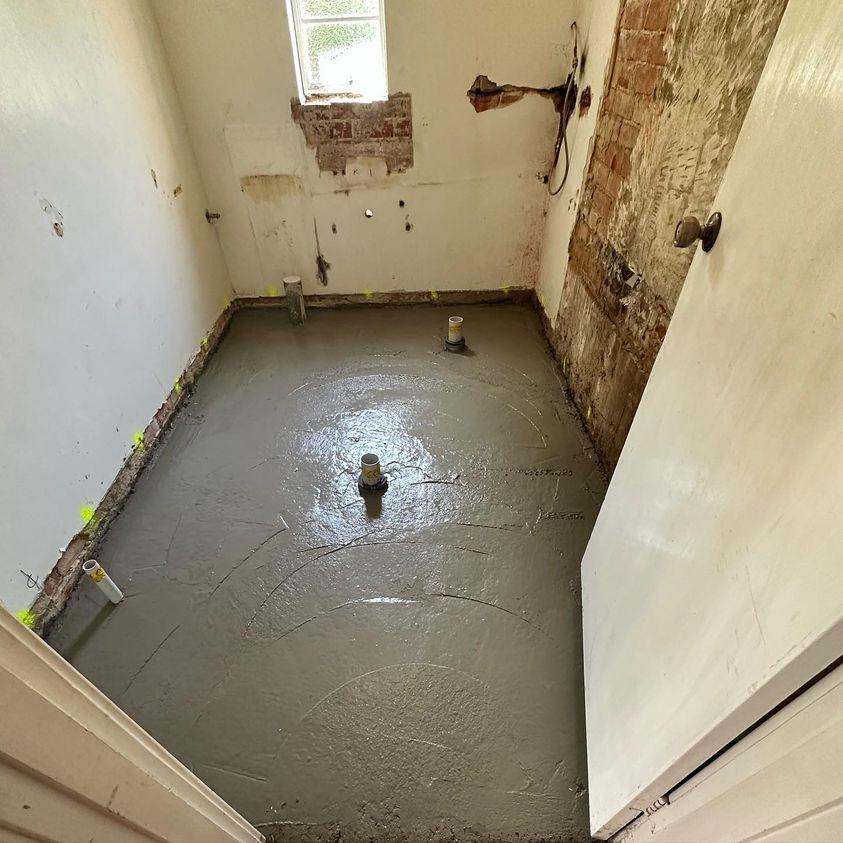
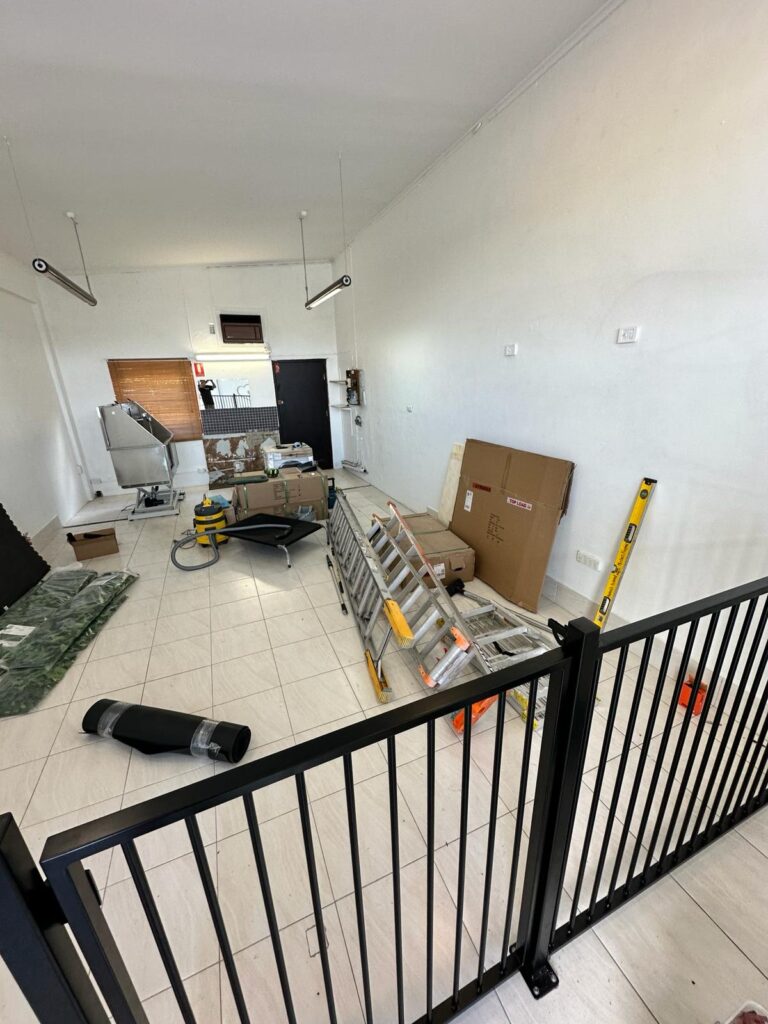
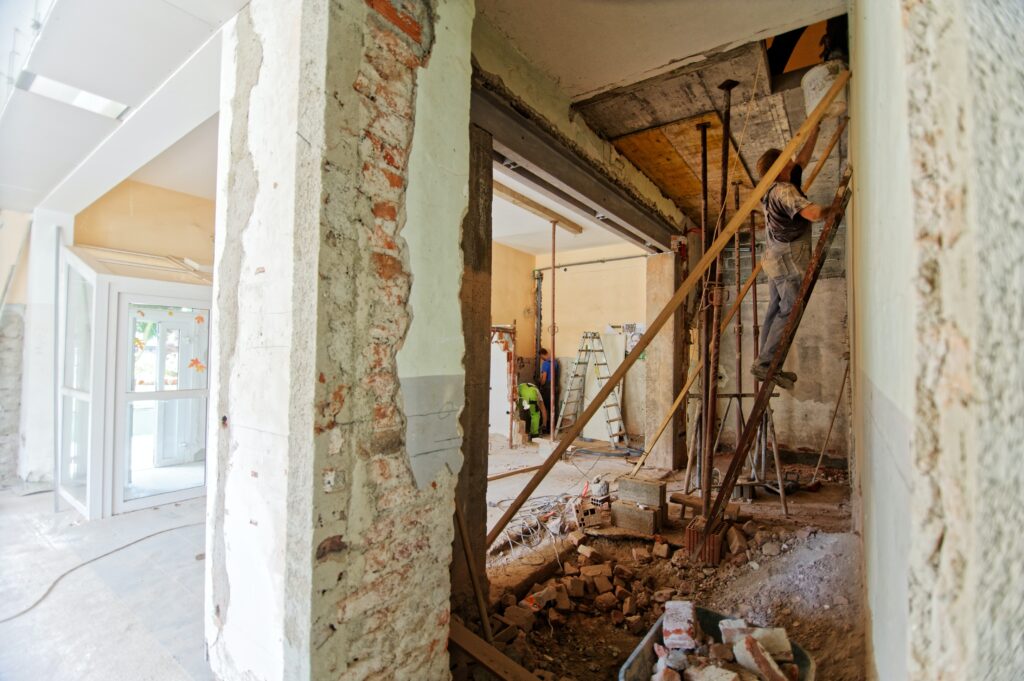
Preparing for Epoxy Floor Installation

It is necessary to review the installation process of epoxy flooring for bathrooms as it presents notable benefits. This involves an in-depth twofold preparation – evaluating existing tiles and substrate, then readying the surface suitable for a successful application of epoxy coating. Inspections should be conducted on both materials.

Any rough or unglased surfaces must also undergo cleaning before grinding the concrete if desired. As far as prepping goes, this includes thorough cleansing followed by making sure that adhesion can take place between covering and ground correctly through roughening up said surface accordingly.

Assessing Existing Tiles and Substrate

The installation process of an epoxy floor begins with a thorough assessment of the existing tiles and surface. This helps ensure successful adhesion for long-term performance, by making sure there is no roughness, unglased areas or chipping in any parts that could disrupt it. Not thoroughly assessing these factors can cause issues such as inadequate adherence, cracking and even total failure, all resulting from not inspecting properly beforehand.

Having proper preparation to guarantee success is essential when fitting your epoxy flooring so everything sticks correctly together without Damages being caused along its lifespan.
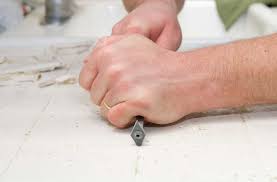
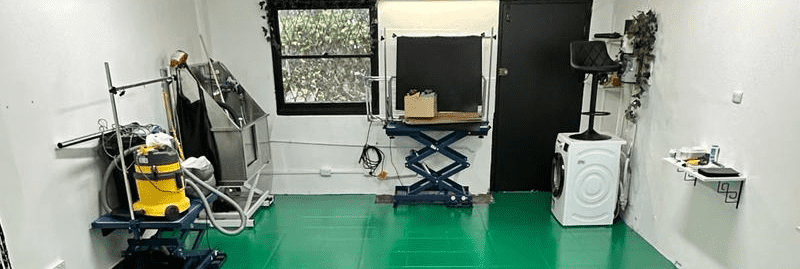
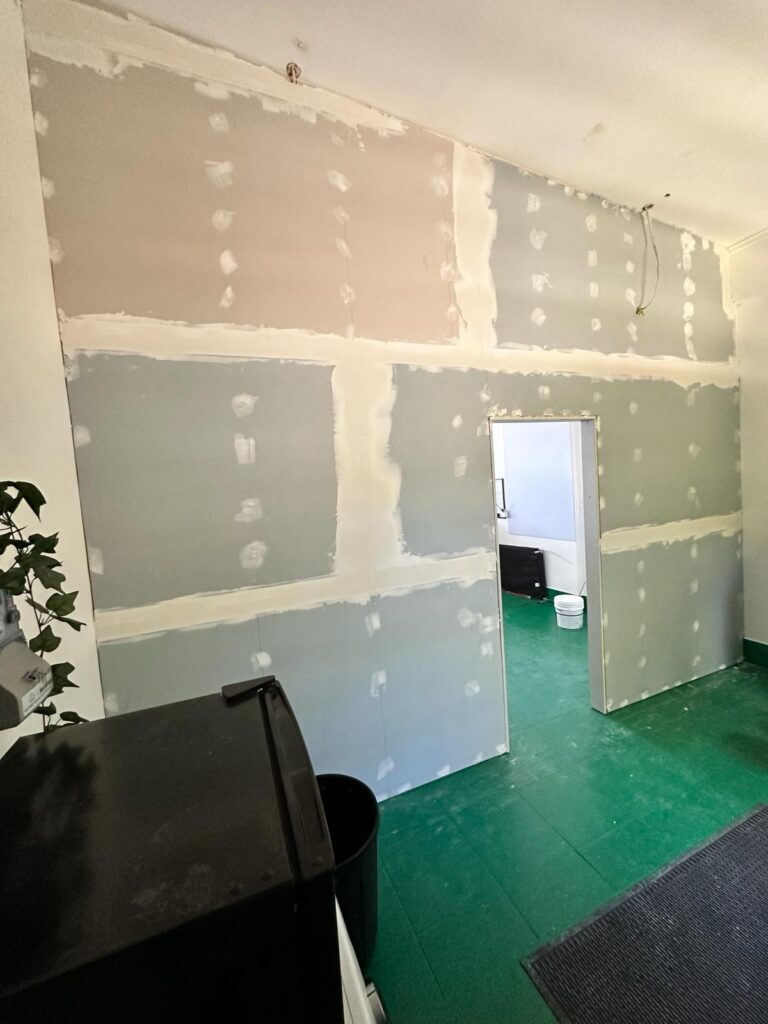
Surface Preparation

Surface preparation is an integral step after evaluating the state of existing tiles and substrates. This requires cleaning as well as creating texture on the surface for strong adhesion to be achieved with epoxy resin application.

Grinders, hoses, vacuums, and crack fillers will need to be used during this process which entails sanding at 80-grit paper level in order for ideal bonding between floor coating and epoxy sealing agent. Achieving a satisfactory roughness is key if one wishes to ensure that their chosen curing compound efficiently sticks onto it without any issues down the line.

Step-by-Step Guide to Installing Epoxy Flooring in Bathrooms

After completing the preparation phase, you can move on to installing epoxy flooring. This process consists of numerous steps which involve applying a primer onto the surface so that the resin holds firmly and then mixing together both components, hardener and resin. Once done with this step, it is time for final touches such as a top coat plus any decorative details or anti-slip additives if needed.

By following these easy instructions one should be able to complete installation of their beautiful new epoxy flooring without difficulty!
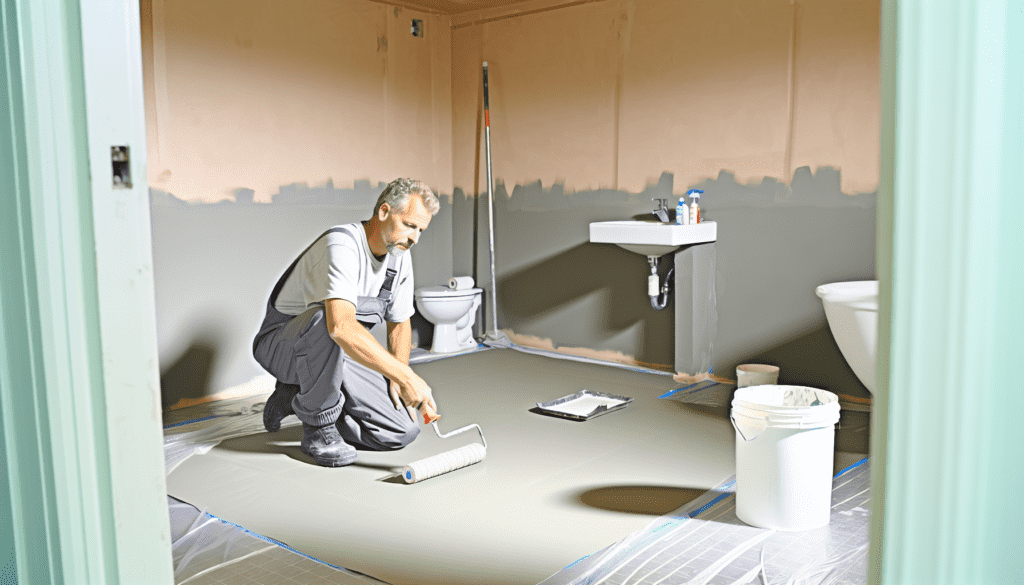
Primer Application

The installation process of a bathroom floor begins with the application of an epoxy primer. This is essential to establish a secure link between the surface and the resin. It should be spread evenly across the space for optimal results. An 18 cm coat roller is recommended to apply approximately 150-200 grams per square metre. Leave at least 24 hours before progressing to any Steps in this venture.

A smooth layer must then be created from applying this epoxy, which will adhere correctly when mixed into its corresponding resin before being applied to your chosen bathroom area’s floorspace.

Mixing and Applying Epoxy Resin

Once the epoxy resin and hardener have been mixed, it is time to apply a coat of the material onto the floor. According to manufacturer instructions, two parts resin should be combined with one part hardener for an even finish when using a roller. The following process must take place in order to achieve this: First mix together according to directions given by producer.

Then spread evenly over surface smoothly using said tools before letting dry completely (about 12 hours). After proper curing takes effect on bathroom floors covered in epoxy coating, they are ready for light use.

Top Coat and Finishing Touches

The final step in the installation process of an epoxy floor involves adding a top coat and any desired aesthetic elements. This layer enhances the surface’s thickness and durability, as well as ensuring that all prior layers have set properly before applying it. After application, one should allow 12 hours for it to dry up fully before putting on another coating.

Possible touches may include special bathroom tiles or anti-slip additives such as shark grip powder or silica sand which can be included within the epoxy for extra safety during wet conditions in bathrooms. Decorative add-ons will lend additional charm to your bathroom floors thus giving them added beauty.


Ensuring Safety with Slip-Resistant Epoxy Floors

Slip-resistant epoxy bathroom floor for safety in wet areas

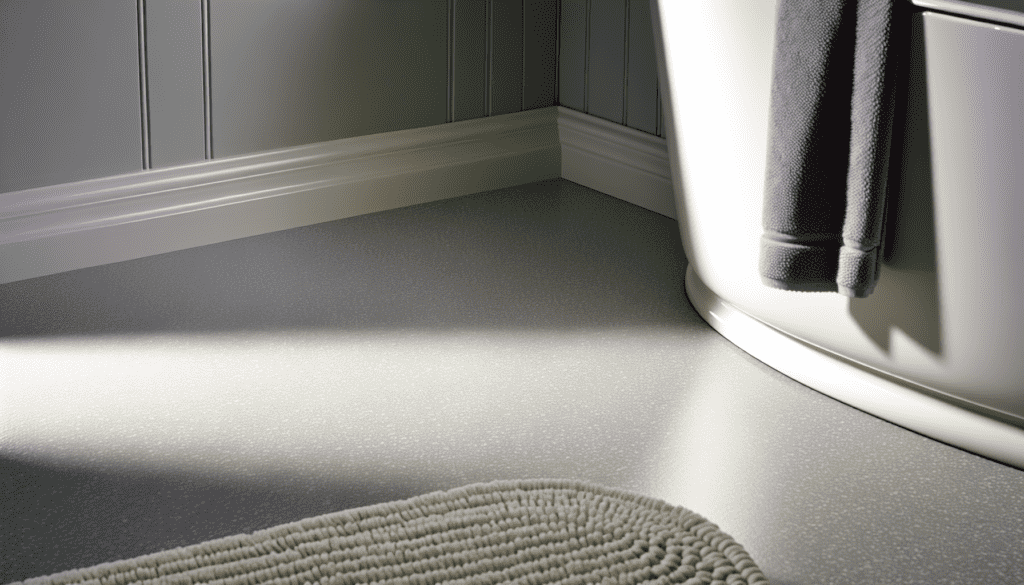
Having a slip-resistant bathroom floor is essential to ensuring safety when it comes to bathrooms, as they are more prone than other areas of the home to becoming slippery. To ensure this resistance, you’ll need an epoxy system with a high rating and incorporate materials such as aluminum oxide or silica sand into the installation process during its curing stage.

During your epoxy bathroom’s construction phase, anti-slip additives should be integrated in order for your flooring to remain resistant throughout usage over time. By taking all these precautions one can rest assured that their floors will have been made safe resistible against slipping accidents due to water presence in bathrooms!

Adding Anti-Slip Additives

Adding anti-slip elements, such as silica sand or rubber granules, to your epoxy coating for wet areas like the bathroom can enhance its safety. This could involve approximately 1.5 pounds of non-skid additive per 500 square foot area and varies depending on size and type of flooring being coated with epoxy.

The approach used when applying these additives may differ depending on the kind included. One example is sprinkling it over a wet surface which must remain untouched up to 48 – 72 hours after application in order to let the additive cure fully into place creating an efficient slip resistant result that doesn’t compromise your floors functionality or longevity.

Selecting the Right Epoxy System

For a safe and long-lasting bathroom floor, selecting the appropriate epoxy system is vital. Slip resistance should be taken into account due to potential wet conditions in this room.

The proper system must possess an elevated slip rating for safety purposes as well as durability able to withstand heavy use without wear or tear. Aesthetic considerations can also accompany it so that your chosen look matches your bathroom’s style. Water-, stain-, and chemical-resistance are necessary components of any ideal epoxy set up, facilitating ease of maintenance over time.

Caring for Your Epoxy Bathroom Floor

After the installation of your epoxy bathroom floor is complete and ready for use, it’s important to take proper care of it in order to maximise its longevity. A regular cleaning routine with a mild cleaner combined with warm water usually suffices when maintaining an epoxy floor. Tackling any minor damages or repairs quickly can help prevent Issues from cropping up later on. Proper maintenance should extend the life-span of your floors while keeping them looking pristine and new!

Routine Cleaning and Maintenance

For your epoxy bathroom floor to maintain its shine and long lifespan, regular cleaning and maintenance are key. Here’s what you should do: use a mild cleaner mixed with warm water for wiping the surface and rinse off. Dry up completely before mopping twice a week as part of routine upkeep, also conducting an extensive scrubbing every 7 days is recommended too. To preserve that shine of the epoxy bathroom floors, suggested solutions include using diluted ammonia for regular cleansing plus periodic application of polymer glaze coats or wax polishes approved by professionals on it’s upper layer. These tips will help keep your lovely bathrooms looking great for years!

Addressing Minor Damage and Repairs

The robustness of epoxy and concrete floors make them a great choice for bathrooms. Over time, some minor damage might be caused. These can range from thinning of the coating to chips or cracks appearing. It’s important that these matters are addressed immediately in order to ensure the quality does not deteriorate further.

Through sanding off an area which has become damaged it is possible often restore it with another coat of epoxy covering it up again. Similarly, compounds can be used if smaller chipping or fissures have occurred. To get ahead on any potential problems developing, you should keep an eye out every couple of months by checking your bathroom floor carefully for such issues.

Cost Considerations for Epoxy Bathroom Flooring

Cost considerations for epoxy bathroom flooring

Once we have looked at the many advantages and how to install epoxy bathroom flooring, it is important to assess its cost. Installing such a type of covering for your bathroom entails some expenditure, both in terms of material expenses as well as labor charges. It also has long-term benefits due to low maintenance needs and longevity, which leads to savings over time.

Different factors can determine the final expense when considering an installation with epoxy floors. These include qualities of materials used, complexity surrounding fitting processes, and size constraints within the washroom area itself. All these relate specifically to what gets bought (epoxy), labor price tags plus complexities around installing this kind of surface finish inside bathrooms. In summary, materials needed, specialist skills required all play their part in calculating overall costs entailed by providing epoxy flooring to bathrooms along with those of repeated words: durability & maintenance ease!

Material and Labor Costs

The cost of epoxy flooring depends mainly on the materials and labor required for installation. The price of the material varies according to its quality, whereas labor costs can be more expensive if there is a complex bathroom layout or intricate patterns that need to be worked with over multiple rooms. Normally, it will cost around $30-$35 per square meter when two coats are applied to an existing concrete surface.

Long-Term Value and Savings

Epoxy floors have upfront costs, but their long-term value and potential savings should not be overlooked. Known for its durability – with a life expectancy ranging from 5 to 20 years – this type of flooring is much more reliable than other alternatives over time, bringing cost benefits in the future. Low maintenance requirements also mean that you won’t need special solutions or extensive upkeep on your epoxy floors, making it an economical option overall as well as saving valuable time when cleaning them up. Not only do these attractive surfaces enhance any home’s aesthetic appeal. They can actually increase its worth too: another great reason to invest in durable epoxy flooring!

Summary

Epoxy flooring is a practical choice for bathrooms and its advantages are undeniable – from the fact that it has remarkable durability to needing minimal maintenance, along with providing versatility in design. Its installation process needs proper preparation as well as professional handling. Taking into consideration its long-term value and affordability, epoxy floors are an affordable investment overall. So if you’re looking at giving your bathroom a new look or revamping the existing one, take into account how efficient and cost effective epoxy floorings can be!

Popular Questions

Below you can read some of the common questions we get asked about this topic.

Is epoxy good for bathroom floor?

Epoxy is a great choice for flooring in bathrooms due to its durability, ease of cleaning and resistance against slipping – making it an ideal option for wet areas. It remains strong even with moisture present and thus provides the bathroom with a slip-resistant surface that keeps everyone safe.

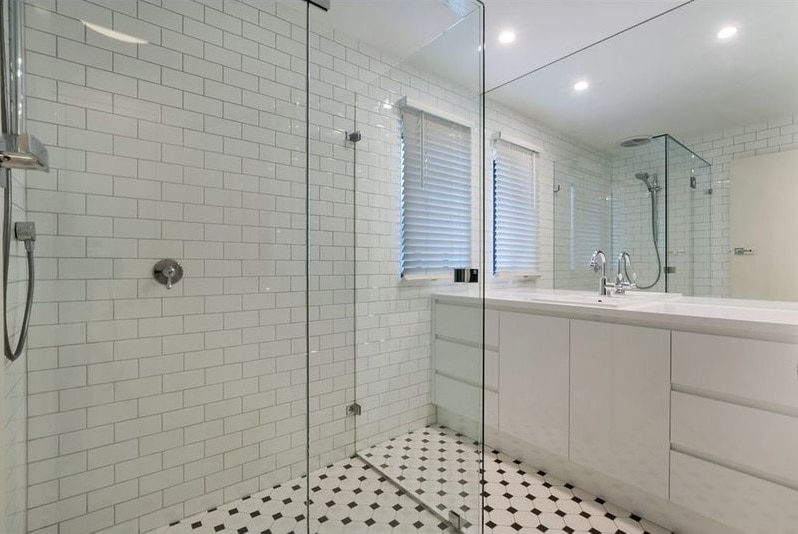
Can you epoxy over shower tile?

Yes, you can epoxy over shower tile with proper preparation and industrial-grade epoxy resin coating materials. It can give new life to the surface.

How long does epoxy last in the bathroom?

Epoxy flooring for bathrooms can provide a durable surface that endures up to 20 years when properly installed in residences. This longevity is due to the superior quality of epoxy compared with traditional types of indoor floor coverings.

What is epoxy flooring?

Epoxy flooring is a highly durable coating applied to prepped concrete, creating a chemically bonded protective barrier over the surface.

How is epoxy flooring maintained in a bathroom?

For effective maintenance of epoxy flooring in a bathroom, regular mopping with mild cleaner and water is recommended. Applying a glaze coat or wax polish may be done occasionally to enhance its luster while protecting the surface from damage over time.


bathroom fixtures and fitting

Guide to Choosing the Best Bathroom Flooring: Options, Trends, and Installation Tips

Choosing the best bathroom flooring is important due to the unique challenges of bathrooms, including high moisture levels, standing water, and the potential for slip and fall accidents. We look at how you can navigate through the most popular flooring options available, ensuring you pick the right flooring for your needs.

Popular Bathroom Flooring Options

The following are some of the most popular choices.

Ceramic and Porcelain Tiles

Ceramic tiles and porcelain tiles are among the most popular bathroom flooring options due to their water resistance, durability, and slip resistance. Both materials offer a hard surface that withstands high traffic bathrooms and wet environments.

Bathroom renos after in Hyde Park
  • Ceramic tile is known for its affordability and versatility in design. It can mimic the look of natural stone, wood, or even linoleum floors while maintaining a waterproof surface. The material is stain resistant and easy to clean, making it a practical choice for bathrooms.
  • Porcelain tile is a type of ceramic tile but with a higher density, making it more durable and completely waterproof. It’s an excellent choice for areas with standing water. Porcelain tiles are available in larger tiles, offering a modern and sleek look, but smaller tiles can be used in smaller bathrooms for a classic design.

Porcelain and ceramic tiles both provide timeless appeal and are available in various finishes, including textured surfaces that enhance slip resistance.

Installation Tip: Proper grout sealing is necessary to prevent water infiltration, which can lead to mold and mildew growth.

Vinyl Flooring

Vinyl flooring is another excellent option for bathroom floors, particularly for those seeking affordable and waterproof flooring. This material comes in several forms, including vinyl planks and sheet vinyl, and is known for its water resistance and ease of maintenance.

  • SPC vinyl flooring (Stone Plastic Composite) is an advanced form of vinyl flooring that offers an extremely durable and completely waterproof surface, ideal for high traffic bathrooms.
  • Waterproof vinyl options, including luxury vinyl planks (LVP), are popular due to their ability to mimic hardwood floors while providing superior water resistance.

Vinyl flooring is also stain resistant, making it an ideal choice for areas prone to minor spills and excess moisture. The protective layer on the surface of vinyl flooring helps in preventing scratches and wear.

Installation Tip: Ensure the subfloor is smooth and clean before installation to prevent imperfections from showing through the vinyl.

Natural Stone

For those who prioritize natural beauty and luxury, natural stone flooring, such as stone tiles made from marble, granite, or slate, offers an unparalleled aesthetic. Natural stone is inherently water resistant and extremely durable, though it requires careful consideration due to its porous nature.

  • Stone flooring offers a timeless appeal, but it’s important to apply a polyurethane topcoat or sealant to enhance its water resistance. Without proper sealing, natural stone can absorb water, leading to potential damage.
  • Stone tiles provide a slip resistant surface when textured, making them safer for wet environments.

Installation Tip: Sealing the stone regularly is crucial to maintaining its appearance and protecting it from moisture damage.

Engineered Wood and Laminate Flooring

Engineered wood and laminate flooring bring the warmth and natural beauty of wood into the bathroom while offering better water resistance than solid wood.

  • Engineered hardwood is made from layers of wood with a waterproof surface layer, providing the appearance of hardwood floors with enhanced durability in wet environments. It’s a good option for those who want the look of wood without the risks associated with excess moisture.
  • Laminate floors consist of a photographic layer that can mimic wood, stone, or tile flooring, covered by a protective layer that offers scratch resistance and water resistance. However, it’s less waterproof than vinyl or tile, so spills should be cleaned up promptly to avoid damage.

Installation Tip: Consider using water-resistant underlayment to further protect against moisture.

Cork and Linoleum Flooring

Cork floors and linoleum floors are eco-friendly flooring options that are gaining popularity for bathrooms due to their sustainability and comfort underfoot.

  • Cork flooring is naturally water resistant and offers a soft, cushioned surface, reducing the risk of slip and fall accidents. It also provides natural insulation, making it less cold underfoot than tile or stone.
  • Linoleum floors are made from natural materials like wood flour and linseed oil, offering water resistance and stain resistance. Modern linoleum is treated with a polyurethane topcoat for added durability and ease of maintenance.

Installation Tip: For best results, choose unfinished cork or linoleum and apply a sealant on-site to ensure maximum water resistance.

Waterproof and Water-Resistant Flooring Options

In bathrooms, waterproof flooring is essential to prevent damage from standing water and excess moisture. The best options include vinyl flooring, porcelain tile, and natural stone.

Waterproof vinyl is especially effective in wet environments, providing a completely waterproof barrier that resists moisture infiltration. Porcelain tiles are also a top choice, as they are inherently waterproof and can handle the humidity and spills common in bathrooms.

For those who prefer the look of wood, engineered wood offers a water-resistant alternative to traditional hardwood floors, combining the aesthetic appeal of wood with the water resistance needed in bathrooms.

Maintenance Tip: Regular cleaning and prompt attention to spills will extend the life of your bathroom flooring.

Trends in Bathroom Flooring

The following are current trends.

Heated Flooring

Heated flooring is becoming increasingly popular in bathrooms, offering comfort and luxury. This trend is particularly effective with tile flooring such as ceramic or stone tiles, which can feel cold underfoot.

Radiant heating systems installed under floor tiles warm the surface, making bathrooms more inviting, especially during colder months. This feature is not only a luxury but also adds value to your home.

Large-Format and Patterned Tiles

Larger tiles are trending in bathroom design, offering a sleek, modern look with fewer grout lines, which makes cleaning easier. White bathroom tiles in large formats can make a small bathroom appear more spacious, while smaller tiles with bold patterns add visual interest and personality to the space.

Textured and slip resistant surfaces are also becoming more common, enhancing safety in wet environments.

Installation Tip: Ensure the subfloor is properly leveled before installing large tiles to prevent cracks and uneven surfaces.

Budgeting for Bathroom Flooring

When choosing bathroom flooring, it’s important to balance cost with durability and aesthetic appeal. Vinyl flooring is one of the most cost-effective options, offering water resistance and easy maintenance at a lower price point. Ceramic tiles are also relatively affordable, especially when compared to natural stone or engineered wood.

Stone tiles and porcelain tiles are at the higher end of the price spectrum, but their durability and timeless appeal can justify the investment. Laminate flooring and cork floors offer a middle ground, with moderate pricing and decent water resistance.

Budget Tip: Consider DIY installation for vinyl or laminate floors to save on labor costs, but leave more complex installations like stone or tile flooring to professionals.

Installation Tips for Bathroom Flooring

Proper installation is important for the longevity and performance of your bathroom flooring. Here are some general tips:

  • Subfloor Preparation: Ensure the subfloor is clean, dry, and level before installation. Any imperfections can affect the final result.
  • Waterproofing: Apply a waterproof underlayment or membrane, especially if you’re installing tile flooring or engineered wood.
  • Grout Sealing: If using ceramic tiles or porcelain tiles, seal the grout to prevent water infiltration and mold growth.

For those opting for DIY installation, vinyl planks or laminate flooring are easier to work with, while natural stone or porcelain tile may require professional expertise.

Maintenance and Longevity of Bathroom Flooring

The longevity of your bathroom flooring depends largely on proper maintenance. Regular cleaning, especially in wet environments, helps prevent issues like mold and mildew.

  • Tile flooring (both ceramic and porcelain tiles) should be swept regularly and mopped with a mild detergent. Ensure that grout lines are kept clean and resealed as needed.
  • Vinyl flooring is low-maintenance but should be cleaned with non-abrasive products to preserve the protective layer.
  • Stone flooring requires periodic sealing to maintain its water resistance and prevent stains.

For all bathroom floors, it’s important to address any minor spills immediately to avoid water damage.

Maintenance Tip: Use mats or rugs in areas prone to excess moisture, such as near the bathtub or shower, to protect your bathroom floor.

Final Points

Selecting the best bathroom flooring involves careful consideration of various factors, including water resistance, durability, and personal style. Whether you opt for the classic look of ceramic tiles, the modern appeal of vinyl flooring, or the luxury of natural stone, choosing the right material will ensure your bathroom floors stand the test of time while enhancing the overall aesthetic of your space.

Popular Questions

Below are some of the most common questions we get asked.

What is the best flooring option for a bathroom?

The best bathroom flooring option depends on your priorities, such as water resistance, durability, and style. Porcelain tile is often considered the top choice due to its completely waterproof nature, timeless appeal, and slip resistance. Vinyl flooring, especially SPC vinyl flooring, is another excellent choice for wet environments as it is extremely durable, waterproof, and more budget-friendly. For a more luxurious feel, natural stone like marble or slate offers natural beauty but requires sealing to maintain its water resistance.

Can I use hardwood floors in a bathroom?

Using solid hardwood floors in a bathroom is not recommended due to the material’s susceptibility to excess moisture and potential water damage. However, engineered hardwood is a viable alternative because it is designed to be more water-resistant while still providing the warm, natural look of wood. If you prefer a wood appearance without the risks, waterproof vinyl planks or laminate flooring that mimics wood can be excellent options for bathroom floors.

How can I make my bathroom floor less slippery?

To make your bathroom floor less slippery and reduce the risk of slip and fall accidents, consider using slip-resistant materials such as textured ceramic tiles or porcelain tiles. These options provide better traction, especially when wet. Additionally, you can add bath mats in areas prone to standing water, such as near the bathtub or shower, and regularly clean the floor to prevent the buildup of soap or water residues that can make the surface slippery.

height of a kitchen bench

Standard Kitchen Bench Height in Australia – Considerations & Specifications

The standard kitchen bench height in Australia is 900 mm (90 cm), designed to offer optimal ergonomics and comfort for most users. This measurement includes the floor cabinet carcass excluding the thickness of the benchtop, which is generally 33mm thick whereas laminate materials are typically 33mm thick whereas materials like granite and engineered stones tend to be 20mm or 40mm thick.

When installing a new kitchen or renovating and older kitchen, it’s an important consideration.

height of kitchen bench tops

Importance of Kitchen Bench Height

Ergonomics and Comfort: The correct bench height ensures that kitchen tasks are performed comfortably, reducing strain on the back and wrists. It also improves productivity by enabling a more natural posture. Proper bench height can prevent long-term injuries and contribute to overall kitchen efficiency.

User Comfort: For tasks like chopping vegetables or kneading dough, a well-measured bench height can make all the difference in ease and efficiency. It is important for both home cooks and professional chefs to work in a space that accommodates their physical needs.

Australian Standards for Kitchen Bench and Splashback Height

Standard Measurement: In Australia, the standard kitchen bench height is set at 900 mm, which accounts for the floor cabinet height plus the benchtop thickness. The standard floor cabinet height is typically 720mm, excluding the kickboard, and the benchtop height can vary between 850mm and 1050mm to accommodate different user preferences. This standard is designed to meet the needs of the average user, ensuring a balance between functionality and comfort.

Building Codes: These standards are in place to ensure uniformity and ease of use across various kitchen designs. Compliance with these codes ensures that kitchens are safe and functional, minimizing the risk of injury and maximizing efficiency.

Materials and Thickness: The choice of materials, such as engineered stone, can affect the final height of the bench. Benchtop thickness varies, and it’s important to consider this when planning your kitchen layout.

Measuring the Ideal Benchtop Height

Measuring Tape: Use a measuring tape to determine the height from the floor to the top of the benchtop. Ensure that the measurement is taken accurately to avoid any discrepancies during installation.

Personal Adjustments: Depending on the user’s height, the bench height can be adjusted slightly, but maintaining the standard ensures compatibility with appliances like bench ovens and gas cooktops. A common adjustment might involve raising the bench slightly for taller users or lowering it for shorter individuals. The standard cabinet height is 720mm, which is a baseline for both floor and wall cabinets, with minor variations allowed.

Kickboard Depth: The kickboard depth can also impact the overall comfort and usability of the kitchen. Ensuring the right depth allows for better posture while standing at the bench. When measuring, consider the carcass excluding the door to provide precise guidelines for cabinetry design.

Factors Influencing Bench Height

User Height: Taller individuals may require a slightly higher bench height to avoid stooping, while shorter users might need a lower bench. Customizing the height based on user preferences can enhance the kitchen’s functionality. Additionally, it is crucial to consider the minimum height requirements for rangehoods and splashbacks, which generally range between 650mm and 750mm for rangehoods and must meet the minimum industry fire safety standards of 600mm for electric cooktops and 700mm for gas cooktops.

Kitchen Tasks: The type of tasks performed, such as using a bench oven or preparing meals, can influence the ideal height. Additionally, incorporating breakfast bars or an island bench may require varying heights for different sections. Specific tasks, such as baking, might benefit from a lower bench for ease of rolling dough.

Appliance Integration: The installation of appliances such as gas cooktops and bench ovens must be considered when determining the bench height. Proper integration ensures that all elements of the kitchen work seamlessly together.

Built-Up Edge: Some designs feature a built-up edge for aesthetic or practical reasons, which can add to the overall height. It’s important to factor this in during the planning phase.

Customising Bench Height for Specific Needs

Lifestyle and Habits: Customizing the bench height to fit specific cooking habits can improve kitchen workflow. For example, a home baker might prefer a lower bench for easier dough preparation. When planning, consider the overall dimensions inclusive of door thickness and the standard tall cabinet height, such as 2073mm or 2100mm, to ensure proper alignment and functionality.

Additional Space: Including features like an island bench or breakfast bars can provide additional workspace at varying heights. These can be tailored to serve multiple functions within the kitchen, such as seating areas or extended prep spaces.

Breakfast Bars: These are often at a different height than the main kitchen bench, providing a space for casual dining or additional preparation area. Ensuring that these are at a comfortable height for sitting is essential for functionality.

Benchtop Thickness: The thickness of the benchtop also affects the final height. Opting for a thicker material can add to the overall height, which might need adjustment in the cabinet heights to maintain ergonomic standards.

Comparing Standard Bench Heights Internationally

Height Differences: Comparing Australian standards with those in other countries, such as the US (which typically uses 36 inches), highlights the importance of local standards. This comparison can be useful for expatriates or those designing kitchens with international influences.

Kitchen Design Trends: Understanding these differences can help in designing kitchens that cater to international preferences, especially for expatriates. Knowing the trends and standards in different regions can also inspire innovative design solutions.

Same Height: While some countries prefer uniform heights throughout the kitchen, others might vary the heights for specific tasks. Understanding these preferences can guide the design process to suit user needs.

Future Trends in Kitchen and Island Bench Design

Adjustable Benches: Future trends include adjustable benchtops that cater to different tasks and user heights. These can be manually adjusted or feature motorized systems for ease of use.

Smart Kitchens: Integration of smart technologies that allow for height adjustments at the touch of a button. This innovation caters to multi-user households where members have different height requirements.

Sustainability: Using sustainable materials and designs that promote longevity and reduce environmental impact. Innovations in materials like engineered stone offer both aesthetic appeal and durability.

Case Studies of Australian Kitchens

Custom Kitchens: Examples of Australian kitchens that have implemented varying bench heights to accommodate multiple users, showcasing the flexibility and practicality of custom solutions. These case studies highlight the importance of personalized design in enhancing kitchen functionality.

Engineered Stone: Use of durable materials like engineered stone for benchtops, ensuring longevity and style. These materials not only add to the aesthetic appeal but also offer practical benefits such as ease of maintenance and durability.

Square Metre Efficiency: Maximizing the use of available space by designing multifunctional areas. Efficient use of each square metre ensures that the kitchen remains functional without feeling cramped.

Expert Tips on Choosing the Right Bench Height

Consultation: Seeking advice from kitchen designers can help in selecting the right height, ensuring both functionality and comfort. Professionals can offer insights into the latest trends and best practices in kitchen design.

Standard Width: Alongside height, considering the standard width of cabinets and kickboard depth ensures a cohesive design. Proper width and depth measurements contribute to the overall usability and aesthetics of the kitchen.

Door Thickness: The thickness of cabinet doors can affect the final look and feel of the kitchen. Ensuring that door thickness is compatible with the overall design is crucial for a seamless appearance.

Gas Cooktop Integration: Proper integration of appliances like gas cooktops ensures safety and functionality. The height of these appliances should align with the bench height for ease of use.

By adhering to the standard bench height of 900 mm, Australian kitchens can achieve a balance of comfort, efficiency, and aesthetic appeal. For personalized designs, adjustments can be made to cater to specific needs and preferences, ensuring an optimal kitchen experience. The inclusion of modern innovations and consideration of individual requirements can further enhance the usability and enjoyment of the kitchen space.

Popular Questions

Below are common questions we get asked.

What is the standard kitchen bench height in Australia?

The standard kitchen bench height in Australia is 900 mm (90 cm). This measurement includes the floor cabinet carcass excluding the benchtop thickness, which typically ranges from 20 mm to 40 mm. This height is designed to provide optimal ergonomics and comfort for most users, ensuring ease of use and reducing the risk of strain or injury during kitchen tasks.

How do I measure my kitchen bench height correctly?

To measure your kitchen bench height accurately, follow these steps:

  • Use a measuring tape to measure from the floor to the top of the benchtop.
  • Ensure the measurement includes the height of the floor cabinet carcass plus the benchtop thickness.
  • For personalized adjustments, consider the height of the primary users and any specific tasks that might require different heights, such as baking or using a bench oven.

Can I customise my kitchen bench height?

Yes, you can customize your kitchen bench height to suit your specific needs and preferences. While the standard height is 900 mm, adjustments can be made to accommodate taller or shorter users. Customizing the bench height can enhance comfort and efficiency, particularly if you frequently perform specific tasks like baking or cooking with a gas cooktop. Consider factors such as benchtop thickness, kickboard depth, and the integration of appliances when customizing your kitchen bench height.

What materials affect the kitchen bench height, and how?

The material chosen for your benchtop can significantly affect the final height of your kitchen bench. Common materials include engineered stone, granite, and laminate, each with varying benchtop thickness:

  • Engineered Stone: Typically ranges from 20 mm to 40 mm in thickness, adding durability and aesthetic appeal to your kitchen.
  • Laminate: Usually thinner, around 20 mm, which might require adjustments to the floor cabinet height to maintain the standard bench height.
  • Granite and Other Stones: These materials can vary in thickness and weight, necessitating sturdy support from the floor cabinet carcass.

Considering these factors ensures that the overall bench height remains comfortable and functional, adhering to both personal needs and standard guidelines.

how to remove bathroom tiles

Removing Bathroom Tiles Before A Renovation Or Remodel

As a bathroom renovation expert, I’m here to guide you on how to start on that much-needed makeover for your bathroom.

Beginning with the removal of the bathroom tiles. This is an important part of the renovation process, as it involves safely getting rid of the old tiles, preparing the wall for the new ones, and ensuring your fixtures remain intact.

While it might seem complex, our detailed, step-by-step instructions will make you feel like an expert in no time.

BUT….if you’d rather let us take care of it for you for your home in Adelaide, make sure you get in touch.

So, grab your safety goggles and let’s get you started on this renovation journey!

Points To Note

  • You can complete the job with hand tools ie a chisel and hammer. You might however look at hiring a tile removal machine for a larger area.
  • It’s important to stay safe. Removing tiles is relatively simple and low risk, but with any construction job, safety is important.
  • You are now ready to prepare your wall for the installation of new tiles and transform your bathroom into the ideal space you’ve always envisioned. Preparation is key
  • Keep this guide handy for your future tile removal projects.

Also see the Bunnings video below on how to remove tiles:


Understanding the Basics of Tile Removal

As a bathroom renovation expert, I can provide insights into the essentials of bathroom tile removal.

It’s important to grasp the fundamentals, starting with the significance of safety precautions and the necessity of the correct tools.

This guideline will detail the procedures for removing bathroom tiles efficiently.

Initial steps involve donning protective equipment, such as safety goggles and work gloves.

The tools required for the tile removal are a chisel and hammer.

Begin the process by loosening the old adhesive behind each tile, then use the chisel to carefully remove the tiles from the wall.

Patience is important during wall tile removal; avoid rushing or exerting excessive force to pry the tiles off.

Once the tiles are removed, it’s essential to clean the residual adhesive to prepare a clean, ready-for-tile surface.

Preparing Your Bathroom for the Process

This DIY project demands the correct tools and a well-organized approach. Start by decluttering the area; this means taking out all items such as shower curtains and rugs.

Here’s a handy checklist to follow:


Task Tools Importance
Declutter the space Avoid damage to personal items
Shield fixtures Plastic sheets Safeguard from dust and debris
Assemble the necessary tools Hammer, chisel, gloves Enable efficient tile removal


Use plastic sheets to shield any immovable fixtures from dust and debris. When your bathroom is well-prepared, you’re set to start removing bathroom tiles. Always remember, preparation is the cornerstone of successful execution.

Essential Safety Measures

As a bathroom renovation expert, I can’t stress enough the importance of safety when undertaking a task such as removing bathroom tiles. It’s absolutely vital that you remember to equip yourself with essential protective gear, such as safety goggles and gloves.

The role of safety goggles in this context is to shield your eyes from debris and dust that might fly around during the process. Gloves, on the other hand, are there to keep your hands safe from potential cuts that could be caused by sharp tile pieces or tools.

Going a step further, I highly recommend wearing a long-sleeved shirt and pants as part of your protective attire. This will act as a barrier between your skin and any sharp or irritating materials that you might encounter during the renovation.

Even if the work seems minor, never underestimate the potential risks and always prioritize your safety gear. Unexpected hazards can arise, such as small tile pieces flying off and causing harm. Also, it’s important to have your workspace well-lit and free from any objects that could cause you to trip and fall.

Always remember, your safety should always be the first consideration. After all, your well-being is of the utmost importance.

Necessary Tools and Equipment

Necessary implements and tools include a utility knife for cutting through old grout and a putty knife or chisel for prying up tiles.

You’ll also need a jimmy bar to leverage resistant tiles off the wall. For stubborn grout, a heat gun can be utilized to soften it, simplifying the removal process.

Utility clippers prove to be useful in cutting through any mesh backing or metal lath.

It’s important not just to have these tools, but also to understand their proper usage. I’s recommended to get acquainted with each tool prior to starting your project to ensure efficient tile removal, if you haven’t ever used them before. We all start somewhere.

Procedure of Removing Grout

Once you have the tiles removed, the next step is to remove the old grout that remains. While it may seem intricate, removing grout can be straightforward with a bit of patience and meticulousness.

Here are some guidelines to help you through the process:

  • Begin by spotting all the grout lines surrounding the tile you’re planning to extract.
  • Employ a grout saw or a multi-tool equipped with a grout removal blade to scrape the grout.
  • Be meticulous in clearing all the grout, especially within the corners and edges.
  • Continually sweep or vacuum the residual grout to maintain a clean workspace.
  • After most of the grout is cleared, utilize a grout rake to remove any lingering bits.

Safety is paramount during this process. Make sure to don eye protection and a dust mask while you’re at work removing grout.


a renovator removing grout

Techniques to Locate Loose Tiles

Identifying loose tiles is a critical step prior to embarking on your tile removal journey. The first thing you should do is delicately tap each bathroom tile. A tile producing a hollow sound may well be loose.

It’s wise to be particularly vigilant around areas where grout has been removed, as these spots frequently harbor the problematic tiles. Once you’ve pinpointed a loose tile, arm yourself with a chisel or putty knife and gently coax it away from the wall. Be mindful not to exert excessive pressure as this could inflict damage to the wall or the tiles nearby.

Please bear in mind, tile removal might require a bit of finesse, but with these tile identification techniques, you’ll be removing tiles effectively and efficiently.

How to Break Tiles Safely

As an experienced bathroom renovation pro, I can’t stress enough the importance of safety when it comes to breaking tiles. The process of removing wall tiles requires not just skill but also consciousness towards safety protocols to prevent any potential injuries.

Here are some key pointers to remember:

  • Always target the loose tiles first.
  • Employ a chisel and hammer to establish a starting point at the center of the tile.
  • With caution, chisel around this point to fragment the tile into smaller pieces.
  • Refrain from applying too much pressure on the chisel to avoid slipping that could lead to damage to yourself or the adjacent tiles.
  • Make sure to dispose of the shattered tiles right away to maintain a tidy workspace and avert any accidents.

Following these steps will ensure the efficient and safe removal of tiles from your bathroom wall.

Cleaning up After Tile Removal

Ensuring all tile fragments are collected and disposed of prevents accidental injuries. Sweep up every last piece with a dust pan, leaving no sharp remnants behind.

Then, turn your attention to the leftover adhesive on the floor. Employ a scraper or putty knife to delicately remove this, taking care not to damage your floor surface in the process. Once you’ve accomplished that, utilize a vacuum to eliminate any lingering dust. This step is vital for achieving a perfect finish when you lay new tiles.

For larger areas, this is where a tile removal machine / floor stripper can help.

As a final measure, wipe the entire area down with a damp cloth. It’s crucial to remember that proper cleanup after tile removal is just as important as the removal itself. It safeguards against accidents and sets the stage for the next steps in your bathroom renovation project.

Difficulty Level of Removing Bathroom Tiles

As a bathroom renovation expert, I can share that the process of removing bathroom tiles can be managed efficiently with patience and the correct tools, despite the level of difficulty seeming variable at first. Factors such as the size and type of tiles, the specific adhesive utilized, and the status of surrounding tiles can influence the complexity of the project.

When it comes to tile replacement, meticulous handling of the grout removal is important. This typically involves a series of steps:

  • Utilizing a grout saw or rotary tool to loosen the grout encircling the tiles
  • Being cautious while extracting tiles to prevent any damage to the adjacent ones
  • Ensuring the area is clean and ready to accept new tiles. See our article on choosing new tiles.
  • Proper application of new grout and tiles
  • Adequately sealing the grout

Keep in mind, the objective extends beyond merely removing wall tiles. It also involves effectively prepping the surface to receive the new tiles.

Prioritizing safety is key in this task, so make sure you’re properly equipped with safety gear before you begin!

Removing Wall Tiles

First, make sure your bathroom is as empty as possible to prevent any accidental damage. To protect your shower tray from falling debris, consider using a drop cloth or old towel.

Now, let’s proceed to the actual tile removal process:

  • Start by employing a grout remover tool to scrape off the grout that surrounds your wall tiles.
  • Gradually work your way under a tile starting from its edges with a chisel, gently tapping with a mallet to loosen it.
  • When removing the tile, take extra care to avoid causing any damage to the wall behind it.
  • Use a putty knife to get rid of any lingering adhesive.
  • Continue with the same process for each tile until your wall is completely tile-free.

Bear in mind, the process of removing wall tiles can be quite time-consuming, so patience is key here. Be methodical and careful, and you’ll achieve the best results.

Handling Adhesive and Leftovers

Dealing with adhesive and debris after tile removal is an important step in any bathroom renovation project. Post tile removal, it’s common to find residual adhesive and debris that you’ll need to tackle with precision. Commence with the spot where you’d the first tile removed, make use of a chisel or a scraper to eliminate the adhesive. Be meticulous in your efforts to ensure that no residue is left behind, as this could potentially disrupt the adhesion for the new tiles.

There might be some stubborn patches that could be challenging to remove. In such cases, you could try dampening the patch before gently scraping it off. When dealing with a single tile, it’s important to meticulously remove adhesive from its back if you plan on reusing it.

As for the tile debris, make sure to dispose of it in an environmentally friendly manner. Take note that each tile, regardless of its size, contributes to the overall aesthetics of your bathroom, hence it’s essential to handle each one with utmost care.

Key Points to Remember

As a bathroom renovation expert, I often stress the importance of adhering to safety measures and proper cleanup procedures during the removal of bathroom tiles. Not only does this help to prevent injuries and damage, but it also paves the way for the successful installation of new tiles.

Here are some key points that I always advise my clients to keep in mind:

  • Safety gear is a must. Wearing it can protect you from injuries that could occur due to falling tiles or sharp tools.
  • Be gentle when removing tiles. Aim to remove one tile at a time to avoid causing damage to the entire wall or the tiles nearby.
  • Be mindful of spacer lugs. You should be able to see them once the grout and tile have been removed. Make sure to remove these lugs completely to create an even surface.
  • Once all the tiles have been removed, take the time to clean the wall surface thoroughly. Any residual adhesive should be removed to ensure that the new tiles bond properly.
  • Consider how you’ll dispose of the removed tiles. They can be quite heavy and sharp, which makes them a potential safety hazard.

Always remember that careful preparation and patience are your most valuable tools when it comes to bathroom renovations.

Protecting the Rest of Your Bathroom

Protecting the rest of your bathroom during a revamp is also a consideration. It goes without saying you will not want to damage any fixtures or other items. A simple yet effective step is to use protective coverings for fixtures and surfaces.

Here are some effective protective measures for you to consider:

  • Shield your bathtub, sinks, and toilet by using sheets or tarps.
  • Affix plastic sheeting on the wall, just beneath the line where you plan to remove the next set of tiles.
  • Use a thick and sturdy drop cloth to cover the floor.
  • Ensure any drains are well sealed to keep debris from causing blockages.
  • Keeping a vacuum at hand to swiftly clean up dust and debris can be beneficial.

It’s important to remember that safeguarding your bathroom goes beyond mere convenience—it’s a vital step to uphold the integrity of your space.

Final Notes

Congratulations, you have successfully learned how to remove bathroom tiles like an expert. Always prioritize safety and remember that patience is a key factor in this process. It might appear challenging, but you’re definitely equipped to handle it.

You’re now prepared to get your wall ready for new tiles and turn your bathroom into the dream space you’ve always wanted.

As always, if you’d like a consult or have one of our experts discuss your project, please give us a call.

Also see our article on choosing bathroom tiles.

choosing bathroom tiles

Choosing Tiles For Your Bathroom – Tips & Ideas

Selecting the appropriate bathroom tiles can significantly improve both the visual appeal and usefulness of your space. This guide gives a comprehensive analysis of various tile types, their traits, and their appropriateness for different bathroom designs.

We provide tactical advice on tile upkeep, positioning, colour choice, and quality considerations.

The goal of this resource is to simplify the tile selection process, assisting you in creating a well-balanced mix of style and functionality in your bathroom.

Points To Note

  • Selecting bathroom tiles requires a thorough comprehension of various styles, constraints, and upkeep needs. The decision should harmonize aesthetics and functionality, considering elements such as quality, hue, maintenance, and strategic positioning.
  • A carefully considered tile choice can drastically boost the overall atmosphere and functionality of a bathroom, turning it into a personalized retreat that mirrors the homeowner’s style and fulfills their practical demands.

Even though this video is from Bunnings, it’s actually a pretty good start for choosing your bathroom tiles.

https://www.youtube.com/watch?v=UPDCgaeZO3o

Understanding Different Bathroom Styles

Your choice of bathroom style significantly impacts the overall design, and it’s an important step in any bathroom renovation.

Gaining knowledge about different bathroom styles can help you choose tiles that match your desired aesthetic. For example, a minimalist style may prefer neutral, large-format tiles to forge a sleek and modern area. Also see our article on tiles for kitchens and bathrooms.

On the other hand, a vintage style might favor smaller, patterned tiles to evoke a sense of nostalgia. Also, a spa-like bathroom might use natural stone tiles to create a tranquil ambiance.

Each style has its unique charm, mirroring individual tastes and preferences in its unique manner.

Limiting Your Tile Choices

Limiting your tile options is an important step in the tile selection process. This is key in maintaining a harmonious and balanced look that aligns with the bathroom style you have chosen.

When starting to choose tiles for your new bathroom, you may be enticed to select a variety at the tile store. But, it’s vital to limit your options for a unified look. Having too many tile types, colors, or sizes can lead to visual confusion.

Set a primary type and color of bathroom tiles, then select one or two accent tiles to add visual interest. Also, ponder over tile size. Bigger tiles can give the illusion of a larger bathroom, while smaller tiles can provide texture to a large bathroom.

This method narrows down your options and assures a cohesive design.

Shower Space Tile Selection

Selecting the right tiles for your shower space is an important aspect of your tile selection process. This part of the bathroom often serves as a centerpiece and needs thoughtful evaluation. The tiles chosen for the shower should not only be visually appealing, but also durable and appropriate for areas frequently exposed to water.

  1. Slip-Resistance: It’s wise to select tiles with a high slip-resistance rating to avoid accidents.
  2. Durability: Opt for tiles that can endure constant exposure to water, soap, and cleaning substances.
  3. Size and Color: Bigger, light-hued tiles can enhance the shower space, making it seem larger and brighter.

Always ensure that your chosen shower space tiles blend well with the overall bathroom tile design, resulting in a balanced and attractive appearance.

Choosing Quality Bathroom Tiles

When it comes to the upkeep of bathroom tiles, it’s also important to account for the quality during the selection stage. On your journey to select bathroom tiles that mirror your style and fit your needs, ponder the following points:

  1. Tile Materials: The most suitable tile for your bathroom will hinge on your financial plan and style desires. Porcelain and ceramic are favorites due to their robustness and wide array of designs.
  2. Water Absorption Rate: Top-notch bathroom tiles possess a minimal water absorption rate, which makes them resistant to moisture and stains.
  3. Tile Hardness: Tiles are classified based on their resilience to wear and tear. For bathrooms, choose tiles with a high hardness rating to ensure their longevity.

Preparing for tiling a bathroom

Types of Bathroom Tiles

After examining tile quality, let’s now focus on the different kinds of bathroom tiles available for purchase.

Wall tiles, usually ceramic or porcelain, offer a cleanable, moisture-resistant surface perfect for bathrooms. Ceramic tiles are favored because of their longevity and wide variety of styles and colors.

Porcelain tiles, denser and better at resisting water, are an excellent choice for flooring.

Natural stone tiles like marble or granite present a luxurious, organic appeal but necessitate consistent sealing to ward off water damage.

Mosaic tiles, crafted from glass, ceramic, or stone, contribute a decorative element, perfect for crafting feature walls or shower niches.

Understanding Slip Wear Ratings

Understanding slip wear ratings is essential when selecting bathroom tiles. These ratings provide insight into the tile’s slip resistance and its applicability in different scenarios.

  1. The PEI (Porcelain Enamel Institute) rating system is a widely accepted method to gauge a tile’s capacity to handle foot traffic. Tiles that possess a higher PEI rating exhibit higher durability and wear resistance, making them apt for areas with high foot traffic.
  2. The DCOF (Dynamic Coefficient of Friction) is another significant rating that specifies the tile’s slip resistance. A DCOF value of 0.42 or more is deemed safe for damp zones such as bathrooms.
  3. Certain tiles, such as porcelain floor tiles, usually boast a high PEI and DCOF rating. This makes them a preferred selection for bathroom floor tiles due to their durability and slip resistance.

Deciding on Tile Size

Transitioning from the evaluation of slip wear ratings, it’s equally significant to ponder over the size of the bathroom tiles.

For compact bathrooms, tinier tiles can help maintain proportion and prevent the space from appearing overcrowded.

Large format tiles are perfect for extensive bathrooms, offering a sleek, modern charm. They can also be utilized in compact bathrooms to create a perception of a larger space, as they have fewer grout lines which can visually congest the room.

The secret is to harmonize the tile size with the bathroom space, ensuring it enhances rather than overpowers.

Whether you choose tinier tiles or large format tiles, bear in mind that your selection can greatly impact the overall aesthetic of your bathroom.

Keep in mind size may also be determined if it’s a brand new bathroom, or a renovation where tiles may have been removed previously.

Colour Rules for Tiles

Moving on from size aspects, the hue of bathroom tiles becomes a key factor which significantly influences the overall look and atmosphere of the area. There are countless colour options available for bathroom tiles, enabling high-level personalisation in your interior aesthetics.

  1. Neutral hues: These are frequently chosen to achieve an enduring, classic aesthetic. They bring about a sense of peace and tranquility, making them a favored selection for bathrooms.
  2. Bold hues: These can aid in crafting a lively and dynamic space, but should be utilized judiciously to prevent visual overload.
  3. Complementary hues: The appropriate mix of colour shades can boost the overall aesthetics, generating a balanced and visually pleasing bathroom environment.

Considerations in Tile Selection

When selecting tiles for your bathroom, there are several key factors to keep in mind to ensure you make the best choice.

  1. Material: The type of material used for bathroom tiles is a significant factor in their lifespan and maintenance. Porcelain and ceramic tiles are often chosen for their resistance to water and durability.
  2. Size and Shape: The tiles’ size and shape can greatly influence the visual perception of your bathroom. For instance, bigger tiles can create an illusion of a larger space in a small bathroom.
  3. Colour and Style: Choose the colour and style of your tiles that fit well with your bathroom and overall home aesthetic.

Keep in mind that the tiles you select will influence your bathroom’s overall ambiance, so be mindful when choosing bathroom tiles.

Strategic Placement of Tiles

Many factors play a role in the strategic placement of tiles in your bathroom, having a significant impact on the overall look and functionality of the space.

The strategic positioning of tiles can create an eye-catching focal point that enhances the aesthetic appeal of the room. For example, feature walls in your shower or behind the vanity can introduce a dramatic effect.

Tiles can also be arranged horizontally or vertically on walls to influence the perception of space, giving the illusion of a larger or taller bathroom.

When picking bathroom tiles, it’s important to think about their shape and size as these aspects will shape the final design. For example, large format tiles can give the illusion of a more spacious bathroom.

To sum it up, strategic tile placement can significantly change your bathroom, making it visually attractive and practical.

Frequently Asked Questions

What Are Some Eco-Friendly Tile Options for Bathrooms?

Eco-friendly tiles that can be used in bathrooms encompass recycled ceramic, glass tiles, and natural stone. These materials are not only sustainable but also leave a minimal environmental footprint. They offer a balance of aesthetics and durability, serving as green substitutes.

How Can Personal Style Be Incorporated Into the Choice of Bathroom Tiles?

Incorporating personal style into your choice of bathroom tiles is about selecting designs, colours, and materials that align with your taste. You might think about unique patterns, striking colours, or specific tile materials that match your aesthetic preferences and lifestyle.

What Are Some Factors to Consider When Choosing Tiles for a Kid-Friendly Bathroom?

When selecting tiles for a bathroom that’s kid-friendly, you should take into account factors such as resistance to slips for safety, long-lasting durability, simplicity of cleaning for upkeep, and vibrant, joyful colours to establish a fun atmosphere for kids.

How Does Lighting Affect the Appearance of Bathroom Tiles?

The impact of lighting on the look of bathroom tiles is significant. It has the power to intensify or soften the colours of the tiles, emphasize texture and finishes, and set a certain ambiance. Proper lighting can cause tiles to seem brighter and make the room appear bigger.

What Are Some Tips for Choosing Tiles for a Bathroom Remodel on a Budget?

When you’re deciding on tiles for your bathroom remodel while staying budget-conscious, consider cost-effective alternatives such as ceramic or vinyl. It’s important to keep functionality and longevity at the forefront of your choices. Opting for universal designs can provide a timeless appeal. Always buy some extra tiles that could be used for future replacements.

Final Notes

Choosing bathroom tiles requires an extensive understanding of different styles, limitations, and maintenance requirements. The choice should strike a balance between aesthetics and functionality, taking into account factors such as quality, colour, care, and strategic placement.

A well-thought-out tile selection can significantly enhance the overall ambiance and utility of a bathroom, transforming it into a personalized sanctuary that reflects the homeowner’s style and meets their practical needs.

updating your kitchen floor

There Are Other Ways To Update Your Bathroom Tiles Without Removing Them!

Revamping kitchen floors often involves cumbersome tile removal, but now there are innovative methods that allow for updates without the need to remove your old tiles.

This guide covers options such as vinyl overlays, grout renewal, and specialized coatings. We will look at practical, cost-effective solutions that promise aesthetic enhancement and minimal disturbance, perfect for those wanting a new look without a full renovation.

Discover how to transform your kitchen flooring with ease and efficiency.

Points To Note

  • The strategies described offer homeowners inventive and practical methods for updating kitchen floor tiles without the need for removal. Approaches such as applying vinyl overlays, refreshing grout, and using strategic coverings are cost-efficient and customizable options that improve the appearance of kitchen spaces.
  • Employing these strategies will result in minimal disruption and support a swift change from outdated flooring to attractive surfaces that complement contemporary kitchen styles.

Even though this video is from the USA but, it’s actually has some good ideas.


Assessing the Situation

Evaluate the condition of your existing kitchen floor tiles to determine the most suitable update method without removal.

Start by checking the tiles for any cracks, chips, or significant wear that might affect the adhesion of new surface treatments. If the existing tiles are stable, consider using paint specifically formulated to bond with ceramic or porcelain surfaces, ensuring a long-lasting finish.

To refresh grout lines, use a strong grout cleaner to eliminate accumulated dirt and stains, bringing back the original color and preventing further decay.

For a broader change, covering tiles with a new material like vinyl flooring offers an extra layer of design while keeping the underlying tiles intact. Precise measurement and cutting are important for a seamless installation.

Vinyl Flooring Installation

After assessing the stability and condition of your existing kitchen tiles, you can choose vinyl flooring as a versatile and waterproof option that installs directly over your old tiles.

The process involves cleaning the existing floor to ensure the vinyl sticks properly. When selecting new flooring, consider the thickness of the vinyl to manage height differences at thresholds.

To install, measure the area precisely, and cut the vinyl to fit the space, leaving a slight excess which can be trimmed off later. Position the vinyl carefully, gradually peeling back the adhesive layer to cover the existing tiles. Use a roller to eliminate air pockets and ensure a strong adherence between the vinyl and the tiles underneath.

Utilizing Rugs and Carpets

Incorporating rugs and carpets is a simple yet effective approach for revamping the look of old kitchen floor tiles without needing to remove them. By strategically positioning rugs or using modular carpet tiles, homeowners can conceal unsightly tiles and introduce a touch of modernity or a warm atmosphere to the area.

This strategy does not only improve the look of existing floors but also adds a layer of comfort underfoot. When choosing a covering, opt for materials that are robust and simple to maintain, considering the kitchen’s high chance of spills.

The adaptability of carpet tiles permits personalization and straightforward swapping of sections when needed, while larger rugs can create a consistent appearance across a wider space.

This method is both practical and economical for refreshing kitchen floor tile designs.

Laminated Wooden Flooring

Transitioning to laminated wooden flooring offers a durable and aesthetically pleasing solution to update kitchen floor tiles without the need for removal. This method involves installing wooden cladding over existing flooring, effectively hiding outdated or worn tile floors.

Laminated flooring, known for its resemblance to natural wood, is produced by bonding synthetic materials with a laminate finish, making it a practical choice for indoor areas.

As a less expensive option compared to traditional hardwood, laminated flooring provides cost savings without sacrificing style. When updating kitchen tiles, this approach reduces labor and material costs, as it avoids the need to dismantle the existing tile work.

Laminated wooden flooring is also lightweight, easy to maintain, and brings a sense of warmth to the kitchen’s overall design.

Epoxy Coating Application

Applying an epoxy coating offers homeowners a long-lasting and visually attractive option to update their kitchen floor tiles without the need to remove them. This method involves a series of steps that cover old tiles with specialized tile paint, giving a new, glossy surface. Epoxy coating application demands meticulous preparation and precision to ensure a lasting and even outcome.

  • Surface Preparation: Clean the kitchen floor meticulously to eliminate any grease, dirt, or previous sealers that might hinder the epoxy’s adhesion.
  • Epoxy Mixing: Follow the manufacturer’s guidelines to mix the epoxy resin and hardener for the right consistency and durability.
  • Application: Spread the epoxy coating uniformly over the old tiles, using a roller or brush made for epoxy paint to get a glossy and even surface.


Deep Cleaning Tile Grout

A homeowner’s guide to deep cleaning tile grout includes using specialized cleaners or a combination of baking soda and vinegar to effectively lift accumulated dirt and bring back the grout’s bright color. This detailed process is vital for upholding the look and cleanliness of ceramic tile floors.

To carry out a complete clean:

  • Spread a grout-specific cleaning agent or create a mix of baking soda and water, then spritz with vinegar.
  • Employ a stiff-bristled brush to rigorously scrub the grout lines, making sure to clear away all trapped dirt.
  • Wash the area with fresh water and dry well to avoid any leftover residue or dampness from getting back into the grout pores.

This careful method ensures that the deep cleaning of grout aids in an overall refreshed look of the flooring.

Applying Tile Stickers

For homeowners wanting a swift and economical method to update their space, tile stickers are an inventive option to refresh kitchen floors without removing the old ones. These sticky overlays are made to attach to your existing floor tiles, providing an instant makeover to any kitchen backsplash or floor area. The application demands precise cleaning of the current tiles for a strong grip and exact alignment of the stickers to achieve a cohesive look.

Step Detail Tips
Surface Preparation Clean and dry the existing floor tiles Use gentle detergent; avoid leaving soap residue
Alignment Measure and plan sticker layout Use a ruler for exact positioning
Application Peel and stick onto the current tiles Use a flat tool to press out air bubbles
Finishing Touches Cut off extra material A sharp blade will ensure neat edges
Maintenance Clean regularly with a soft cloth Stay away from strong cleaners to maintain stickiness

Following these instructions, you can refresh your kitchen tiles with tile stickers effectively, giving your space a renewed appearance with little interruption.

Painting Kitchen Tiles

Painting kitchen tiles is an alternative method for refreshing your kitchen floor’s appearance without the need to remove existing tiles. This option not only reduces time spent but also gives homeowners the opportunity to express their individual style in their home.

Consider the following when deciding to paint your floor tiles:

  • Proper Surface Preparation: Make sure tiles are cleaned, repaired, and primed before applying paint to ensure strong adhesion and a beautiful finish.
  • High-Quality Tile Paint: Choose specialty paints specifically made for tile use, which are durable enough to handle the activity of kitchen floors.
  • Sealing the Paint: Use a clear urethane topcoat to shield the paint from moisture, scratches, and stains, which helps maintain the fresh look for an extended period.


Using Contact Paper

Shifting from reinvigorating grout lines, another inventive method to refresh kitchen tiles without removal is using contact paper. This adaptable, temporary adhesive material can mimic an array of finishes and designs. Contact paper can swiftly alter the appearance of your kitchen floor to complement the style of your countertop and cabinets, presenting an economical and speedy makeover.

  • Natural Stone Appearance: Contact paper is available in styles that replicate the look of natural stone, offering an upscale appearance without the expense and effort involved with real stone installation.
  • Vinyl-Like Durability: High-quality contact paper can mirror the appearance of premium vinyl flooring, providing a resilient surface that endures the activity of a kitchen.
  • Harmonizing Styles: Contact paper comes in a broad selection of designs, making it simple to match with your current kitchen theme, whether it’s contemporary or traditional.

Wood and Metal Paneling

For homeowners wanting to give their kitchen floors an elegant update, wood and metal paneling are contemporary choices that can be installed over existing tiles. Wood brings a cozy touch, adding warmth and natural texture, while metal paneling creates an industrial vibe with clean lines and reflective surfaces. These options not only refresh the kitchen’s look but also enhance its durability.

Emotion Evoked Paneling Choice
Warmth Natural Wood
Modernity Brushed Metal
Elegance Polished Metal
Comfort Distressed Wood
Boldness Corrugated Metal

When selecting wood or metal paneling, preparing the existing tile surface for proper adhesion is important. Both materials need accurate measurement and cutting to ensure a seamless installation. Always take the overall kitchen design into account to create a cohesive look.

Why Update Your Tiles?

Updating floor tiles without removing them not only enhances the kitchen’s look with wood or metal paneling but also offers significant savings and less interference with everyday activities. This method is especially advantageous for homeowners aiming to revitalize their space without the extensive and messy procedure of tile replacement. Here are some practical advantages:

  • Cost Efficiency: Skips the cost of purchasing new tiles and the labor for their removal and installation.
  • Time-Saving: Cuts out the prolonged period needed for tile removal, enabling a quicker makeover.
  • Less Mess: Minimizes the dust and debris usually linked with tile replacement, which helps to maintain a tidier home during the renovation.

Choosing to update tiles without removing them allows homeowners to revamp their living space with reduced trouble and financial outlay.


Kitchen Remodel Planning

When planning a kitchen remodel, it is important to measure the scope of work, especially when you intend to update the floor tiles without removal. This ensures that the design and budget are in line with the renovation goals.

A comprehensive plan should include consideration of alternative materials and new techniques that can refresh the kitchen’s look without needing extensive demolition. Here are some practical points to consider:

  • Evaluating the existing floor condition: Check whether the concrete base is stable or if any repairs are necessary before adding new materials.
  • Selection of materials: Choose high-quality, durable wallpapers or vinyl that are suitable for kitchen use, and can withstand areas with high moisture levels.
  • Design integration: Make sure that the updates you choose will blend well with the current kitchen cabinetry and fixtures, to create a uniform look.

Popular Questions


Can Updating Floor Tiles Without Removal Address Issues of Uneven or Damaged Tile Surfaces?

Updating damaged or uneven tile surfaces often requires removal, but specific resurfacing products might offer a leveled layer, though with some constraints based on how severe the underlying damage is. Seeking professional advice is recommended.

How Do I Ensure That the New Surface Treatment, Such as Stickers or Paint, Adheres Properly to Glossy or Glazed Tile Finishes?

To ensure a new surface treatment such as stickers or paint adheres properly to glossy or glazed tile finishes, clean the surface completely and gently sand it to create a rougher texture. Then apply primers that are specifically made for non-porous surfaces before adding the new treatment.

Are There Any Specific Precautions to Take When Updating Kitchen Floor Tiles Around Appliances and Plumbing Fixtures?

When updating floor tiles near appliances and plumbing fixtures, make sure the surfaces are clean and moisture-free. Be careful to prevent water damage or electrical problems. Adhere to the instructions provided by the manufacturers for materials that will be near heat sources.

How Does Foot Traffic and the Weight of Kitchen Furniture Affect the Longevity of Non-Removal Tile Update Methods?

High levels of foot traffic and the substantial weight of kitchen furniture can cause increased deterioration of surface treatments, making it necessary to use robust solutions like top-quality vinyl or epoxy coatings for updates to tiles that do not require removal.

What Are the Environmental Considerations to Keep in Mind When Choosing Materials for Updating Kitchen Tiles Without Removing Them?

When choosing materials for updating kitchen tiles without removing them, opt for environmentally friendly alternatives that reduce waste, like recyclable vinyl or biodegradable glues. Select products with low volatile organic compounds (VOCs) to maintain good indoor air quality during the application process.

Final Points

The methods discussed provide homeowners with inventive and practical ways to update kitchen floor tiles without removing them. Techniques such as vinyl overlays, grout renewal, and strategic coverings are cost-effective and customizable solutions that enhance the look of kitchen spaces.

Using these methods will cause minimal interruption and allow for a quick transformation of old flooring into attractive surfaces that suit modern kitchen designs.

new shop fit out in Adelaide

Shop Fit Out & Renovation For Mavericks Dog Grooming Adelaide

We recently wrapped up a shop fit out and renovation project for the newly opened Mavericks Dog Grooming in Hazelwood Park, Adelaide.

The project included a complete epoxy floor installation.

Where is Mavericks Dog Grooming Located?

Photos Of The Project

We complete the project over the Christmas and New Year break was the shop fit-out of Mavericks Dog Grooming in Hazelwood Park.

We met the client in November 2023 for the initial site visit and quotation. The objective was to get the job done over the Christmas period and have the dog salon operational for the early weeks of January 2024.

Tasks were performed in this order:

Flooring

The original floor coverings in the tenancy were high gloss white tiles. When these tiles are wet, they become very slippery and create an OHS issue. We suggested the customer use a product from Dulux to coat the floors. The product is a 2-part epoxy coating system that can be tinted to a wide variety of colours.

In this case, we used a colour called Paw Paw Green. Once the product has time to cure it can be driven on etc, so it is very durable. There are 3 stages to applying this product successfully. Firstly, the floor must be 100% clean. To achieve this, we used a vacuum and then went over the entire area with thinners.

Next is to apply a two-part primer. This is applied with a short nap roller and a brush for the edges. Once completed this needs 24 hour to cure in a well-ventilated room. The next day we started with the first coat of colour. It is also a two-part epoxy kit that is applied in the same method as the primer and requires similar curing times.

Once it has cured a second coat is applied. In the ideal world, a 3 rd cost could also be applied if desired. From here Dulux recommend a 7-day curing period before any vehicular traffic etc can be introduced. After a couple of days light foot traffic is ok.

Separating the washing room from the grooming room to control noise and dog fur flying everywhere we were asked to separate the washing area of the shop from the grooming and reception areas. The stud wall was created out of 90mm x 35mm timber members (non-treated). The wall was then insulated using Bradford gold wall batts R2.5.

The idea behind using the wall batts is firstly they will control the temperature transfer from one room to another and secondly add acoustic characteristics. Once the wall was insulated, we used CSR Gyprock Aqua Chek 10mm Gyprock on the washing side of the room and 10mm Gyprock wall sheets on the other side of the wall. The Aqua Chek sheets are designed to be used in bathrooms, laundries and protected outdoor ceilings, so\ using these inside the washing room is a good solution.

A new opening for an 820mm x 2040mm door from Hume’s was created using a passage set of handles from Gainsborough. Our team then began the flushing and sanding process of the new Gyprock installation before the painting could be completed.

Keeping Dogs Secure

At the front of the shop between the reception counter and the grooming area, we installed pool fencing with a gate (auto closer). The black tubular fencing is designed as a safety device in case a dog does accidentally get off the lead while being groomed it cannot escape and potentially run out to Greenhill Road.

Heating and Cooling

To keep the dog salon at a constant temperature for the dogs and workers we installed 2 new air conditioning systems. At the rear of the shop in the dog washing area, we installed a 5.2KW Kelvinator air conditioner. In the dog grooming area, we installed a Gree 7.1KW reverse cycle air conditioner. Both systems work fantastically and keep both rooms at a constant 22 degrees all day long.

Plumbing and Electrical

The services side of things was not too involved and the majority of this was in the back of the house for the dog washing and cleaning of towels and floors processes. A new gas-fired hot water service was installed outside. The Rinnai B20 will deliver a continuous flow of hot water day in and out to keep the dogs clean.

A local plumbing and electrical company were engaged for this called Mayfair Plumbing. They are in Burnside and were able to fit this job over the Christmas break which was another great result.

Acoustics

The acoustics of the room had to be addressed. We were asked to assist with the echo of the room and help keep the sound down if a dog was starting to bark. The epoxy flooring had already reduced some of the noise, but we knew more could be done from previous jobs and shop fit-outs completed in Adelaide.

We purchased some acoustic felt pads to install on the walls from Bunnings Mile End. The acoustic panels are designed to be seen and come in all different colours. In this case, we purchased some light grey panels (white would get too dirty and the light grey blends in). The panels are 2m x 1.5m and get stuck about halfway up the wall. Using 3 panels on each wall immediately took the sting out of the echo and
gave our customer a great result.

Final Hand Over

Once all the building works were completed over a short two-week period, we handed the salon back over to the client for the final fit out which involved setting up hydraulic lifting tables for the dogs to be dried and groomed on, shelving units, computer, front desk, wall decorations and other bits and pieces.

Mavericks Dog Grooming has now been operating for a month since the fit-out was completed by
our team of expert builders.

bathroom renos time

Renovating Your Bathroom? How Long Will It Take?

Renovating a bathroom can be an overwhelming process, but we are here to help you navigate it with ease. Discover how long does a bathroom renovation take and the key stages of completing one in this blog post! We will also touch upon factors that affect the timeline as well as tips for creating your ideal dream bathroom without any hassle. So, get ready to explore all possible options for customizing your perfect space, start remodeling today! See also our article on how to clean a bathroom after a renovation.

Key Takeaways

  • Bathroom renovations can take from 1-12 weeks, depending on the scope of the project.
  • Professional planning and hiring experienced professionals are essential for a successful renovation process.
  • A bathroom renovation can significantly improve home value, functionality, and aesthetic appeal.

Understanding Bathroom Renovation Timeframes


A modern bathroom with new fixtures and fittings


Undertaking a bathroom renovation can be thrilling and intimidating. One of the most frequent questions is how long it will take to finish this kind of project? The duration for your specific bathroom remodeling largely depends on the scope and complexity of work required. You should plan approximately six weeks until completion when creating an entirely new washroom through renovating. Nevertheless, various elements such as material delays, availability from contractors plus any unanticipated complications could all affect the timeline too.

Let’s break down the basics. Into three types: minor facelifts. Full-scale revamps. Or luxurious spruce ups in order to understand each timeframe better.

Simple Makeovers: 1-2 weeks

If you want to give your old bathroom a fresh touch, such as new tiles, new shower or epoxy floor, install then simple makeovers could be an ideal choice. These types of renovations involve small alterations that can typically take up to two weeks. Examples include changing the fixtures, making updates in vanity designs and repainting for a renewed look. While this time frame may vary depending on delays with materials or contractor availability plus other unexpected circumstances encountered along the way. Your renovated bathroom will have its desired style within no time!

Full Bathroom Renovations: 3-12 weeks

A full bathroom renovation requires a comprehensive overhaul of your current space, which can take anywhere from 3-12 weeks. Such an upgrade may be inconvenient, but the end results are often quite rewarding in terms of added home value and improved aesthetics. Material delays or unforeseen issues could extend the duration. So it’s important to do ample research beforehand and bring on experienced professionals who have realistic expectations for completion time. By investing in a high quality full bathroom renovation project you will enjoy greater functionality and more attractive surroundings overall!

Luxurious Upgrades: Up to 8 weeks

A successful bathroom renovation process requires thorough research, experienced professionals, and practical goals. A luxurious revamp can take 4-8 weeks to complete depending on material delays or contractor availability. By investing in high end materials and fixtures you will be able to create a sanctuary of indulgence for your own personal oasis right at home. To ensure the best results when performing such a renovation, it is important to make sure that all expectations are realistic before taking any action steps towards completing this project!

Key Stages in a Bathroom Renovation


A bathroom with a demolition in progress


The process of a bathroom renovation normally contains several steps. Firstly, pre-renovation planning is essential to make sure the project runs smoothly. Secondly, demolition will be necessary in order to start remodelling this space. Following that installation and construction for the room must take place before any fixtures or decorative touches are added into it. If you’re considering employing a contractor to complete all aspects of this task, familiarizing yourself with these stages can help monitor its progress effectively throughout. All-in-all, renovating your bathroom requires dedication, diligence and awareness so think ahead when executing such an important job!

Pre-Renovation Planning: 1-6 months

The bathroom renovation project needs to be properly organized in order for it to reach a successful outcome. This process usually takes 1-6 months, which includes exploring ideas and gathering funds as well as getting contractors onboard. Cost of labor and materials should all be taken into account when creating the budget needed for such an endeavor. It is also important to check with your local council if you need any particular planning permission before proceeding with renovations on your bathroom space. Allowing sufficient time dedicated towards thorough preparation will help avoid any potential delays down the line so that everything runs smoothly upon completion of this home improvement task!

Demolition: 1-2 days

The first stage of the renovation is demolition, involving taking apart and eliminating existing bathroom elements. This step usually takes 1 to 2 days. It could be extended by an extra 1-2 days if asbestos needs special removal. Having solid brick walls will also add time to the completion of this process.

It’s essential to factor in potential delays while demolishing because this phase serves as a base for all other steps during renovating the bathroom space.

Installation and Construction: 1-7 days

When remodeling a bathroom, the full installation and construction phase is vital. This consists of plumbing and electrical work that takes 1 to 7 days. During this step, new windows are placed in position as well as structural beams needed for renovation purposes along with other details required to complete your desired outcome.

It’s essential you coordinate with your contractor and make sure all necessary tasks specified on the timeline have been done correctly throughout the length of time expected which usually lasts from 1-4 days when it comes down to electrical or plumbing duties involved in a bathroom overhaul project.

Fixtures and Finishing Touches: 1-5 days

The completion of a bathroom renovation includes adding fixtures and decorations, such as painting and tiling. This phase can last anywhere from one to five days. Finishing touches like heated towel racks, enclosures for showers or baths, along with toilet paper holders will help complete your dream restroom. Once these elements have been implemented properly, the project should be finished. You’ll now enjoy having access to your brand new renovated bathroom!

Factors Affecting Bathroom Renovation Timelines

When it comes to bathroom renovation projects, numerous aspects can affect the timeline of completion. Potential delays due to material acquisition (such as cement sheeting or plasterboard) or contractor scheduling must be taken into account in order for a successful outcome. Unexpected issues that may occur during the construction phase are also something homeowners should anticipate before embarking on their project.

By being aware and prepared from the outset, individuals can make sure their home transformation is kept running smoothly, minimizing any potential hiccups along the way!

Material Delays

Material delays in regard to a bathroom renovation can be caused by supply chain problems or custom orders. This kind of occurrence has the potential to heavily affect the entire timeline for your project and thus, it is wise to order materials ahead of time and make sure that all relevant contractors are aware if any hiccups arise. Having an alternate plan set up will ease matters should unexpected roadblocks present themselves, inconveniences which could otherwise impede progress significantly.

Contractor Availability

Planning ahead and securing the services of a contractor in advance is essential to minimize any delays caused by availability issues when it comes to your bathroom renovation. Being open with communication between yourself and the contractor about changes in timelines or project scope will also be beneficial for successful completion. Completing such projects on time can depend heavily upon promptness within these stages, so being flexible may ultimately prove helpful too.

Unforeseen Issues

When undergoing a bathroom renovation, there may be unexpected circumstances that arise and add time to the project. Structural complications or mold can draw out the duration of your remodel by days, weeks, or months. It is wise to prepare for potential delays and have an alternate plan in place. This will secure successful completion of renovating your lavatory space.

Tips for a Smooth Bathroom Renovation Process


A bathroom with a new shower enclosure


To make sure that your bathroom renovation goes as smoothly and stress-free as possible, having realistic expectations is key. Taking the time to research and plan ahead of time is necessary for achieving a successful outcome when creating your dream bathroom space. Hiring professionals experienced in this field will also help ensure good results throughout the process of transforming what was once just an ordinary restroom into something extraordinary!

Thorough Research and Planning

When renovating, it is essential to do extensive research and prepare properly in order to prevent delays and attain a successful outcome. This includes setting up the budget taking into account material costs, labor expenses, as well as permits. It involves keeping daily bathroom needs in mind together with lifestyle requirements when making aesthetic updates whilst preserving original layout of the space so that its value may be maximized.

Hiring Experienced Professionals

For a successful bathroom remodel, hiring experienced professionals is key. When looking for the right contractor to execute your renovation, their experience level and communication abilities should be taken into account along with certification. To make sure goals are met on budget and in time, it’s important that open dialogue between you and the hired specialist remain consistent throughout the entire project duration. A quality bath transformation requires reliable workmanship, so having certified individuals guaranteeing high standards guarantees success of any bathroom upgrade endeavor.

Setting Realistic Expectations

Having clear, realistic expectations is key to managing stress and avoiding frustration when going through the process of a renovation. Look into things like how you want your space allocated, budgeting necessities, as well as any design preferences so that your understanding of what will occur during renovations is precise. It’s good to remember these projects may take longer than expected and could be costlier than initially thought too.

Keeping on top of all elements concerning designing or upgrading by being aware beforehand can help one prepare for any difficulties which might arise during this transformation project.

Customizing Your Dream Bathroom

A bathroom renovation is the ideal way to personalize your dream bath with unique touches and features. By including shower enclosures, heated towel racks, toilet paper holders as well as other accessories you can shape a restroom that displays your style and meets all of your requirements. You can truly customize it into what best fits for you!

Heated Towel Ladders

A heated towel ladder is a luxurious bathroom accessory which, with its warming capabilities, provides an ideal atmosphere for towels. Constructed in various materials such as stainless steel, chrome and brass, these ladders give you all the comfort of warm dry towels whilst also adding elegance to your restroom’s decor. Powered by electricity, they make sure that any used items are not only kept at a comfortable temperature but will remain free from dampness quickly drying out once washed.

Shower Doors and Enclosures

Making a bathroom renovation? A great option to give the area an improved aesthetic and additional practical advantages is installing shower doors or enclosures. With many different types available, such as hinged, sliding, and bi-fold models, you can find one that suits your space perfectly! It will keep bathrooms dry while maintaining privacy while making it look stylish too.

Shower door installations are just what’s needed for any type of restroom revamp – providing both looks and performance in equal measure, which makes them truly invaluable additions!

Toilet Paper Holders and Accessories

Adding toilet roll holders and other such accessories can be a great way to add some personalization to your bathroom while also enhancing the organization. Toilet paper holders come in many designs and colors so you are sure to find something that will match with your chosen style for this space. Not only is it useful as its main purpose, but these types of pieces could even serve double duty by functioning as both a magazine rack or phone shelf providing additional storage on top of being aesthetically pleasing. With all these details incorporated together, you create an appealing small bathroom which has been thoughtfully constructed using quality elements!


A bathroom with a new toilet holder

The Impact of a Bathroom Renovation on Your Home

A bathroom renovation can make a huge difference to your house, adding value and improving its appearance while providing added functional features. Investing in a well-done project will let you upgrade the space from just meeting needs into something that is highly desirable – with modern fixtures, improved storage solutions and an assortment of finishes available it’s easy to complete this transformation. Your bathroom can be transformed into something truly special!

Home Value Increase

The return on investment in bathroom or kitchen remodeling can be considerable, with some figures indicating a rise of up to 10% or more. If one focuses only on aesthetic upgrades and not changing the layout around, they could gain even more value from this type of project. This also applies to selling as well. An improved bathroom may draw greater attention from prospective buyers and raise your asking price accordingly.

Enhanced Functionality

By improving the amenities and making use of available space, it is possible to transform your bathroom into an efficient and pleasing area. This can be achieved through a selection of measures such as eliminating bathtub barriers for increased mobility, providing extra storage possibilities, or modernizing fittings. These modifications will contribute to having a fully functioning bathroom that both delivers its purpose effectively yet remains inviting at the same time.

Aesthetic Appeal

Renovating a bathroom can truly boost its aesthetic value. With the addition of items like heated towel rails, shower doors and frames, as well as toilet paper holders and accessories one could make their bathing area look attractive with great unity. So how long does such a remodel take? This length varies based on complexity of the project along with availability of materials and staff involved in it.

Besides that, reorganizing space wisely plus introducing particular design aspects will transform your restroom into an enjoyable atmosphere for relaxation purposes.

Summary

A bathroom renovation project has the potential to upgrade its value, performance and look. To have a successful outcome, it is important to plan out a suitable timeline that factors in key steps of the procedure as well as other essential elements. With thoughtful research and help from experts, you can build your dream bathroom which reflects your individual style while satisfying all necessities.

Also see our article on fixing a smelly bathroom drain.

Frequently Asked Questions

How long does it take on average to renovate a bathroom?

A bathroom renovation can take anywhere from two to ten weeks, depending on the complexity of the project. Usually it takes between 13 and 25 days or up to four weeks, but some may require a few months for completion.

Can you remodel a bathroom in 2 days?

It is possible to complete the remodeling of a small bathroom in two days. For those who require their task completed quickly and efficiently, this timeline provides an excellent opportunity for them. Prior preparation is essential when beginning such a project. One should make sure that all needed items are gathered before starting any work including demolition or carpentry needs. Having a clear vision on how you want your new bathroom to look can help significantly with staying organized throughout the process as well as making sure everything goes smoothly from start to finish!

How long does it take to tile a bathroom Australia?

A tiler with knowledge and experience can typically complete the job of tile installation in an Australian bathroom within 6 to 8 hours, while for someone inexperienced it may take 10-16 hours.

What are the key stages in a bathroom renovation?

It’s essential to plan thoroughly when carrying out a bathroom renovation – from the demolition, constructing and installing, all the way through to adding fixtures and any final touches. The process of renovating this part of your home is never complete until these elements are included.

What factors can affect the timeline of a bathroom renovation?

When undertaking a bathroom renovation, it’s essential to plan ahead due to possible material delays, contractor unavailability and the possibility of unforeseen problems during building.

an outdoor kitchen renovation

What To Focus On If You’re Renovating Your Home To Sell

When renovating to sell a house (flipping) there are some key things to consider that need to be performed to gain the maximum return from your investment.

In this article, we will highlight a few tasks that we have found to maximise the sale price when listing the property for sale once the renovation has been completed.

External Features Of The Home

Starting from the outside of the house rendering has become a real game changer to the overall look of a home.  In the 70’s and 80’s exposed red, brown, and cream bricks were all the trends.  Today people are opting for rendering and having this painted (see image on this page).  The cost of doing the front of an average home in Adelaide starts from $15,000 which includes painting and scaffold hire.  The advantage of using products from the Dulux range is that these come with a colour already mixed in with the product, which minimises the painting procedure.

Backyard

In the back yard if there is enough room a concrete tiled swimming pool is a must-have along with an outdoor entertaining area to compliment the swimming pool.  The outdoor entertaining area should incorporate a kitchen, fridge, heater, BBQ (connected to natural gas) and television (see image on this page).  When you are renovating to maximise your buyer’s market outdoor living will certainly give you more buyer reach.

Established gardens create a sense of lush enjoyable spaces.  Automated irrigation allows the grass and plants to take care of themselves and once again create a feeling of high-end landscaping.  Some very cool products from Hunter allow blue tooth control of the watering systems which allows simple programming and ease of turning on and off when the ground moisture levels are too high or low.

Exposed aggregate concrete paths and driveways make a real statement when potential purchasers visit the home.  Everyone knows concrete costs a lot of money and exposed aggregate concrete is even more.  So, if the budget allows then this is another big must-have item, if possible, to put it in the budget for your renovation.

Bathrooms

Moving inside the house there are also a few must-do items as well.  Starting with the bathrooms, floor-to-ceiling wall tiles are favoured, but they will put a dent in the costs, and they will give a true luxury feeling.  Clear shower screens create a sense of open space and huge freestanding baths.  These 3 items will set your bathroom apart from others.

The Kitchen

In the kitchen electric induction cooktops are on trend along with butler pantries.  The butler’s pantry does not need to be huge, just large enough to accommodate another area for prep and storage.  The size of the cooktop is typically 90cm these days (see image on this page).  You will see many under-bench ovens are 90cm in size as well.  It is important to make these decisions early into the renovation as the electric induction cooktops will require a dedicated power supply with its circuit breaker rated to a minimum of 32 amps and its isolation switch mounted on the splashback close to the appliance.

High ceilings create a sense of the space so if possible , creating the highest ceiling as possible is preferable.  Many of our clients are opting not to install cornices and instead using square sets to give the feeling of more height inside a room.  Neutral colours are another go-to so as not to offend anyone.

In this article, we have highlighted a handful of the items that we have seen many of our clients excel with the sale of their homes once we have renovated their houses for them.

cost of granny flats

What Does It Cost To Build A Granny Flat?

The cost to construct a granny flat varies widely, depending on numerous factors that should be carefully examined before embarking on this endeavor. Average prices for these secondary housing units see substantial variation, influenced by the complexity of the design, the materials selected, and local construction regulations. Custom granny flats may lead to greater expenses, as they often require unique architectural designs and premium materials. Additionally, the price of your own granny, may be affected by the specific characteristics of the build site, such as ease of access, land slope, and pre-existing structures.

A comprehensive financial breakdown should include not just the costs of materials and labor, but also expenses related to preparing the site, obtaining necessary permits, connecting utilities, and any relevant local fees. This detailed overview serves as a foundation for understanding the financial outlay needed to construct a granny flat on your property and acts as a strategic point of reference for budget planning.

Key Takeaways

  • Constructing a granny flat entails several variables that impact the total cost. Key elements include the dimensions of the unit, selected style, construction materials, area of the country, and unique characteristics of the site.
  • A comprehensive financial review is vital in planning for the construction of a granny flat. This assessment must consider both the national standards and details unique to a personalised build. Labor expenses often represent a significant portion of the overall cost. Other expenditures, like municipal council fees and the other costs involved to connect utilities, may also add to the final amount.
  • Nevertheless, with strategic planning and cost-saving measures, building a granny flat can be a manageable and economically rewarding endeavor.

Below is a very informative video on granny flat costs:

Understanding Granny Flats

Before exploring the financial aspects of constructing a granny flat, it is important to comprehend that granny flat prices and a self-contained living space are usually situated on the grounds of a larger family home.

The cost to build a granny flat includes several key components, such as site preparation, which establishes the foundation for construction of main house. Securing council approval is a significant step, guaranteeing the secondary dwelling adheres to local regulations and zoning requirements.

Construction expenses cover a detailed tally of materials, labor, and design costs. Careful planning and execution of these elements are paramount in creating a functional and compliant granny flat. Each aspect must be carefully considered to avoid unexpected costs and stay within financial limits. Also see our article on the cost of a bathroom renovation.

National Average Prices

With an understanding of all the materials and various factors that impact the construction of a granny flat, we turn our focus to the associated costs.

On average, building such a dwelling typically runs between $135,000 and $190,000 (Based on Australian national averages). These figures encompass the myriad expenses involved in the building process, which includes development approval, securing building materials, and labor costs.

The estimates provided are for standard dimensions and finishes of granny flats and presuppose adherence to existing building codes and regulations. Notably, expenditures can vary greatly depending on design complexity, choice of material quality, and specific development approval requirements in the chosen area, which may push the final cost above the higher estimate for highly specialized or extensively customised constructions.

Custom Build Considerations

While standard granny flat constructions come with set price ranges, opting for a custom build introduces a host of variables that can significantly influence the overall cost. Custom built granny flats allow for personalisation that aligns with specific preferences and site constraints, but they also necessitate a clear understanding of the numerous factors affecting building costs. Professional advice is essential to navigate the intricacies of planning permission, council fees, and regulatory compliance.

ConsiderationImpact on Cost
Design ComplexityIncreases costs
Material QualityVariable effect
Professional AdviceEnsures compliance, may increase initial cost
Council Fees & PermitsMandatory, varies by location
Site-specific ChallengesCan significantly alter budget

In-depth planning and strategic decision-making are crucial to manage the financial implications of a custom granny flat project.

What Influences Cost

The expenses involved in building a granny flat are shaped by elements such as dimensions, intricacy of design, and material selection. Construction of such a dwelling must comply with local council rules, potentially adding to costs through various fees. Foundation specifications, such as the choice between piers and a concrete slab, also have a significant influence on the final price made. Opting for high-quality materials can raise the investment due to their impact on longevity and visual appeal.

The skill of the building company is also important. Their ability to manage regulatory demands, obtain materials, and carry out the build can either reduce spending or lead to unexpected increases. A comprehensive evaluation of the project should consider these factors to predict an accurate budget.

Site Preparation Expenses

The impact of site preparation expenses on the total cost for constructing a granny flat can be considerable. These costs play a pivotal role in determining the project’s overall affordability and viability. Site preparation encompasses several tasks vital for establishing a firm and appropriate foundation for the new construction. A detailed breakdown follows:

  1. Clearing and Levelling: The financial outlay for removing vegetation, rubble, and making the terrain even might be significant, based on the land’s condition before any work is done.
  2. Soil Testing and Grading: A professional assessment of the soil assures that the land is fit for building, which may prevent expensive complications later on. Additional work might be necessary to ensure proper water runoff.
  3. Access and Infrastructure: Setting up suitable entry points for construction machinery and installing essential services such as water and electricity contributes to the site’s initial outlay.

Builders of granny flats need to consider these aspects diligently. Neglecting them can result in escalated landscaping expenses and unforeseen costs that could broaden the project’s original scope. Adequate site preparation is imperative for the long-term stability and security of the granny flat.

Material Selection Impact

Choosing materials is a primary factor influencing the cost of granny flat construction. Different types and qualities can cause significant variations in expenses. The impact of material selection is broad, affecting not just the initial cost but also the sustainability and ongoing maintenance expenses.

When selecting materials, builders and homeowners should weigh durability against cost-effectiveness. Opting for high-quality materials may lead to higher initial expenses, but they often offer greater resilience. On the other hand, the most economical choices might minimize the initial cost, yet could incur greater maintenance expenses as time goes on.

Careful selection of materials is key to managing the total construction costs of a granny flat. We have a great article on the cement sheet vs plasterboard.

Permit and Regulation Fees

The need to secure appropriate permits and meet local regulations also plays a major role in the project’s final costs. Prospective builders need to allocate funds for:

  1. Local Council Application Fees: These charges for submitting a development application can differ based on the jurisdiction, taking into account the size and intricacy of the custom-built granny flat.
  2. Compliance with Council Requirements: With different rules in various municipalities, there are assorted charges for inspections, reviewing plans, and possible zoning changes.
  3. Permit and Regulation Expenses: These required payments ensure that the dwelling complies with all building codes and safety norms, which may significantly increase the overall cost.

Careful planning and deep understanding of the specific rules of the area are necessary to navigate these financial considerations.

Standard Inclusions Variance

Permit costs and regulatory fees play a significant role in the total expense of constructing a granny flat. Variations in standard inclusions among builders can have an equally substantial effect on the overall cost of a kit granny flat. Prospective builders must carefully compare the standard inclusions when assessing quotes for granny flats.

These differences may include a range of materials, finishes, and construction methods. For example, flat pack granny flats and kit options often come with a basic package that might not cover essential items like floor coverings, light fixtures, and at times, windows. Such exclusions can lead to additional expenditures, escalating the end price.

It is important for individuals to examine precisely what the base price of their chosen granny flat includes. This is to assure financial readiness and prevent going over their budget.

Resale Value Factors

Considering the significant investment required to construct a granny flat, homeowners must evaluate how such an addition will impact the resale value of their property. Resale value factors hinge on market demand and the quality of the construction.

A well-designed, custom-built granny flat can enhance the attractiveness of a home to potential buyers, particularly those with extended family members who may reside with them. Conversely, the reduction of backyard space might deter buyers looking for ample outdoor living areas.

The key to optimising a granny flat’s value is ensuring it complements the existing property and meets high construction standards. Strategic planning and execution can thus not only serve immediate functional needs of rental property but also strengthen the property’s financial potential in the real estate market.

Construction Cost Reduction

Homeowners seeking to reduce the investment in granny flat construction can significantly benefit from strategic cost-saving measures. Working with builders who are experienced in lowering construction expenses is important. These experts take into account various factors to decrease overall costs without sacrificing quality.

Smart design choices, such as an efficient layout minimizing wasted space, can cut down on materials and workmanship costs. Choosing economical materials that comply with building regulations can also have a notable impact.

Careful planning and smart procurement strategies can help avoid unnecessary spending. Homeowners can find a balance between cost-effectiveness and creating a compliant, appealing granny flat by employing these methods.

Eligibility and Council Approval

Constructing a granny flat involves following specific rules, which include meeting certain eligibility criteria and obtaining the local council regulations and approvals that differ depending on the location. Those looking to build must collaborate with their local councils to understand the intricacies of zoning and adherence to regulations.

Consider the following:

  1. In New South Wales, the law requires that a property be at least 450 square meters to be considered suitable for constructing an additional dwelling.
  2. South Australia presents its own set of stipulations, potentially involving aspects like how far the structure must be from the property line and its effect on adjacent homes.
  3. How close the granny flat is to the main residence plays a pivotal role, influencing the permissible dimensions and siting of the auxiliary unit.

Builders need to confirm their eligibility and gain council consent before moving forward, to ensure their project is in line with the area’s planning policies and construction standards.

Size and Design Affect

It’s to recognize that the size and complexity of its design are key factors driving construction costs. As living space increases or design complexity elevates, granny flat builders must incorporate more materials and labor, which invariably elevates the expenditure. Materials such as brick veneer, while aesthetically pleasing and durable, can substantially increase the budget. Costs vary depending on the choices made during the design phase.

FactorImpact on Cost
SizeLarger footprint elevates material and labor costs
DesignComplex designs necessitate advanced construction techniques
MaterialHigh-end materials such as brick veneer increase overall expense

Granny flat construction is not a one-size-fits-all endeavor; meticulous planning and design choices significantly influence the cost.

Additional Expenses

When setting a budget for a granny flat, it’s important to consider various extra expenses that extend beyond the initial construction costs. These can typically include:

  1. Permitting and Legal Fees: Acquiring the necessary building permits and ensuring adherence to local guidelines is a must. Expenses can fluctuate greatly depending on the area and the project’s intricacy.
  2. Utility Connections: Account for the cost of extending essential services such as water, electricity, gas, and sewage systems to the new dwelling. This will require both skilled labor and materials, potentially involving expert contractors.
  3. Landscaping and Exterior Work: Set aside funds for outdoor features like pathways, fences, and planting areas, which enhance both the functionality and visual appeal of the granny flat.

Careful planning and precise budgeting for each category are vital to prevent unexpected cost overruns.

Popular Questions

Below you can see some of the common we get asked.

How Does the Addition of a Granny Flat Impact My Property’s Insurance Premiums?

Adding a granny flat can lead to higher insurance premiums because of increased replacement costs and the extra liability risks from having another extra living space on your property.

Can I Legally Build a Two-Story Granny Flat, and What Additional Considerations Does This Entail?

To lawfully erect a two-story granny flat, compliance with local zoning regulations and construction codes is necessary. This process may require extra structural evaluations, careful consideration of neighbors’ privacy, and might incur increased expenses owing to the complexity of the architectural design.

What Are the Environmental Sustainability Options for Granny Flat Construction, and How Might They Affect the Cost?

Incorporating eco-friendly practices into granny flat construction, such as installing solar panels, using efficient insulation, and setting up rainwater harvesting systems, may lead to higher initial expenses. Despite this, they can result in long-term financial savings and contribute positively to the environment.

How Does the Construction of a Granny Flat Affect My Neighbors, and What Are My Obligations to Inform or Involve Them in the Process?

Building a granny flat can influence your neighbors by introducing more noise, diminishing their privacy, and altering the surrounding infrastructure. Property owners need to comply with local zoning laws and could be obligated to involve neighboring residents as part of obtaining permissions.

Are There Any Government Grants or Incentives Available for Building Granny Flats That Cater to Specific Populations, Such as the Elderly or Individuals With Disabilities?

Government support in the form of grants or incentives for constructing granny flats can differ from one area to another, with a focus on promoting suitable living spaces for seniors or individuals with disabilities. To ascertain eligibility, it’s advised to consult with local governing bodies.

Final Points

Building a granny flat involves various factors that influence the overall expense. These factors include the unit’s size, chosen design, materials used, the geographical location, and the specific conditions of the building site.

Conducting a detailed financial analysis is necessary when planning to build a granny flat. This analysis should take into account both national averages and the particulars of a custom build. It is important to consider the cost of labor, which is a prominent part of the total expense. Additionally, other costs such as local council fees and the price of connecting utilities can increase the overall granny flat cost.

However, through strategic financial planning and implementing measures to save costs, constructing a granny flat can be a manageable and profitable project.