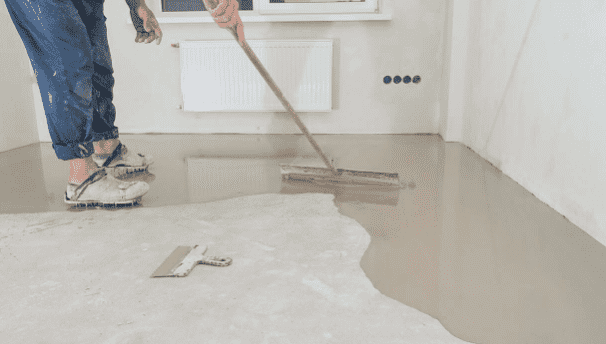
Painting a concrete floor is a worthwhile DIY project that can transform a dull space into an amazing area. Whether you’re revamping your garage floor or refreshing your patio, the right approach to paint concrete floors ensures a durable and visually appealing finish. Follow this comprehensive guide to learn the best practices for painting concrete floors, from preparation to the finishing touches.
We also have a great article on epoxy bathroom floors.
Introduction
Painting your concrete floor is an excellent way to refresh your space, be it a garage, basement, or an outdoor patio. With the right tools and techniques, even those with minimal experience can achieve a smooth, durable finish.
The TL;DR version can be viewed through this Bunnings DIY video:
Materials Needed
To start your painting project, gather all the must-have supplies to ensure a smooth process:
- Acrylic latex concrete paint and patio floor paint: Choose high-quality paint designed for concrete surfaces.
- Primer: A concrete primer is essential for ensuring paint adhesion.
- Putty knife, wire brush, and paint stripper: For removing old paint and smoothing surfaces.
- Roller, roller covers, and paint tray: For applying paint and primer.
- Painter’s tape: To protect edges and corners.
- Bucket, sponge, and dish soap: For cleaning the floor.
- Hand sander or sandpaper: For sanding rough areas.
These supplies are specifically chosen for their effectiveness on concrete flooring, emphasizing the importance of selecting the right materials for concrete surfaces.
Preparation of the Concrete Floor
Proper preparation is important for a successful paint job on concrete floors. Removing all the old paint (if any), including leftover paint or paint stains, is essential for achieving a smooth concrete surface. This step ensures that the floor is free of imperfections that could affect the final appearance. Sanding down high spots not only helps in eliminating any remaining paint but also aims to create an even concrete surface that’s ideal for painting.
Cleaning and Repairing
- Remove Dirt and Debris: Use a vacuum to clean the floor thoroughly. For stubborn dirt or stains, use a bucket with warm water and dish soap to scrub the surface.
- Strip Old Paint: If there’s peeling or flaking paint, use a paint stripper and a putty knife to remove it.
- Sanding & Grinding: Rough areas should be sanded or ground down to create a smooth surface. Depending on how rough your floor is, you can hire concrete grinders and sander from hire outlets like Kennards or Coates.
- Repair Cracks and Holes: Fill any cracks or holes with a cement filler. Use a putty knife to smooth the filler and ensure it’s level with the floor.
Moisture Test
Before applying new paint, conduct a moisture test. Tape a plastic sheet to the floor and leave it for 24 hours. If condensation forms underneath, the concrete has too much moisture for painting.
Applying Primer
Priming is essential for a long-lasting paint job. It helps the paint adhere better and last longer.
Primer Application
- Apply Masonry Sealer: If needed, apply a masonry sealer with a roller to block moisture.
- Priming: Apply a concrete primer using a roller. Start from the far corner of the room and work towards the door. Allow the primer to dry completely according to the application instructions.
Painting Concrete Floors Process
The main task of your project is the painting process. Use a roller for the best results, and follow these steps for applying acrylic latex concrete paint. For those considering an alternative finish, concrete stain might be an appealing option. Acid-based stains penetrate the concrete, offering longer-lasting coverage with a unique appearance, though they may result in some streaking and unevenness. In contrast, painting concrete provides a more uniform and richly colored finish but may not be as durable over time.

Base Coat
- First Coat: Pour the paint into a paint tray. Begin at the farthest corner of the room and use a roller to apply a thin, even coat. Use painter’s tape to protect walls and corners.
- Let the First Coat Dry: Allow the first coat to dry completely. This can take several hours, depending on air circulation and humidity.
Second Coat
- Apply the Second Coat: After the first coat is dry, apply the second coat. This ensures a durable and opaque finish.
- Dry Completely: Let the second coat dry completely, which can be time-consuming but is essential for a durable finish.
Finishing Touches
Applying Concrete Floor Sealer
After the paint has dried, apply a concrete sealer. This will protect your painted floor from moisture, stains, and wear, especially in high traffic areas.
- Sealer Application: Use a clean roller to apply the sealer. Start from the back of the room and work towards the entrance.
- Let the Sealer Dry: Allow ample time for the sealer to dry. Avoid walking on the floor until the sealer is completely dry.
Maintenance and Care
To maintain your newly painted concrete floor, regular cleaning and occasional touch-ups are necessary.
- Regular Cleaning: Sweep the floor regularly and mop with a gentle cleaner.
- Occasional Touch-Ups: For scratches or peeling, apply a small amount of paint to the affected area.
Final Points
Painting a concrete floor can significantly improve the appearance of your space. With the right preparation, materials, and techniques, you can achieve a professional-quality finish that is both beautiful and durable. Remember to allow each layer to dry completely and follow all application instructions for the best results.

