Are you considering an epoxy bathroom floor for its toughness and design freedom? This guide provides clear, no-nonsense insights on the benefits, installation, and upkeep of epoxy flooring.
Learn about its superior water resistance, design versatility, ease of cleaning, and how you can achieve this modern flooring in your own bathroom. Also see our article on garage epoxy floors.
Also see our article on paining concrete floors.
Main Points To Note
- Epoxy bathroom flooring offers durability, resistance to moisture and chemicals, easy maintenance, and design flexibility, allowing for a range of colours, patterns, and finishes.
- Proper floor preparation is crucial for successful epoxy flooring installation, requiring assessment of the existing surface and thorough cleaning and roughening for optimal epoxy adhesion.
- Ongoing care for epoxy flooring is straightforward, involving regular cleaning with mild solutions, addressing minor repairs promptly, and considering potential long-term savings due to its durability and low maintenance needs.
Why Choose Epoxy Flooring for Your Bathroom?
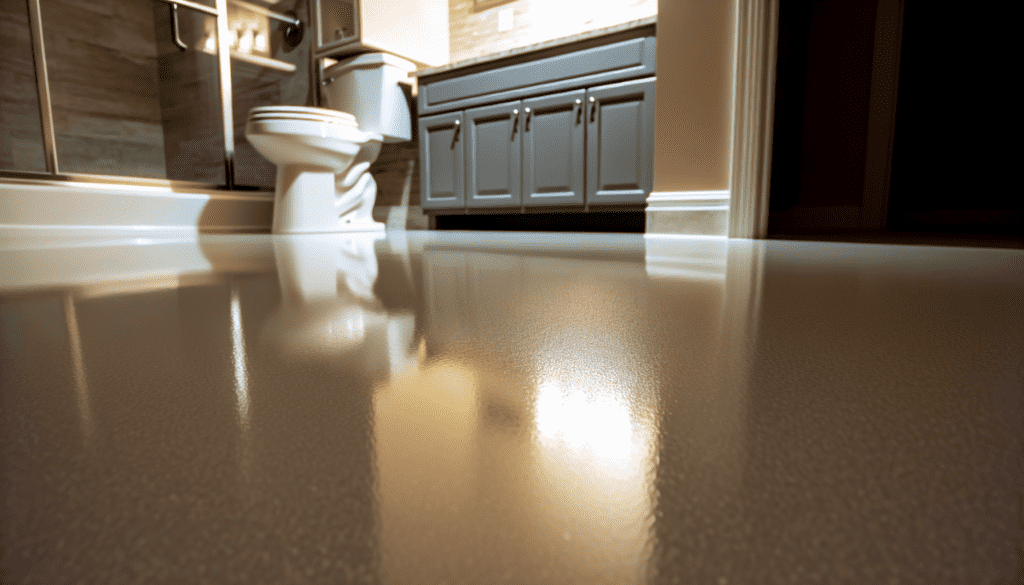
Epoxy is becoming a go-to flooring option for bathrooms due to the range of advantages it offers. It not only looks great, but can also be used in residential and commercial spaces alike. Its strength makes maintenance easy while offering an abundance of design possibilities too, creating seamless finishes perfect for any setting. Epoxy coatings give added protection against wear and tear as well as extending the lifespan of your bathroom’s flooring system significantly.
Durability and Resistance
Epoxy flooring stands head and shoulders above the rest when it comes to durability, as well as its resistance. Its remarkable strength is what makes epoxy a top pick for bathrooms that will be under considerable use regularly.
Showers taken multiple times daily or occasional liquid spills are handled with ease by this type of flooring solution. It also has superb immunity against various chemical compounds including common household cleaning products and urine – making it ideal in wet areas such as bathrooms due to its impermeable surface against water damage caused by moisture buildup other floors (for example near drains) may warp/discolour easily against.
Easy Maintenance and Cleaning
The incredible durability and resistance offered by epoxy flooring, as well as its low maintenance requirements, have made it a popular choice for bathroom floors. Its seamless surface ensures there are no grout lines where dirt or mold can accumulate– something that is common with tiled floors.
The glossy finish of this type of floor makes dirt and stains clearly visible so they can be addressed quickly. Basic cleaning involves using warm water mixed in detergent every two to four weeks together with immediate action against spills, much simpler than scrubbing constantly like some other types of surfaces would require! This ease-of-use turns maintaining your bathroom’s epoxy floor from a chore into an enjoyable task.
Customisation and Design Flexibility
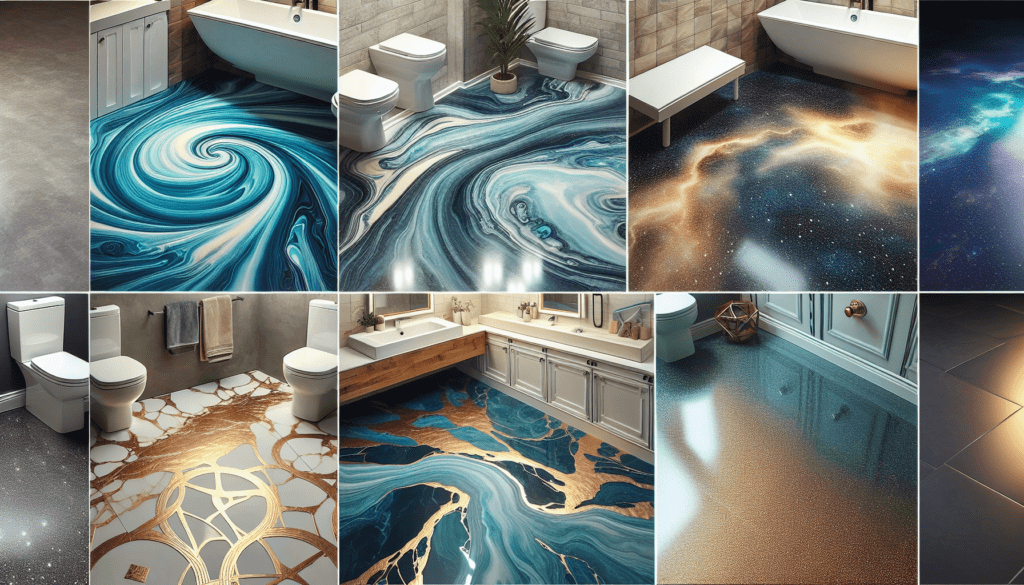
Epoxy flooring offers not just practicality, but it’s also an effective way to make a bathroom that suits your style. With all of the different shades, patterns and finishes available, you can find something unique for yourself. Achieve a luxurious finish with its mirror-like shine or fashion intricate designs, anything is achievable!
You even have access to getting marble/granite looks at an affordable price point compared to installing real materials. Epoxy allows you full control in creating the ideal restroom which meets both needs: visually pleasing yet still functional space that serves its purpose best while standing out from the rest as uniquely yours.
Preparing for Epoxy Floor Installation
It is necessary to review the installation process of epoxy flooring for bathrooms as it presents notable benefits. This involves an in-depth twofold preparation – evaluating existing tiles and substrate, then readying the surface suitable for a successful application of epoxy coating. Inspections should be conducted on both materials.
Any rough or unglased surfaces must also undergo cleaning before grinding the concrete if desired. As far as prepping goes, this includes thorough cleansing followed by making sure that adhesion can take place between covering and ground correctly through roughening up said surface accordingly.
Assessing Existing Tiles and Substrate
The installation process of an epoxy floor begins with a thorough assessment of the existing tiles and surface. This helps ensure successful adhesion for long-term performance, by making sure there is no roughness, unglased areas or chipping in any parts that could disrupt it. Not thoroughly assessing these factors can cause issues such as inadequate adherence, cracking and even total failure, all resulting from not inspecting properly beforehand.
Having proper preparation to guarantee success is essential when fitting your epoxy flooring so everything sticks correctly together without Damages being caused along its lifespan.
Surface Preparation
Surface preparation is an integral step after evaluating the state of existing tiles and substrates. This requires cleaning as well as creating texture on the surface for strong adhesion to be achieved with epoxy resin application.
Grinders, hoses, vacuums, and crack fillers will need to be used during this process which entails sanding at 80-grit paper level in order for ideal bonding between floor coating and epoxy sealing agent. Achieving a satisfactory roughness is key if one wishes to ensure that their chosen curing compound efficiently sticks onto it without any issues down the line.
Step-by-Step Guide to Installing Epoxy Flooring in Bathrooms
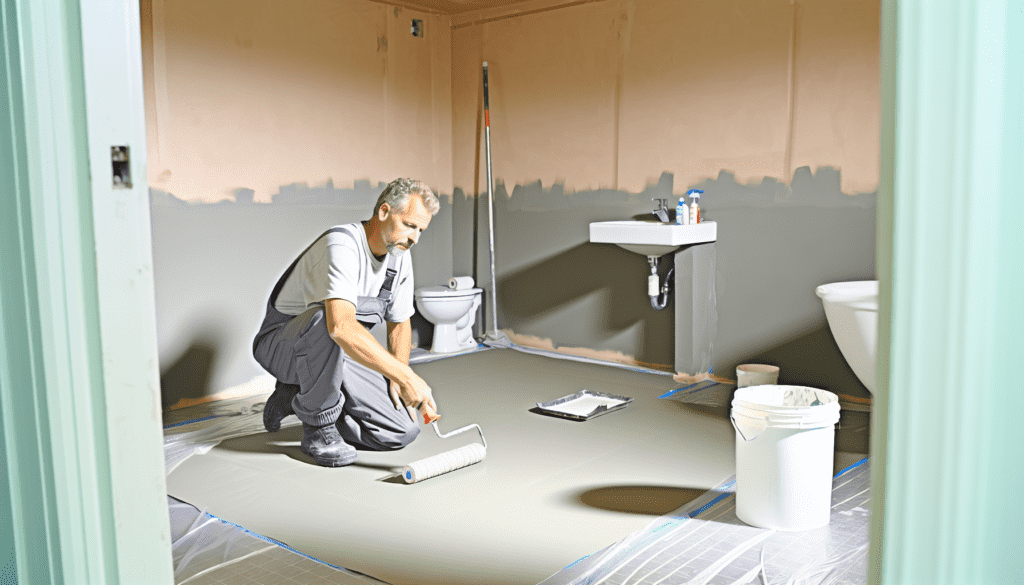
After completing the preparation phase, you can move on to installing epoxy flooring. This process consists of numerous steps which involve applying a primer onto the surface so that the resin holds firmly and then mixing together both components, hardener and resin. Once done with this step, it is time for final touches such as a top coat plus any decorative details or anti-slip additives if needed.
By following these easy instructions one should be able to complete installation of their beautiful new epoxy flooring without difficulty!
Primer Application
The installation process of a bathroom floor begins with the application of an epoxy primer. This is essential to establish a secure link between the surface and the resin. It should be spread evenly across the space for optimal results. An 18 cm coat roller is recommended to apply approximately 150-200 grams per square metre. Leave at least 24 hours before progressing to any Steps in this venture.
A smooth layer must then be created from applying this epoxy, which will adhere correctly when mixed into its corresponding resin before being applied to your chosen bathroom area’s floorspace.
Mixing and Applying Epoxy Resin
Once the epoxy resin and hardener have been mixed, it is time to apply a coat of the material onto the floor. According to manufacturer instructions, two parts resin should be combined with one part hardener for an even finish when using a roller. The following process must take place in order to achieve this: First mix together according to directions given by producer.
Then spread evenly over surface smoothly using said tools before letting dry completely (about 12 hours). After proper curing takes effect on bathroom floors covered in epoxy coating, they are ready for light use.
Top Coat and Finishing Touches
The final step in the installation process of an epoxy floor involves adding a top coat and any desired aesthetic elements. This layer enhances the surface’s thickness and durability, as well as ensuring that all prior layers have set properly before applying it. After application, one should allow 12 hours for it to dry up fully before putting on another coating.
Possible touches may include special bathroom tiles or anti-slip additives such as shark grip powder or silica sand which can be included within the epoxy for extra safety during wet conditions in bathrooms. Decorative add-ons will lend additional charm to your bathroom floors thus giving them added beauty.
Ensuring Safety with Slip-Resistant Epoxy Floors
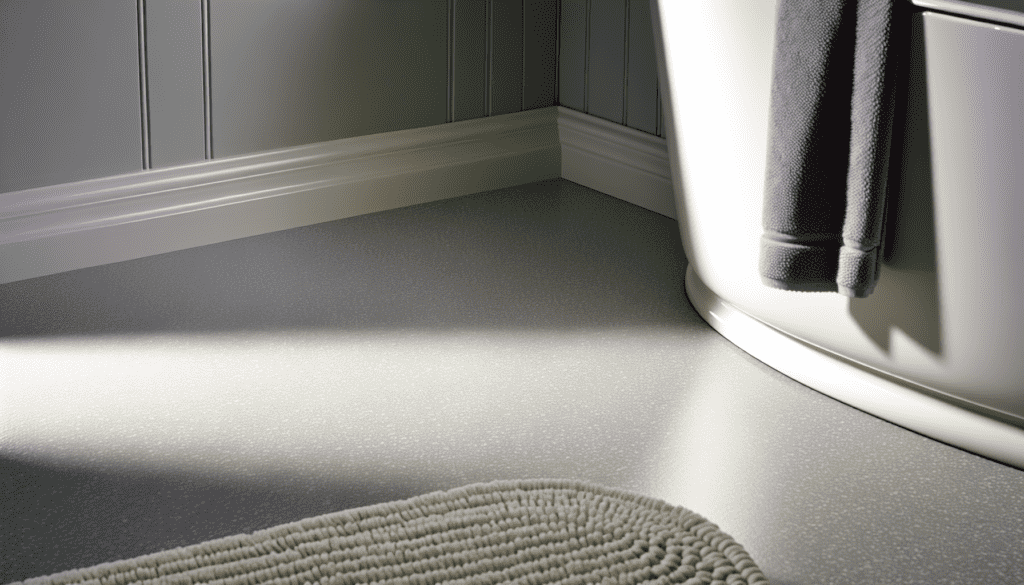
Having a slip-resistant bathroom floor is essential to ensuring safety when it comes to bathrooms, as they are more prone than other areas of the home to becoming slippery. To ensure this resistance, you’ll need an epoxy system with a high rating and incorporate materials such as aluminum oxide or silica sand into the installation process during its curing stage.
During your epoxy bathroom’s construction phase, anti-slip additives should be integrated in order for your flooring to remain resistant throughout usage over time. By taking all these precautions one can rest assured that their floors will have been made safe resistible against slipping accidents due to water presence in bathrooms!
Adding Anti-Slip Additives
Adding anti-slip elements, such as silica sand or rubber granules, to your epoxy coating for wet areas like the bathroom can enhance its safety. This could involve approximately 1.5 pounds of non-skid additive per 500 square foot area and varies depending on size and type of flooring being coated with epoxy.
The approach used when applying these additives may differ depending on the kind included. One example is sprinkling it over a wet surface which must remain untouched up to 48 – 72 hours after application in order to let the additive cure fully into place creating an efficient slip resistant result that doesn’t compromise your floors functionality or longevity.
Selecting the Right Epoxy System
For a safe and long-lasting bathroom floor, selecting the appropriate epoxy system is vital. Slip resistance should be taken into account due to potential wet conditions in this room.
The proper system must possess an elevated slip rating for safety purposes as well as durability able to withstand heavy use without wear or tear. Aesthetic considerations can also accompany it so that your chosen look matches your bathroom’s style. Water-, stain-, and chemical-resistance are necessary components of any ideal epoxy set up, facilitating ease of maintenance over time.
Caring for Your Epoxy Bathroom Floor
After the installation of your epoxy bathroom floor is complete and ready for use, it’s important to take proper care of it in order to maximise its longevity. A regular cleaning routine with a mild cleaner combined with warm water usually suffices when maintaining an epoxy floor. Tackling any minor damages or repairs quickly can help prevent Issues from cropping up later on. Proper maintenance should extend the life-span of your floors while keeping them looking pristine and new!
Routine Cleaning and Maintenance
For your epoxy bathroom floor to maintain its shine and long lifespan, regular cleaning and maintenance are key. Here’s what you should do: use a mild cleaner mixed with warm water for wiping the surface and rinse off. Dry up completely before mopping twice a week as part of routine upkeep, also conducting an extensive scrubbing every 7 days is recommended too. To preserve that shine of the epoxy bathroom floors, suggested solutions include using diluted ammonia for regular cleansing plus periodic application of polymer glaze coats or wax polishes approved by professionals on it’s upper layer. These tips will help keep your lovely bathrooms looking great for years!
Addressing Minor Damage and Repairs
The robustness of epoxy and concrete floors make them a great choice for bathrooms. Over time, some minor damage might be caused. These can range from thinning of the coating to chips or cracks appearing. It’s important that these matters are addressed immediately in order to ensure the quality does not deteriorate further.
Through sanding off an area which has become damaged it is possible often restore it with another coat of epoxy covering it up again. Similarly, compounds can be used if smaller chipping or fissures have occurred. To get ahead on any potential problems developing, you should keep an eye out every couple of months by checking your bathroom floor carefully for such issues.
Cost Considerations for Epoxy Bathroom Flooring
Once we have looked at the many advantages and how to install epoxy bathroom flooring, it is important to assess its cost. Installing such a type of covering for your bathroom entails some expenditure, both in terms of material expenses as well as labor charges. It also has long-term benefits due to low maintenance needs and longevity, which leads to savings over time.
Different factors can determine the final expense when considering an installation with epoxy floors. These include qualities of materials used, complexity surrounding fitting processes, and size constraints within the washroom area itself. All these relate specifically to what gets bought (epoxy), labor price tags plus complexities around installing this kind of surface finish inside bathrooms. In summary, materials needed, specialist skills required all play their part in calculating overall costs entailed by providing epoxy flooring to bathrooms along with those of repeated words: durability & maintenance ease!
Material and Labor Costs
The cost of epoxy flooring depends mainly on the materials and labor required for installation. The price of the material varies according to its quality, whereas labor costs can be more expensive if there is a complex bathroom layout or intricate patterns that need to be worked with over multiple rooms. Normally, it will cost around $30-$35 per square meter when two coats are applied to an existing concrete surface.
Long-Term Value and Savings
Epoxy floors have upfront costs, but their long-term value and potential savings should not be overlooked. Known for its durability – with a life expectancy ranging from 5 to 20 years – this type of flooring is much more reliable than other alternatives over time, bringing cost benefits in the future. Low maintenance requirements also mean that you won’t need special solutions or extensive upkeep on your epoxy floors, making it an economical option overall as well as saving valuable time when cleaning them up. Not only do these attractive surfaces enhance any home’s aesthetic appeal. They can actually increase its worth too: another great reason to invest in durable epoxy flooring!
Summary
Epoxy flooring is a practical choice for bathrooms and its advantages are undeniable – from the fact that it has remarkable durability to needing minimal maintenance, along with providing versatility in design. Its installation process needs proper preparation as well as professional handling. Taking into consideration its long-term value and affordability, epoxy floors are an affordable investment overall. So if you’re looking at giving your bathroom a new look or revamping the existing one, take into account how efficient and cost effective epoxy floorings can be!
Popular Questions
Below you can read some of the common questions we get asked about this topic.
Is epoxy good for bathroom floor?
Epoxy is a great choice for flooring in bathrooms due to its durability, ease of cleaning and resistance against slipping – making it an ideal option for wet areas. It remains strong even with moisture present and thus provides the bathroom with a slip-resistant surface that keeps everyone safe.
Can you epoxy over shower tile?
Yes, you can epoxy over shower tile with proper preparation and industrial-grade epoxy resin coating materials. It can give new life to the surface.
How long does epoxy last in the bathroom?
Epoxy flooring for bathrooms can provide a durable surface that endures up to 20 years when properly installed in residences. This longevity is due to the superior quality of epoxy compared with traditional types of indoor floor coverings.
What is epoxy flooring?
Epoxy flooring is a highly durable coating applied to prepped concrete, creating a chemically bonded protective barrier over the surface.
How is epoxy flooring maintained in a bathroom?
For effective maintenance of epoxy flooring in a bathroom, regular mopping with mild cleaner and water is recommended. Applying a glaze coat or wax polish may be done occasionally to enhance its luster while protecting the surface from damage over time.

