Albo with no fuel

Surging Fuel Costs Another Hit to the Building Industry

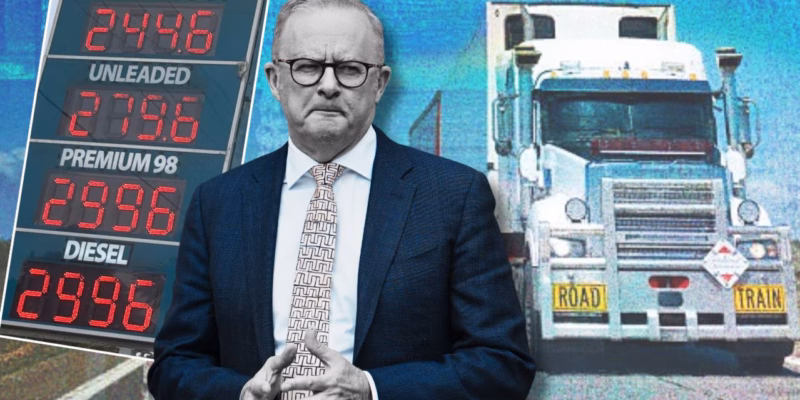
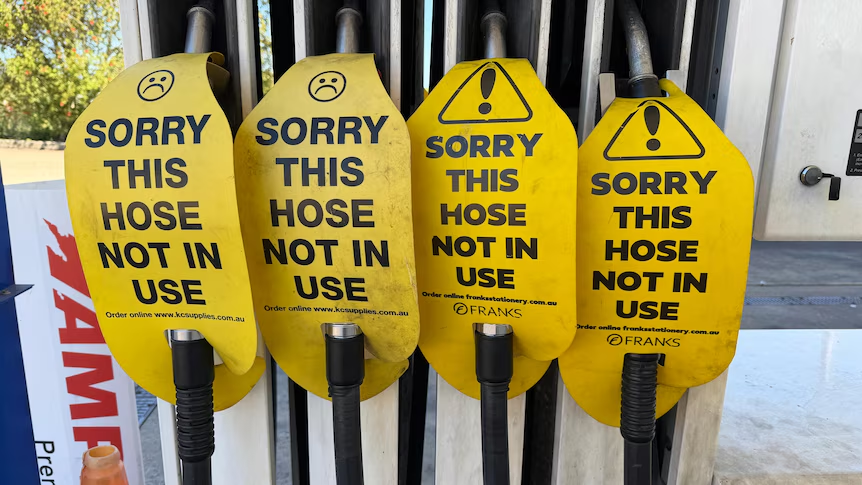
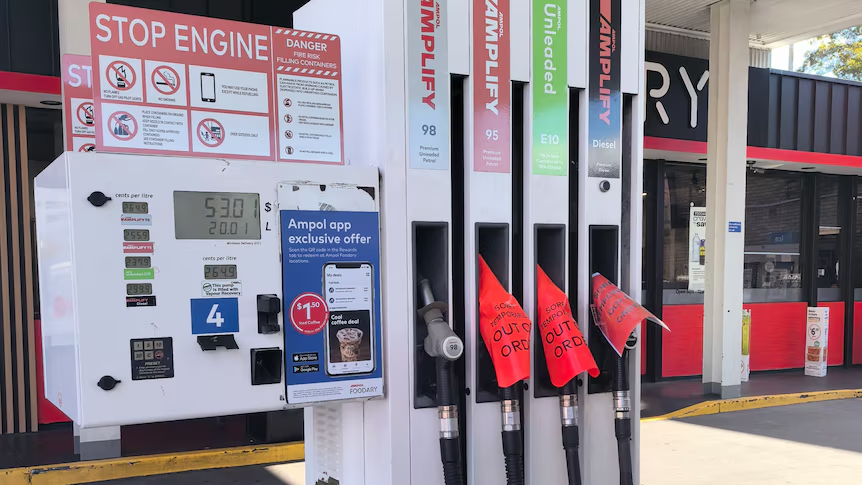
Over the last 6 weeks, we have seen fuel prices increase significantly and even availability start to decline due to the war in Iran.  It is starting to look like the COVID days all over again, when we had supply shortages and hefty price hikes as a consequence throughout the building industry not just in Adelaide but Australia wide.  We are hearing reports of potential fuel limitations and restrictions on using motor vehicles.  Some states are starting to offer free public transport for 1 month to minimise the number of passenger vehicles on the roads.

Building Supplies

Many of our suppliers have already put their costs up in relation to delivery fees, and we are now receiving daily updates from material companies such as plumbing, electrical and paint wholesalers who are noting up to a 30% to 40% increase in plastic products, which rely upon oil to manufacture their fittings.  It will only be a matter of time before all sectors have price increases as the flow on effects of these increases impact on business operations.

As a result of the COVID period in the building industry, we saw an average bathroom renovation go from $27,000 to around $45,000, nearly doubling.  We have seen an architecturally designed extension on a home of around 150 sqm go from $450,000 to nearly $1 million.  This has all happened over a period of approx 5 years.  Can the building industry handle another hefty price hike like this again?  And what does this mean for the customers?

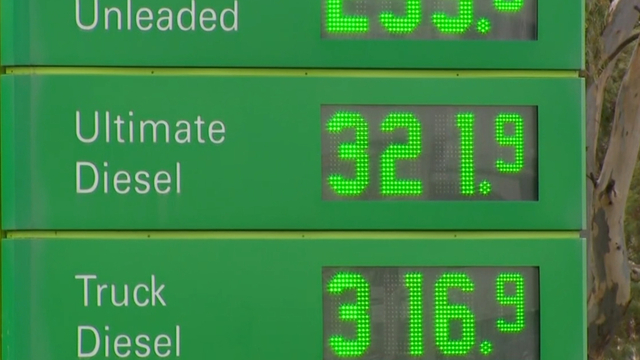
It is already bad enough with slow approval processes across all aspects of the building industry, snail-paced approval for new builds (red tape), Council Approvals on renovation/extensions and an increase in Builders Indemnity Insurance premiums effective from October 2025.  These costs and implications of the lack of urgency and level of red tape, creating delays in approvals are already hurting the building industry.  But now that we are seeing huge fuel costs impacting all parts of the building industry (diesel expected to hit $4 a litre shortly), it will be a sad outcome for many companies if this drags on too much longer.  

Coming Out Of The Hole

Hopefully, over the coming weeks, we will see some light at the end of the tunnelm, decrease in the fuel excise has already been implemented, and positive news surrounding supply levels to Australia.  There is no doubt that the government is making a huge amount of money out of this, just on the increased GST component right before their May budget, but we need relief in the building industry to ensure we do not see another COVID spike and another doubling of the cost to build new homes and renovate in Adelaide.

Housing Shortage Risks

With the growing housing shortage, and the severe skills shortage on top of that, this is not what any builder wants to or can afford to see happening to the industry.  Fixed price contracts that are potentially locked in for 12 to 18 months, is a long time to hold over massive price increases that no one saw coming.  With Adelaide currently experiencing a higher-than-ever construction activity in the CBD and the urban sprawl only just starting to gain momentum, a permanent increase in the cost to build will be a very interesting space to watch.  

We have seen this before, the costs are increased but they rarely come back down and we are all stuck with the inflated prices as the new normal.  

Let’s hope it isn’t the same outcome this time, Australian businesses and consumers simply can’t keep taking these financial hits.

old to new building renovations

Adapting Old buildings to Modern Renovations

Many of our projects over the years have involved keeping the front part of an old home and adding a modern addition to the rear of the building.  Some of these projects have been in locations across South Australia in Tusmore, St. George’s, Aldgate, Rose Park, Maylands, Toorak Gardens, Port Elliot and our most recent project, currently under construction, is in Kingswood.

When we carefully remove the old part of the building (typically over 100 years old), we find that construction methods from the early 1900’s often were not built to the same standard as that which we practise today in the building industry to comply with the NCC and Australian Standards.

old to new building renovations

Joining the old to the new

One of the first places in which the new building will join the old is the concrete slab.  Now, if, like most old buildings, the existing footings were made from slate or stone, they will not be suitable for dowelling, unlike concrete ones.

Marrying the old roof to the new roof.  This is another tricky area to deal with and can take some very carefully thought-out carpentry work to ensure we get the same roof pitches and fascia heights to complement the old with the new.

Adapting the old plumbing to the new.  It wasn’t until 1970 that Adelaide was using clay pipes for the sewer drainage system.  Depending on the location in South Australia, some homes were converted to PVC in the mid 70’s, with others in the late 70’s.  So in most cases we either find that the plumber needs to adapt to the Earthenware pipes or connect onto a brand new PVC connection supplied by SA Water (or there sub contractor BTR excavations).  Another area of plumbing is the water supply pipes

Upgrading the electrical supplies. Often, when we do a renovation, the electrical wiring will be renewed.  What we often find is the original bare earth, cotton sheathed cables still in use.  These older-style cables need to be replaced with new cables and often an upgraded switchboard.  Many of our clients are also opting for solar panels and batteries, so having an electrical system that can cope is very important.

Stormwater systems.  Many of the older properties we renovate either have no stormwater system in place or the stormwater system that is in place is neglected and no longer performing as it needs to.  Depending on the topography of the land today, we will install a storm water pumping chamber in the rear of the property to carefully manage the treatment of storm water back out to the water table on the street.

Reduce, Reuse and Recycle of building materials

During the demolition phase of the building project, we will typically see items like roof tiles, timber flooring and bricks being salvaged for reuse later in the project or taken away to a salvage yard for future use on other projects across SA.  The positives of adopting the 3 R’s in a renovation of an older building is costs savings and also saving the environment in many ways.  Over the last 20 years, we have seen a growing trend towards recycling hardwood timber floors.  The trend has grown so much that on many of our projects, we are having to import it from interstate.

It is an exciting process adapting the old to the new and seeing the finished product where you can feel the transition between the 2 eras.  Although each project presents its challenges, the end result is always an amazing build for our clients.  Using the right trades always helps the renovation process, and it’s something we are well-known for in Adelaide.  If you are considering a renovation, reach out to our team and let us help you get the process started.

a deck being built

Deck Joists: How Far Apart Should They Actually Be?

The short answer is this: 40cm on center. For most wood or composite decks, that’s your number.

But if you’re using thinner stuff, or putting the boards down at an angle, you gotta go closer. 30 cm on center. And no matter what, you check the local building codes first. Always.

Getting the on-center (or O.C.) spacing right for your deck joists is probably the most important thing you’ll calculate, I mean, it’s the whole foundation for the thing. It decides how the deck feels when you walk on it, whether it can handle a big party or a heavy snow, and if the building inspector is going to pass your work or make you tear it all down. If you get it wrong the whole deck will be bouncy and saggy and just… bad. So this is the guide that gets into the weeds, the engineering, the materials, and all the stuff that answers the big question of how far apart to put those joists, especially when you start doing weird stuff like adding a spa.

a deck with spacing of joists

The Guts of It: Why You Can’t Just Guess on Spacing

This isn’t art class. You can’t just “feel it out.” Getting into building means understanding a little bit of the physics behind it all, because proper joist spacing is a safety calculation, not a style choice. The whole substructure, the joists, the beams, the posts, it’s all one big system designed to move weight from your feet down into the dirt, and the joist spacing is the main knob you can turn to control how that system works.

A deck has to hold up two kinds of weight:

  • Dead Loads: This is just… the weight of the deck itself. The boards, the joists, the big heavy beams, railings, anything that’s screwed down permanently.
  • Live Loads: People. Furniture. That giant planter your aunt gave you. Snow. This is the stuff that comes and goes. The code (usually the IRC) makes you build it to handle at least 40 pounds per square foot (PSF) of this stuff.

And the joists are what carry all that weight over to the beams. So how far apart they are changes everything about how the deck feels and performs.

What Happens When You Get It Wrong

Not following the rules on joist spacing is just asking for trouble. Big trouble.

  • The Trampoline Effect: Joists too far apart means the deck boards have to span a bigger gap than they’re made for. Which is why you get that bouncy, spongy feeling under your feet. It’s not just weird, it’s the first sign of a weak deck.
  • Sagging and Warping: Over time, those wide spans will make the deck boards droop between the joists. Looks terrible. Creates puddles and tripping hazards. This is a huge problem with composite and PVC decking, which can get soft in the sun and sag.
  • Structural failure. This isn’t a joke; with a really heavy load, like too many people crowded in one spot, the boards themselves can just snap or the screws can rip right out.
  • Failing Inspection: The town inspector has a rulebook, and “maximum joist spacing” is a big chapter. Get it wrong, and you’ll be ripping it all up. On your own dime.
  • Voided Warranties: The company that made your expensive decking has installation rules for a reason. If you space your joists at 18 inches when the manual says 16 inches max, your warranty is officially trash.

Top Ten Things to Think About for a Strong Deck Frame

If you look at decks that last for decades, they all get the same things right. Joist spacing is kind of the thread that ties all these things together, you have to think about the whole system.

  1. What decking you’re using. The single biggest factor.
  2. The joist wood itself, the size, the grade, the species.
  3. Joist span. That’s the distance the joist travels between beams. It’s not the same as spacing. People always mix those up.
  4. Beams. What size, and where do they go?
  5. Ledger board. How you attach the deck to the house is critical. Seriously critical. Okay, stop. The ledger is probably the most important part of all. No, wait, the decking choice is first because it dictates the joist spacing from the get-go. But a bad ledger will bring the whole thing down. Anyway…
  6. Blocking and bridging. Those little pieces of wood between the joists? They’re not optional. They stop the joists from twisting.
  7. Cantilevers. That’s the part of the joist that hangs over a beam. There are strict rules about how far you can go.
  8. Hardware. Use the right metal connectors and hangers. Nails are not enough.
  9. Airflow underneath. You need to let the underside breathe or it’ll rot.
  10. Your local code. The final boss. Whatever the local inspector says, goes. End of story. Call your town’s building department and talk to someone, ask for Sharon if you’re in my town, she’s been there forever and knows the amendments by heart.

How Decking Material Messes With Your Spacing Plans

The boards you walk on have the biggest say in your joist spacing. Every material has a different stiffness. Some are strong, some are… flexible.

The bottom line.

So how far apart should they be? It depends on what you’re putting on top.

  • Pressure-Treated (PT) Pine
  • Standard 5/4 boards (~32 mm thick) can handle 400 mm on-center joist spacing with no problem.
  • If you use 2×6 boards (~38 × 140 mm), you could stretch to 600 mm, but I wouldn’t. 400 mm just feels more solid underfoot.
  • Cedar / Redwood
  • Pretty much the same as PT pine.
  • For 5/4 boards (~32 mm thick), use 400 mm on-center spacing.
  • Composite Decking
  • This material behaves more like plastic than wood, so it sags more.
  • 400 mm on-center is the absolute maximum for most standard composite boards.
  • For thinner, cheaper scalloped boards, you really need to drop to 300 mm on-center. No shortcuts here.
  • PVC Decking
  • All plastic, no wood fiber.
  • Same rules as composite decking: 400 mm on-center is standard.
  • Ipe and Other Tropical Hardwoods
  • Extremely dense and strong. They could probably span 600 mm, but don’t do it.
  • Stick with 400 mm on-center and the deck will feel rock-solid for decades.

Diagonal Decking is a Whole Different Ballgame

This is the part that trips everyone up. If you lay your deck boards at a 45-degree angle it looks great, but it completely changes the math of your structure.

When you put the boards on an angle, the actual space the board has to cross gets way bigger, it’s a geometry thing with triangles and stuff, so your 400mm spacing suddenly becomes more like 600mm inches which is way too much and the boards will feel super bouncy and sag over time so you have to pull the joists in to 300mm on center to make up for it.

Simple as that.

And you’ll need to add a ton of blocking, which are just short 2x pieces fit between the joists. You need them everywhere to support the ends of the boards where they meet.

Case Study 1: Building Stairs That Don’t Feel Flimsy

For standard 5/4 decking boards (~32 mm thick) used as stair treads, you should space the stringers 400 mm apart, but honestly 300 mm is much better so the stairs don’t flex.

If you’re using thick 2×12 treads (~38 × 285 mm), you have more leeway — maybe up to 600 mm stringer spacing.

For composite treads, manufacturers almost always specify 300 mm maximum stringer spacing. No exceptions.

And make sure you use proper metal stringer hangers/connectors to support the stringers. Never just nail them in place.

Case Study 2: Framing for a Spa (Don’t Do This the Normal Way)

A normal deck cannot hold a hot tub.

Let me repeat that: a normal deck frame – even with joists at 300 mm on-center, can completely fail under the weight of a hot tub. A filled tub with a few people can weigh over 2,000 kg. So the real question isn’t “how far apart are the joists?” – it’s “how do I build a second, mini-deck that’s ridiculously overbuilt?”

You need a dedicated grid of concrete footings directly under the hot tub area.

You’ll use very large beams, often built up from three 2×10s (~38 × 235 mm each) laminated together.

The joists under the tub should be larger, typically 2×10s (~38 × 235 mm), and spaced closer, around 300 mm on-center, sometimes even doubled.

You also need solid blocking between every single joist in that area.

You’re essentially building a separate, bomb-proof structure that just happens to sit at the same height as the rest of your deck. This is one of those times you really, really should consult a structural engineer.

Case Study 3: Outdoor Kitchens

Outdoor kitchens are tricky because the loads are heavy and unevenly distributed.
A granite countertop is extremely heavy, and a large grill creates a concentrated point load.

Under heavy countertops, reduce joist spacing to 300 mm on-center. Add extensive blocking directly under cabinet bases. You should double up joists beneath large grills or pizza ovens.

You also need to plan ahead for plumbing and electrical. You can’t just cut big holes in joists, you must frame around penetrations, essentially like creating a small window opening.

Paperwork and Plans

You need a real plan. On paper. For the municipality.

Not a sketch, a proper framing plan showing:

  • Joist size, species, grade, and spacing (e.g. 38 × 235 mm No.2 PT pine at 400 mm O.C.)
  • Beam sizes and locations
  • Footing locations
  • All connectors and hardware

You submit this before digging anything. The building department checks it against code, and if it passes, you get a permit. Do not skip this step.

Other Stuff You Should Know

It All Works Together

Span vs. Spacing, let’s be clear.

  • Spacing = distance between joists (e.g. 400 mm)
  • Span = distance a joist travels between supports (house to beam, beam to beam)

They directly affect each other. A 2×8 joist (~38 × 184 mm) at 400 mm spacing might span 3.6 m. Increase spacing to 600 mm, and that allowable span drops significantly. It’s always a trade-off.

Attaching to the House

The ledger board is where many decks fail , usually due to rot.

Use through-bolts wherever possible (better than lag screws), and always install proper flashing to keep water from getting behind the ledger.

Joist Tape

This is a newer practice, and it’s excellent.

Apply butyl joist tape to the top of joists and beams. It seals the wood and screw penetrations, keeping water out and dramatically extending the life of the framing. Use it.

A Few Last Questions…

Below we contemplate some questions customers ask us.

Does diagonal decking change joist spacing?

Absolutely.
If you planned 400 mm spacing for straight decking, you must reduce it to 300 mm on-center for diagonal layouts. The boards span farther at an angle and need extra support.

What happens if joists are too far apart?

Nothing good.

You’ll get a bouncy deck, sagging boards, and an uneven surface. Over time, this becomes a safety issue, including the risk of boards cracking underfoot. It’s simply a weak deck.

How does decking type affect joist spacing?

It’s one of the biggest factors.

  • Wood decking is fairly stiff, 400 mm spacing usually works.
  • Composite and PVC decking are more flexible and soften in heat, so they often require 300 mm spacing to prevent long-term sagging.

Always check manufacturer specs.

How far apart should joists be for a hot tub?

That’s a whole different level.

You need a specially engineered support system. Joists will typically be 300 mm apart or less, and much larger (2×10 or 2×12, ~38 × 235–285 mm). But that’s only part of it, you’ll also need more beams, more posts, and more footings, placed directly under the tub.

Don’t guess. The loads are massive.

polished concrete floor with man standing on it

A Practical Guide to the Different Types of Concrete

Concrete isn’t just one thing. It’s a whole family of materials, each one engineered for a very specific job. You’ve got your everyday stuff for sidewalks, and then you have the high-tech mixes that make skyscrapers possible. They all start with the same basic ingredients, but how you tweak the recipe changes everything. We’ll be looking at the standard mixes, the high-performance variants, specialty applications, and even the chemicals that give concrete its superpowers.

Think of this as a walkthrough, from the ground up. We’ll cover:

  • The basic DNA of any concrete mix.
  • A look at the main players: normal, high-strength, lightweight…
  • Diving into the really specialized stuff engineered for unique problems.
  • The chemical admixtures, the secret sauce.
  • Why you’d almost always opt for premix over mixing on site.
  • A final word on picking the right tool for the job.

The Fundamentals: What’s Actually in a Concrete Mix?

Before we get into the wild world of shotcrete and polymer concretes, you have to understand the basics of the mix itself. A concrete mix design isn’t a recipe from a cookbook; it’s a materials science formula. Every single component is proportioned to hit specific targets for strength, how it behaves when wet (workability), and how it will survive for decades out in the real world. This is a balancing act between materials, the environment, and what the structure needs to do.

The Core Components

At its heart, every mix comes down to three things: a binder (cement), aggregates (rocks and sand), and water. The magic happens in how these three interact.

Cement: The Glue Portland cement is the standard. It’s a hydraulic cement, which just means it reacts with water to get hard. This reaction, called hydration, creates a paste that coats all the aggregates. As it hardens, it locks everything together into that familiar stone-like mass. The specific type of Portland cement you use (like a Type I for general use or a Type III for getting strong fast) is a huge lever in the mix design that controls setting timefinis and how quickly you build strength.

Aggregates: The Skeleton The aggregates, sand and gravel, make up the bulk of the mix, usually around 60% to 75% of the volume. They’re not just cheap filler; they are the structural backbone.

  • Fine Aggregate: This is your sand (particles up to 4.75mm). It’s critical for filling the tiny gaps between the bigger rocks, which makes the mix denser and easier to work with.
  • Coarse Aggregate: This is the gravel or crushed stone (anything bigger than 4.75mm). This forms the primary load-bearing skeleton of the concrete.

The Water-Cement Ratio: The God Parameter The water-to-cement (w/c) ratio is probably the single most important number in any mix design. It’s literally the weight of the water divided by the weight of the cement. A lower w/c ratio almost always means stronger, more durable concrete because it creates fewer pores in the hardened paste. But here’s the trade-off: less water makes the fresh concrete stiff and incredibly difficult to place and finish. This is the central problem that admixtures were invented to solve.

The Point of Mix Design

The goal is simple: hit the project specs as cheaply as possible. That means dialing in the proportions to nail two main targets. First is compressive strength (what everyone thinks of), typically measured after 28 days of curing. The other, equally important target is workability, often checked with a slump test. The mix has to be fluid enough to get into the forms and around rebar without the heavy aggregates separating and settling at the bottom.

Beyond that, you’re designing for a service life. Will it be exposed to freezing and thawing? De-icing salts? Sulfates in the soil? All these factors dictate your choice of cement, w/c ratio, and whether you need special admixtures to protect the concrete from attack.

The Main Classifications of Concrete

Concrete types are generally bucketed by their strength, density, or how they’re used. Getting these main categories straight is the first step in material selection. Below is a quick cheat sheet, but we’ll dig into what these numbers and ingredients actually mean in practice.

Concrete TypeTypical Compressive Strength (MPa)Key Differentiating IngredientsCommon Applications
Normal Strength20 – 40Standard Portland cement, sand, coarse aggregatePavements, general building construction, residential foundations
High-Strength60 – 120+Silica fume, superplasticizers, specific aggregate gradingHigh-rise buildings, long-span bridges, shear walls
Lightweight3.5 – 40Lightweight aggregates (pumice, expanded shale, scoria)Long-span bridge decks, precast elements, insulating floors
Self-Compacting (SCC)30 – 60High-range water reducers (superplasticizers)Heavily reinforced structures, complex architectural forms
Pervious / Porous2.8 – 28Minimal to no fine aggregate (sand), creating voidsParking lots, sidewalks, stormwater management systems
Shotcrete20 – 50Accelerating admixtures, fine aggregatesTunnel linings, slope stabilization, swimming pool shells
Polymer Concrete70 – 140Polymer resin binder (epoxy, polyester) instead of cementIndustrial flooring, concrete repair, precast utility components

Data compiled from ACI and other material science publications.

Normal Strength Concrete

This is your workhorse. It’s the backbone of the construction industry, used for everything from foundations to sidewalks. It’s a no-frills mix of cement, sand, and aggregate, designed to balance cost, strength (usually 20-40 MPa), and workability. Its density sits around 2,400 kg/m³. It’s versatile, but it has its limits. For anything that needs to be exceptionally strong, lightweight, or stand up to harsh environments, you need to upgrade.

High-Strength Concrete (HSC)

Once you push past 60 MPa, you’re in the realm of high-strength concrete. This stuff is what allows us to build supertall skyscrapers with reasonably sized columns on the lower floors. The key to getting this strength is a very low w/c ratio (think below 0.35). To keep it from being unworkably stiff, you have to use powerful admixtures called superplasticizers. On top of that, materials like silica fume are added. Silica fume particles are microscopic, and they pack into the tiny voids within the cement paste, creating an incredibly dense and impermeable microstructure. This not only boosts strength but also makes it highly resistant to chemical attack, a huge benefit for things like bridge decks exposed to de-icing salts.

High-Performance Concrete (HPC)

Now, people often use “high-strength” and “high-performance” interchangeably, but there’s a critical difference. All high-strength concrete is high-performance, but not all high-performance concrete is necessarily high-strength. HPC is engineered for a specific performance goal that might not be raw strength. The defining characteristic is usually durability. For an HPC mix, the focus is on creating an almost impermeable material to maximize the structure’s service life. We’re talking low permeability, high resistance to chemical attack, or maybe high early strength for fast-track construction. This is where supplementary cementitious materials (SCMs) like fly ash and slag become absolutely essential.

Lightweight Concrete

With a density often down in the 1,440 to 1,850 kg/m³ range, lightweight concrete achieves its weight reduction by swapping out normal rock and gravel for porous, lightweight aggregates like expanded shale, pumice, or scoria. This has a massive benefit: it reduces the dead load on a structure, which can mean smaller columns, beams, and foundations. It’s a game-changer for projects like adding new floors to an existing building or for long-span bridge decks where every kilogram counts. A side benefit of all those air pockets in the aggregate is excellent thermal and acoustic insulation.

Heavyweight (High-Density) Concrete

The complete opposite. Here, the goal isn’t strength but mass. With densities over 3,000 kg/m³, this concrete is used for radiation shielding. It’s made with extremely dense aggregates like barite or even iron shot. You’ll find it forming the walls of radiation therapy rooms in hospitals, nuclear power plants, and labs with particle accelerators.

Specialized Concrete for Modern Problems

Beyond the basics, there’s a whole suite of specialized concretes that solve unique engineering challenges. These are the result of some serious materials science, designed for flowability, permeability, or unique application methods.

Self-Compacting Concrete (SCC)

Also known as self-consolidating concrete, this is a brilliant piece of engineering. It’s an ultra-flowable mix that can fill complex formwork and wrap around dense reinforcement cages with zero mechanical vibration. It flows like a milkshake but doesn’t segregate. The magic is in its rheology, a careful balance of high powder content and advanced superplasticizers that give it low yield stress but high viscosity. The benefits are huge: faster construction, a beautiful surface finish right out of the form, and a safer job site without the deafening noise of vibrators. But be warned: the mix design is incredibly sensitive. A small change in water content or aggregate moisture can turn a perfect SCC mix into a segregated mess.

Pervious (Porous) Concrete

This is concrete designed to let water pass right through it. The trick? You leave out most or all of the sand. This creates a network of interconnected voids (typically 15-25% of the volume) that water can drain through. It’s a fantastic tool for stormwater management—used in parking lots and sidewalks, it allows rainwater to infiltrate the ground instead of overwhelming storm drains. It’s not for heavy-duty pavements, as the voids reduce its strength, and it requires maintenance. The pores can get clogged with dirt and debris, so they need to be periodically cleaned to keep them working.

Shotcrete (Sprayed Concrete)

Shotcrete is defined by its application method: it’s pneumatically sprayed at high velocity onto a surface. This allows you to place concrete on vertical or even overhead surfaces without forms. Think…

  • Tunnel linings
  • Slope stabilization, often with rock bolts and mesh
  • Repairing damaged concrete surfaces
  • Free-form structures, like artificial rocks or swimming pools.

It comes in two flavors: a dry-mix process where water is added at the nozzle (giving the nozzleman a lot of control) and a wet-mix process where it’s all mixed beforehand and pumped to the nozzle. Wet-mix generally gives you better consistency. To get it to stick overhead, shotcrete mixes often include accelerating admixtures that make it set almost instantly.

Polymer Concrete

Here, we throw out the Portland cement entirely and replace it with a polymer resin like epoxy or polyester as the binder. The aggregates are mixed with the resin, which then cures via a chemical reaction. The resulting material is a beast. It can have incredible compressive strength (>100 MPa), cures very quickly, and is almost completely resistant to chemical attack and water penetration. Its bond to old concrete is also phenomenal. This makes it an expensive but highly effective material for things like industrial flooring in chemical plants or critical structural repairs.

Precast and Prestressed Concrete

Precast simply means the concrete element (a beam, a wall panel, a pipe) was cast in a controlled factory setting and then shipped to the site. This factory control gives you a much higher and more consistent quality than you can ever achieve casting concrete in the field with variable weather.

Prestressed concrete is a type of precast where we introduce compressive stresses into the element before it ever sees a load. This is done to counteract the tensile stresses that will be applied when it’s in service (remember, concrete is terrible in tension).

  • Pre-tensioning: Steel tendons are stretched in the casting bed, concrete is poured around them, and once the concrete hardens, the tendons are cut, transferring compression into the concrete.
  • Post-tensioning: Ducts are cast into the concrete. Later, tendons are fed through, tensioned with jacks, and then anchored. This technology is what makes long, slender, and efficient bridge girders and floor slabs possible.

Fiber-Reinforced Concrete (FRC)

This is concrete with a bunch of small, discrete fibers mixed in. The point of the fibers isn’t really to increase the ultimate compressive strength. It’s all about controlling cracking and improving toughness. When a microcrack starts to form, a fiber will bridge the gap, transferring load and preventing the crack from growing. This makes the concrete far less brittle and able to absorb much more energy before failing. The fibers can be:

  • Steel fibers for serious toughness in industrial floors or shotcrete.
  • Glass fibers for lightweight architectural panels (GFRC).
  • Synthetic fibers like polypropylene, mostly just to control plastic shrinkage cracks that form when the concrete is still fresh.
  • Natural fibers are an area of ongoing research for sustainability.

Decorative Concrete

This is where concrete gets to be pretty.

  • Stamped Concrete: Molds are pressed into fresh concrete to mimic the look of stone, brick, or wood.
  • Stained and Polished Concrete: Acid stains react chemically with the concrete to create rich, variegated colors. Polishing involves grinding the surface smooth to a high gloss, often revealing the beauty of the aggregates inside.

The Secret Sauce: Types of Concrete Admixtures

Admixtures are the chemicals you add to the mix to tweak its properties. They are the tools that allow us to create all the high-performance and specialized concretes we’ve been talking about.

  • Water-Reducers (Plasticizers): They let you get the same workability (slump) with less water. Less water means a lower w/c ratio, which means higher strength. Simple.
  • High-Range Water Reducers (Superplasticizers): These are plasticizers on steroids, able to cut water content by up to 30%. They are non-negotiable for making high-strength concrete and are the key ingredient in self-compacting concrete.
  • Accelerators: They speed up hydration, making the concrete set faster and gain strength earlier. Essential for cold-weather concreting or when you need to strip forms quickly.
  • Retarders: The opposite of accelerators. They slow down hydration, giving you more time to place and finish the concrete. A lifesaver during hot weather or for massive, continuous pours where you need to avoid “cold joints.”
  • Air-Entraining Admixtures: These create a network of microscopic, stable air bubbles in the concrete. When water in the pores freezes and expands, it can move into these tiny air pockets, relieving the pressure. This dramatically improves a concrete’s ability to survive freeze-thaw cycles.
  • Corrosion-Inhibiting Admixtures: These chemicals are added to the mix to protect the steel rebar from corrosion, usually by forming a protective film on the steel’s surface. They are a crucial part of designing for long-term durability in corrosive environments.

The Logistics: Why Go with Premix Concrete?

Premix, or ready-mix concrete, is batched at a plant and delivered to your site in a truck. For any serious construction project, this is almost always the way to go versus mixing it yourself on-site. The reason comes down to one word: control.

A ready-mix plant is a factory. Everything is automated and computer-controlled. The moisture content of the aggregates is measured, materials are weighed precisely, and admixtures are dosed accurately. This gives you a level of consistency and quality from batch to batch that is practically impossible to replicate with manual, on-site mixing. It also simplifies site logistics immensely. You don’t have to store huge piles of sand, gravel, and cement, and you don’t need a crew of people dedicated to running a mixer. For large pours, it’s the only way to get the volume of concrete you need, when you need it. While it might seem more expensive upfront, the cost of inconsistent quality, material waste, and labor for site-batching almost never pencils out for professional work.

Final Word: Picking the Right Concrete

As you can see, the world of concrete is far more complex than just specifying a certain compressive strength. The selection process has to be a holistic evaluation of what the structure needs to do over its entire life. You have to consider the environment it will live in, the loads it will carry, how it will be built, and even what you want it to look like. From the simple utility of a normal strength sidewalk mix to the slender, durable columns of an HSC skyscraper, the optimal choice is always the one that is perfectly matched to the job at hand.

A Few Practical Questions

How does water resistance vary between these different types?

It varies dramatically. On one end, you have pervious concrete, which is designed to be a sieve. On the other end, you have materials like polymer concrete or a well-designed shotcrete mix, which are engineered to be virtually impermeable. These are your go-to options for things like swimming pools, tunnels, or marine structures where keeping water out is the entire point.

Which of these is the most sustainable option?

That’s a tricky question, but generally, any concrete that incorporates significant amounts of supplementary cementitious materials (SCMs) gets the nod. “Green concrete” often refers to mixes that replace a large portion of the Portland cement, the production of which is very CO2-intensive, with industrial byproducts like fly ash (from coal plants) or slag (from steel manufacturing). This not only cuts the carbon footprint but also reduces landfill waste.

For decorative work, what are the best bets?

If aesthetics are the main driver, stamped and stained concrete are probably the most popular choices. Stamped concrete gives you texture, letting you mimic expensive materials like slate or flagstone for a fraction of the cost. Staining, especially acid staining, can create incredibly rich, deep, and unique colors that look like natural stone. For a modern, industrial look, nothing beats polished concrete, which grinds the surface smooth and brings out the character of the aggregates.

concrete form work

When to Remove Formwork from a Concrete Slab

Remove vertical formwork from slabs after 16 to 24 hours. The slab’s horizontal support forms must stay longer. Concrete should reach 70% of its design strength before their removal. This process often takes 7 to 21 days. The total slab span determines the final required time for safe removal.

Fundamental Principles: When Should Formwork Be Removed?

The decision of when to remove formwork, or “strike” it, from a concrete slab is an important engineering judgment that directly impacts structural integrity, safety, and project timelines. Premature removal can lead to excessive deflection, surface defects, or catastrophic failure. Conversely, leaving formwork in place for too long can delay subsequent construction activities and increase costs. The determination hinges on a core principle: the concrete must have achieved sufficient strength to support its own weight (dead load) and any construction loads that will be applied to it without adverse effects. This process is governed by the rate of concrete strength gain, the type of formwork used, and the ambient environmental conditions.

The Critical Role of Concrete Strength Gain

Concrete does not “dry” but cures through a chemical reaction called hydration, where water reacts with cementitious materials to form a crystalline matrix that binds the aggregates. This process is what gives concrete its compressive strength. The rate of strength gain is logarithmic, meaning it is rapid in the first few days and slows over time. A typical concrete mix may achieve:

  • 40-50% of its 28-day design strength in 3 days.
  • 65-75% of its 28-day design strength in 7 days.
  • 85-95% of its 28-day design strength in 14 days.
  • ~99% of its 28-day design strength in 28 days.

The fundamental requirement for striking formwork is that the in-place concrete strength must be high enough to resist the stresses imposed upon it. These stresses primarily come from the slab’s self-weight and any additional construction loads, such as materials, equipment, or workers. The required strength is specified by the structural engineer and is typically a percentage of the concrete’s characteristic 28-day design strength (f’c).

concrete formwork

Differentiating Between Vertical and Horizontal Formwork

Understanding the function of different formwork components is essential to determining the appropriate removal time. Formwork can be broadly categorized into two types, each with distinct requirements for striking.

  • Vertical Formwork: This includes the forms for columns, walls, and the sides of beams. This type of formwork is not load-bearing once the concrete has set. Its primary purpose is to contain the wet concrete and shape the element. As it does not support any vertical loads, it can be removed much earlier than horizontal formwork. The main consideration for its removal is ensuring the concrete surface is hard enough to resist damage during the stripping process and to hold its own shape.
  • Horizontal Formwork: This includes the soffit forms (the underside sheathing) and the shoring (props and supports) for slabs and beams. This formwork is critical as it supports the full weight of the concrete until it has gained enough strength to be self-supporting. The removal of this load-bearing system is the most critical step and must be guided by strict strength and time requirements.

Impact of Environmental Conditions on Curing Time

The rate of hydration is highly sensitive to temperature and moisture. These environmental factors significantly influence how quickly concrete gains strength and, consequently, when formwork can be removed.

  • Temperature: Higher ambient temperatures accelerate the hydration reaction, leading to faster strength gain. In warm weather (e.g., above 25°C or 77°F), stripping times may be reduced. Conversely, cold temperatures (below 10°C or 50°F) drastically slow hydration. In such conditions, formwork must be left in place much longer, and cold-weather protection measures like insulating blankets or heated enclosures may be necessary to ensure proper curing.
  • Moisture: Hydration requires the presence of water. If the concrete surface is allowed to dry out prematurely, the curing process will stop, and the concrete will not achieve its full potential strength. Therefore, proper curing techniques (e.g., wet curing, curing compounds) are vital. This ensures the concrete in place achieves the required strength within the expected timeframe.
  • Wind: High winds can increase the rate of evaporation from the concrete surface, leading to premature drying and potential plastic shrinkage cracking. This can compromise the surface integrity and affect overall strength development.

Prescribed Concrete Formwork Striking Times

While the ultimate determinant for formwork removal is concrete strength, industry standards and codes of practice provide time-based guidelines. These schedules are typically conservative and assume standard conditions (e.g., Ordinary Cement, temperatures above 15°C). They serve as a reliable baseline but should always be used in conjunction with engineering judgment and, where possible, strength verification testing.

Time-Based Guidelines vs. Strength-Based Verification

There are two primary methods for deciding when to strip formwork. Each way has its own set of advantages and applications.

  • Time-Based Method: This traditional approach relies on minimum time periods specified in building codes like AS 3600. These periods are based on decades of empirical data and provide a safe, if not always efficient, schedule. They are simple to follow but do not account for variations caused by special cement types, admixtures, or actual job-site weather conditions.
  • Strength-Based Method: This modern approach allows formwork removal once the in-place concrete has reached a pre-determined percentage of its design strength, as verified by testing. This is a more precise and efficient way, as it can significantly shorten formwork cycle times in favorable conditions, leading to faster project completion. It requires a robust quality control program with on-site testing of concrete samples.

Detailed Striking Time Table for Concrete Elements

The following table provides a comprehensive guide on when to remove formwork from a concrete slab and other elements, outlining the necessary concrete strength to support subsequent loads and protect the finished surface. The proper way to strip formwork is dependent on the type of cement, ambient temperature, and the specific element in place.

A guide on when to remove formwork from a concrete slab, considering the necessary concrete strength to support subsequent loads and protect the finished surface. The proper way to strip formwork is dependent on the type of cement, ambient temperature, and the specific element in place.

Formwork ComponentMinimum Period (Ordinary Portland Cement, Temp >15°C)Required Concrete Strength (% of Design)Key Considerations & Impact of Loads
Vertical Formwork (Columns, Walls, Beam Sides)16 – 24 Hours~15-20%This formwork is non-load-bearing; early removal is possible but care must be taken to not damage the concrete surface or edges.
Slab Soffits (Props can be re-fixed immediately after removal)3 Days~40%Allows for reuse of sheathing while reshoring supports the slab against its own dead loads until it gains sufficient strength.
Slab Soffits (Props completely removed)Span up to 4.5m: 7 Days~70-75%The concrete must have enough strength to support its self-weight and any imposed construction loads without excessive deflection.
Slab Soffits (Props completely removed)Span over 4.5m: 14 Days~70-75%Longer spans impose higher dead loads on the slab, requiring a longer curing time for the concrete to gain adequate strength.
Beam Soffits (Props can be re-fixed immediately after removal)7 Days~50%Similar to slabs, this way allows for faster formwork cycling while ensuring the beam is supported against initial self-weight loads.
Beam Soffits (Props completely removed)Span up to 6m: 14 Days~80-85%Beams are critical structural elements; their formwork must remain in place longer to prevent failure under self-weight.
Beam Soffits (Props completely removed)Span over 6m: 21 Days~80-85%Significant spans carry heavy loads and demand a high percentage of design strength before full support is removed.
General Strength-Based RemovalVaries (Test Dependent)70% of characteristic strengthA modern way to determine stripping time; removal is permitted once on-site cube/cylinder tests confirm the concrete in place has reached this target.

Sources: Based on guidelines from IS 456:2000 (Indian Standard Code of Practice for Plain and Reinforced Concrete) and principles from ACI 318 (American Concrete Institute).

Vertical Formwork (Non-Load-Bearing)

For vertical components, the primary concern is marring the concrete surface. The removal window of 16-24 hours allows the concrete to be hard enough to be self-supporting and resistant to minor damage, but still “green” enough for minor surface repairs or finishing if needed.

Horizontal Formwork (Soffits and Beams)

The support system for slabs and beams is critical. The concept of reshoring is often employed on multi-story projects to accelerate construction. In this process, the main shoring and sheathing are removed after a few days (e.g., 3 days), and a smaller number of props (reshores) are immediately re-installed to continue supporting the slab. This frees up the bulk of the formwork material for use on the next level while ensuring the slab receives the support it needs to handle its own weight and further construction loads.

The Influence of Span Length on Removal Times

The dead load of a slab or beam increases significantly with its span. Longer spans result in higher bending moments and shear stresses at the center and supports. Consequently, the concrete must achieve a higher level of strength before the formwork can be safely removed. This is why codes and standards prescribe longer minimum periods for longer spans, ensuring the structural element can carry these higher internal loads without risk of failure or excessive long-term deflection.

Technical Procedure: A Step-by-Step Guide to Removing Formwork

The physical act of removing formwork must be done systematically and carefully to prevent damage to the structure and ensure the safety of workers.

Pre-Removal Inspection and Safety Protocol

Before any stripping work begins, a thorough inspection and safety review are mandatory. This protocol is the correct way to initiate the process.

  • Confirm that the engineer of record has approved formwork removal.
  • Verify that the concrete has achieved the specified minimum strength.
  • Ensure the area below the formwork is properly cordoned off and clear.
  • Inspect all formwork components for any signs of binding or stress.
  • Wear appropriate Personal Protective Equipment (PPE), including hard hats and gloves.
  • Have a clear plan for lowering and handling heavy formwork panels.
  • Check that all temporary loads have been removed from the slab surface.
removing formwork

Verifying Concrete Strength In-Place

The most reliable method for strength verification is testing samples cured under the same conditions as the actual structure. Field-cured cylinders or cubes are cast from the same concrete batch used in the slab and are left to cure alongside it. These samples are then tested in a compression machine at various intervals (e.g., 3, 7, 14 days) to directly measure the in-place compressive strength. This data provides definitive proof that the concrete has reached the required strength for safe stripping.

Sequential Removal Process for Slabs and Beams

The removal process should be sequential and deliberate to avoid shock loading the new concrete structure. A disorganized removal can create unintended stress points.

  1. Ease Connections: Begin by gently loosening wedges, clips, and ties. Do not remove them completely at first. This allows the formwork to slightly separate from the concrete surface without a sudden drop.
  2. Remove Vertical Forms: Start by stripping the vertical formwork, such as beam sides and column forms, as they are non-load-bearing.
  3. Lower Horizontal Supports: For horizontal formwork, systematically lower the shoring props. This should be done gradually, working from the mid-span outwards towards the supports. Never remove all props from one area at once.
  4. Remove Sheathing: Once the supports are lowered, the soffit sheathing (plywood or panels) can be carefully pried away and removed. Avoid using the concrete as a leverage point, as this can chip or damage the surface.

Post-Removal Surface Inspection and Curing

Immediately after the formwork is removed, the concrete surface should be inspected for any defects such as honeycombing, voids, or rock pockets. Minor imperfections can be repaired with an appropriate grout mixture. Most importantly, the curing process must continue. The formwork provides a barrier against moisture loss, and its removal exposes the concrete to the air. It is critical to apply a curing compound or use other methods like wet burlap to ensure the slab continues to hydrate and achieve its full design strength.

Preliminary Considerations: Concrete Placement and Mix Design

The timeline for formwork removal is heavily influenced by decisions made before the concrete is even poured. Proper planning of the concrete mix and placement procedures is essential.

How Concrete Mix Affects Formwork Removal Time

The composition of the concrete mix has a direct impact on its rate of strength gain. Engineers can manipulate the mix design to accelerate the construction schedule.

  • Cement Type: Using Type III (High-Early-Strength) cement can significantly reduce the time needed to reach the required strength for stripping.
  • Admixtures: Chemical admixtures like accelerators can be added to speed up hydration, especially in colder weather. Water-reducing admixtures can increase strength without adding more cement.
  • Water-Cement Ratio: A lower water-to-cement ratio results in a higher-strength, more durable concrete that gains strength more quickly.

Best Practices for Pouring a Concrete Slab

The quality of the concrete placement is just as important as the mix design. A well-executed pour ensures a homogenous, strong slab.

  • Ensure all reinforcement and embedded items are securely in place.
  • Deposit the concrete as close to its final position as possible.
  • Consolidate the concrete thoroughly with vibrators to remove air pockets.
  • Properly level and finish the concrete surface to achieve the desired texture.
  • Begin curing procedures as soon as the surface finish will not be damaged.
  • Protect the fresh concrete from extreme weather conditions.
  • The way concrete is placed and finished directly affects its surface quality.

The Importance of Professional Formwork Installation

The ease and safety of formwork removal begin with its construction. Professional installation is not just about containing wet concrete; it’s about designing a system that can be dismantled efficiently without damaging the structure it helped create.

Why Proper Formwork Carpentry is Crucial for Safe Removal

A well-designed formwork system is built with removal in mind. Key elements include using release agents on the form faces, ensuring components are not wedged too tightly, and designing a shoring system that can be lowered systematically. Poorly built formwork can bind to the concrete, making it extremely difficult to remove and increasing the risk of damaging the new concrete surface and edges. The strength and stability of the formwork itself are paramount to preventing blowouts during the pour and ensuring a safe environment.

Finding and Vetting a Formwork Specialist

Engaging a qualified formwork contractor is a critical investment. When sourcing a specialist, look for a team with extensive, verifiable experience on projects of a similar scale and complexity. A professional formwork carpenter understands the structural loads involved, knows how to build for efficient stripping, and can contribute to a safer and faster construction cycle. Their expertise is a crucial part of the overall strategy for successfully placing concrete and determining the right time to remove the formwork.

Commonly Asked Questions

Below you can see common questions we get asked.

What is the safest way to remove formwork without affecting the concrete’s surface strength?

The safest way is to strip formwork gently to avoid shocking the concrete. This protects the new surface and ensures it has the required strength before it bears any loads. Avoid prying against the concrete placed in the formwork.

How do future loads influence when to remove formwork from a concrete slab?

Anticipated loads dictate the required concrete strength before formwork removal. If heavy loads will be placed on the surface soon, the formwork must stay longer, ensuring the slab achieves sufficient strength to prevent deflection or structural damage.

Besides time, what is the best way to verify concrete strength before removing formwork?

The most reliable way is testing field-cured concrete cylinders. This directly measures the in-place compressive strength, confirming the slab can support its own weight and initial loads before you remove the formwork.

Is Council Approval Needed For A Retaining Wall in Adelaide?

In Adelaide, you need approval for a retaining wall over one metre high. Approval is also required for walls of any height supporting a building, driveway, or other structure. Walls under one metre that do not support significant loads generally do not need approval. Always confirm specific rules with your local council.

It’s the classic question. The simple answer you’ll get is: “if it’s over a metre high, yes.” But in practice, that’s just the starting point. The reality is a lot more nuanced, and relying solely on that one-metre rule can get you into hot water with your local council pretty quickly.

A better way to think about it is that you need approval for any retaining wall that’s considered a significant structure. A wall over a metre high is automatically in that category. But a 900mm wall holding back the tonnes of soil under your driveway? That’s also a significant structure. The regulations are fundamentally about risk, not just height.

approval for retaining walls in Adelaide

First, Let’s Get the Terminology Right: “Development Approval”

When people say “council approval” in South Australia, what they’re actually talking about is a formal process called Development Approval. It’s not just one rubber stamp; it’s usually two consents rolled into one application.

  1. Planning Consent: This is the council looking at the big picture. They’re asking, “How does this structure affect the neighbourhood, the streetscape, and your neighbours?” They’re concerned with things like visual impact, stormwater runoff, and whether you’re building it right on the boundary.
  2. Building Rules Consent: This is the nuts and bolts. It’s a technical assessment against the National Construction Code (NCC). Essentially, it’s a check to make sure the wall is designed properly, won’t fall over, and is structurally sound. This is where the engineers get involved.

For most retaining walls that trigger the need for approval, you’re going to need both. This is generally done via PlanSA.

The Key Triggers: When the Council’s Interest is Piqued

So, how do you know if your project is going to require a formal application? It boils down to a few key factors that flag your wall as being more than a simple garden bed.

Wall Height is the big one. That one-metre threshold is the clearest line in the sand. Why one metre? It’s not an arbitrary number. It’s the point where the physics get serious. The mass of retained earth and the potential hydrostatic pressure (water pushing from behind the soil) increase exponentially from there. The risk of a failure becomes significant, protecting you and your neighbours becomes paramount. A wall over this height is no longer considered minor work.

Surcharge Loading… this is the one that catches people out. A surcharge is any extra weight sitting on the soil behind the wall. Think about it:

  • A driveway. Cars are heavy, and that load pushes down and outwards.
  • The foundations of a shed or even a house.
  • A steep slope rising up behind the wall.
  • Even just another retaining wall sitting above it in a tiered design.

If your wall is supporting any of these, its height is almost irrelevant. You need an engineer to do the calculations, which means you definitely need council approval to verify it’s been done right. Failure to account for surcharge loads is a classic cause of wall collapses.

Proximity to a Boundary. Building on or very near a boundary line opens up a whole different can of worms, involving both council rules and separate legal obligations to your neighbour. Any ambiguity over that boundary line can lead to serious disputes. This is why you’ll often need a licensed surveyor to officially peg the boundary before you even think about design. Council approval in these cases acts as a formal record of the wall’s location, which can be invaluable down the track.

Significant Cut and Fill. If your project involves excavating (cutting) or bringing in soil (filling) deeper than about 600mm, this can also trigger the need for Planning Consent, as it’s seen as a significant change to the landform.

The Formal Approval Process, Step-by-Step

Navigating the system isn’t as daunting as it sounds, but you have to be methodical. It’s all managed through the state-wide PlanSA portal.

Step 1: Do Your Homework First. Before you even call a contractor, get onto your local council’s website and the PlanSA portal. Use their online tools to look up your property. Are there any specific overlays or rules for your zone? (Pro-tip: doing this early can save you a world of headaches). This is where you confirm the height, identify any surcharges, and get a feel for the scope.

Step 2: Engage the Professionals. If you’ve tripped any of the triggers, over 1m, surcharge, boundary issues, your next call is to a structural engineer. They’re non-negotiable. They’ll provide the certified designs, soil reports if needed, and the structural adequacy forms that council requires. If it’s a boundary wall, this is also when you’d get a surveyor involved.

Step 3: Lodge the Application. Your engineer or building designer will typically help you pull together the package for the PlanSA portal. This isn’t just one form; it’s a collection of documents: site plans, the engineer’s structural drawings and computations, forms, and so on. Incomplete applications are the number one cause of delays.

Step 4: The Back-and-Forth. A council planner and a building certifier (either council or private) will assess the application. It’s common for them to come back with a “Request for Further Information” (RFI). Responding to this quickly and completely is critical to keeping things moving.

What’s This Going to Cost Me?

The construction cost, timber vs. concrete sleepers vs. stone, is one thing. But the approval process itself adds another layer of costs you need to budget for. Expect to pay for:

  • Engineering Fees: This can be anywhere from several hundred to a few thousand dollars, depending on the wall’s complexity.
  • Surveyor Fees: If needed for a boundary survey, this is another professional cost.
  • Council & PlanSA Fees: There are fixed fees for lodging the application.
  • Private Certifier Fees: Often used for the Building Rules Consent part, this is another professional service fee.

The Neighbour Situation: Don’t Skip the Formal Notice

If your wall is anywhere near the boundary, talking to your neighbour isn’t just polite; it’s a legal necessity. The Fences Act 1975 (which often applies to retaining walls that serve as a boundary) and common law principles dictate a formal process.

You can’t just send a text. You generally need to serve them a formal written notice, sometimes called a Form 1 Notice, at least 30 days before you plan to start. This notice has to be specific: what you’re building, where exactly it’s going, what it’s made of, and the proposed costs.

This 30-day period gives them a chance to review it and respond. They can agree, they can disagree, or they can issue a counter-proposal. If you can’t agree, the next step is usually mediation, and if that fails, the Magistrates Court.

What happens if you just build it without notice? You’re taking a massive risk. Your neighbour could get a court injunction to stop the work or even an order to have the wall removed. This is entirely separate from any trouble you might be in with the council for not getting development approval. Don’t skip this step.

Common FAQs

Below are common questions that are asked about this.

So, what’s the absolute maximum height for a retaining wall in Adelaide before I need council approval?

The hard line is one metre, measured from the lowest point of natural ground. But remember, this is only if it’s a simple wall with no other complications. The moment it’s supporting a driveway or sitting on a boundary, the height becomes a secondary issue, and you’re almost certainly in approval territory.

How much does the approval process itself add to the final cost?

It varies, but you need to budget for it. Between engineer’s designs, potential surveyor costs, and council application fees, it can easily add a couple of thousand dollars or more to the project before a single shovel hits the dirt. It’s a significant, but necessary, part of the budget for any major retaining wall.

Apart from the 1m height rule, when is getting an engineer mandatory for council approval?

An engineer is mandatory anytime the wall is over one metre, OR when it’s supporting a surcharge load (like a building, car park, or another wall), OR if it’s a complex design on a tricky site (like highly reactive soil or a very steep slope). Essentially, if the wall is doing anything more than just holding back a bit of garden, an engineer’s certification is what the council needs to see for Building Rules Consent.

Landfill

Managing Building Site Waste In Adelaide

One of the biggest contributors to landfills today is building sites.  Construction sites use a variety of different types of materials, and the majority of these are sent directly to landfills.  It is approximately 40% of all rubbish that comes from building sites, which equates to around 27 million tonnes in Australia.  It is good news to know that after being sent to a landfill, 76% of this waste can be recovered and recycled. 

The cost of removing mixed waste from building sites is continuously on the rise, and leaves the overall building costs to keep increasing.  Landfill sites across Australia are quickly filling up, and it is anticipated that by 2032, Sydney will have run out of landfill space.

In a way to reduce the cost of rubbish removal and help reduce landfill, there are a variety of ways in which we control our building sites across Adelaide.  There are various building materials that can be recycled and disposed of for money.

If we look at items such as metal, there are many recycling depots across Adelaide that will take scrap metal for free and give a small amount of money for the metal itself.  This is one example of building materials that can be returned into some form of reuse in either the building sector or another area where they can be melted down and repurposed.  The Adelaide City Council will take green waste at their depot behind the Adelaide Zoo and then use it as mulch, etc, for their gardens throughout Adelaide.

There are other building materials that can be sold or given to salvage yards for future projects.  Items such as Old Red Bricks, Wooden Floor Boards, Doors, Windows, Skirting Boards, Appliances and Roofing Covers (tiles and iron).  The benefits of this are reducing landfill and also resources, creating products that already exist.

What Is a Waste Management Plan?

A building site waste management plan should be scoped from the start of the project.  The overall design of the building and how it will be positioned on the land are some of the early things to consider, which can minimise landfill and unnecessary energy consumption, which in turn lowers the build cost.

Some simple examples of thought-out planning are:

  • Multiple material bins are on-site to ensure each type of waste is separated and recycled.
  • Using recycled materials such as concrete for the slab, footings and paths.
  • The use of natural light assists with heating and lowers electrical installation costs and utility costs.
  • Installation of on-site water harvesting for all types of fixtures, which can be used with harvested stormwater.
  • Installation of double-glazed windows and doors to minimise heat and cooling costs.

Using a builder who is willing to participate in the management of waste on a building site can be hard to find.  It is a sector of the building industry that we believe needs change, and something we are passionate about doing to ensure a cleaner/greener building industry across all of Adelaide building sites.

If we look at what products are used in the building industry and break these down into various categories, you will see in the chart below that concrete products make up the largest waste materials on a typical building site, with non-ferrous metals making up the lowest because many contractors will recycle these before they get to waste.

Percentage Weight of Typical Building Waste Materials

Waste descriptionWaste quantity (% of total weight)
Concrete products22.9
Fines (particles less than 4.75mm in size)21.6
Timber20.0
Clay products (for example, bricks, tiles)8.8
Natural aggregates5.6
Ferrous metals5.1
Plasterboard3.7
Paper and cardboard3.2
Plastic2.9
Non-ferrous metals0.6
Other materials5.6
Total100.0

Source: Department of Environment & Climate Change NSW (2007) 

The 3 R’s: Reduce, Reuse and Recycle

Another plan we implement on our projects is the 3 R’s method:

Reduce:  Careful planning and ordering of materials helps to reduce the amount of waste, but also reduces the cost of materials and reduces labour and transport costs on the project.

Reuse:  There are many things that can be reused on a building project.  Items such as timber can be used multiple times throughout a project, and concrete pins and star droppers can be used for all types of tasks and then reused again on another project.  Spoil from trenches can be taken to recycling depots and then reused for clean fill sites and garden beds.  Many sites today are being built up with retaining walls, and the requirement for clean fill is high.

Recycle:  Throughout the building site’s life, there will be large amounts of leftover materials which can be recycled either locally or interstate.  Steel from the reinforced concrete can be melted down and reused, timber can be ground up and reused for mulch or firewood, and plastics can be melted and reused for other plastic-based materials.  Rubber is another product that can be melted down and repurposed for other uses, such as safe flooring for playgrounds and other plastic equipment.

Sediment Control

When you look at the majority of building sites, particularly in the early stages, there is a lot of work done in the ground.  When the initial stages of a building commence we there will be soil removed and potentially soil stockpiled for future use.  It is important to have a sediment control plan in place.  What a sediment control plan implements is the loss of soil during the project, and also the protection of our waterways.

Although this does not sound like direct waste management, it assists.  By controlling soil loss at the building site, it stops public complaints, it minimises the need for future imported fill to be bought to the building site, it helps to reduce the effect of wet weather shutdowns during construction, and also the requirement of other remediation works further down the line, such as cleaning of contaminated waterways both locally and further down the line.

Sediment control

Pollution Control On The Building Sites

Another precaution that can be taken during the building process is the active management of pollution on the building site and during the entire building process.

It is quite amazing to see what some simple tasks, if implemented, can help withwaste management and also pollution to our waterways, etc. Below are a few tasks that we implement on our building sites to manage pollution:

  • Wash down bays for painters: The provision of dedicated painter’s wash down
    stations ensures that all paint is captured into containers and then correctly disposed
    of. This avoids the excess paints making there ways into the waterways and out to
    sea and protects the groundwater table, which people nearby could be using the
    water for bore pumps.
  • Tyre wash down stations: Particularly at the start of a project, there are a lot of
    vehicles that are coming and going, and when the site is wet, mud sticks to the tyres
    and needs to be removed before the vehicle leaves the site. With the use of tyre
    wash down stations, this minimises the amount of mud that leaves the building site
    and maintains cleaner waterways.
  • Temporary stormwater controls: The use of temporary downpipes allows for the
    management of rainwater during the building process. Controlling stormwater
    minimises excess soil and dirt reaching our waterways during construction and also
    stops heavy erosion of the site.
  • Noise control: The Environment Protection Authority has set up rules for work site
    noise allowance and avoiding noise pollution. During the hours of 7 am to 7 pm,
    Monday to Saturday, general construction noise is acceptable. During the hours of 9
    am and 7 pm, waste collection is acceptable on Sundays and Public Holidays. If you
    are seeking to work outside of these hours, it may be necessary to contact your local
    authorities and the EPA to gain the correct permits.

For more information on construction noise, you can find it here: https://www.epa.sa.gov.au/files/4773_info_noise_construction.pdf

Connection of Temporary Site Toilet Directly To Sewer

When a temporary site toilet is installed on the building site, it is very helpful to the minimisation of waste and pollution if the toilet can be plumbed up to the mains sewer line. There are a couple of advantages of doing this. Firstly, the odour emitted from the temporary toilet is a lot lower (much better for existing built-up areas), and secondly, the need to have a truck come to the site, pump the toilet and then drive it to another location and dispose of it is no longer necessary.

So overall, we are saving money on the build costs, a lot of energy, and not harming the environment by doing something as simple as connecting a site toilet to the main sewer line during construction.

Leading The Way To Waste Control On All Building Sites Across Adelaide

At Mayfair Building Group, we are moving in a direction to help improve the building industry’s waste management on all projects, no matter how large or small the project or no matter what the location.  Our company has a sound reputation for delivering projects in the CBD, Fleurieu Peninsula and Adelaide Hills. 

With a constant eye for the evolving building industry, we ensure that our company stays ahead of the future, and this makes Mayfair Building Group a standout industry leader.  Find out how we can work with you and make the waste from your next project go further.

The Benefits Of OMC Quarry Products

During the construction phase of a new home, building or facility, there are numerous processes that require the use of quarry products. The importing of rubble for concrete pads, backfill (sand and screenings) for service trenches, brick laying (lime and sand) and the preparation for new concrete paths, garage pads and driveways.

All these products come directly from a quarry or a recycling plant if we are using recycled rubble. When delivered to the site, the dust level can be very high, which is not ideal when trying to manage airborne particles on the site to comply with pollution levels. To minimise this, we will order the products OMC.

The Three Letters

OMC stand for Optimum Moisture Content. The quarry products are delivered to the site pre-soaked in water. The benefits of this are that one, the airborne dust is minimised, and two, the handling of these products is better.

Who Can Provide OMC Products To Building Sites In Adelaide

When ordering quarry products for a building site, we will typically use a supplier called Clay and Minerals. They have multiple pits across Adelaide in the North and South of the state, so no matter where our project is, they can accommodate us.

Other suppliers would be the likes of Boral, Heidelberg Materials, Resource Co and Hallet Group. With a large amount of infrastructure projects currently underway in Adelaide, such as the new South Road Tunnels, Major intersection upgrades, such as Marion Road/Sir Donald Bradman Drive and Plympton/Glandore tram grade separation being constructed, the use of OMC quarry products will be a significant help to minimise air pollution to surrounding residents during construction.

Common Questions

Read questions we get asked about this topic.

What are the main types of waste generated on construction sites?

The main types of construction waste include concrete and masonry, timber offcuts and formwork, metal scraps including steel and copper, packaging materials like cardboard and plastic, and hazardous materials such as paints and solvents.

How can construction waste be reduced at the source?

Waste can be reduced by ordering accurate material quantities, using prefabricated components, planning cuts carefully to minimize offcuts, reusing materials where possible, and implementing just-in-time delivery to prevent material damage.

What construction materials can be recycled in Adelaide?

Recyclable construction materials in Adelaide include concrete (crushed for aggregate), metals (steel, aluminum, copper), timber (for mulch or chipboard), cardboard and paper packaging, and certain plastics. Many local facilities accept these materials.

What size skip bin do I need for my construction project?

Skip bin size depends on project scale. Small renovations typically need 2-3m³ bins, medium projects require 4-6m³, and large construction sites may need 8-12m³ or multiple bins. Consider waste volume, site access, and collection frequency when choosing.

How should hazardous construction waste be disposed of in Adelaide?

Hazardous waste must be handled according to EPA South Australia regulations. Use licensed contractors for disposal, keep materials in original containers when possible, never mix different hazardous substances, and maintain proper documentation of disposal.

What are the benefits of proper construction waste management?

Benefits include reduced landfill costs, potential revenue from recyclable materials, compliance with environmental regulations, improved site safety, enhanced company reputation, and contribution to environmental sustainability.

Why do the builders always have sprinklers, etc. running during the demolition of a building?

When demolition is undertaken on a construction site, there are often high levels of dust, and one of the best proven methods of dust suppression is the introduction of water to help minimise air-borne particles. This is why you will often see sprinklers and hoses in use during the demolition of buildings and the removal of concrete slabs and walls.

Is there still asbestos in Adelaide?

Although asbestos is no longer used in Adelaide, there is still asbestos in the state. Asbestos was used widely throughout the building industry in Australia from 1940 through to the 1980’s. It was commonly used for wall linings in bathrooms, laundries, floor tiles in kitchens and external cladding. Other uses for asbestos were fire retardant, insulation of pipes, guttering, roof sheets and fence panelling.

Who can remove asbestos?

Quantities of asbestos up to 10 square metres (non-friable) can be removed by non-asbestos companies with the correct permits and by following strict local guidelines.

Asbestos quantities over 10 square metres need to be removed by a licensed asbestos removal company. Safe Work SA needs to be given 5 business days before the commencement of any asbestos removal in South Australia. Asbestos removal is not a cheap project to undertake and will require air monitoring control to ensure air particles do not travel beyond the control zone of the project.

What does asbestos cost to remove in a bathroom and laundry?

If we consider a typical laundry and bathroom with wall linings of asbestos, a budget of around $7,500 to $11,000 is what it would currently cost at the time of writing this article to have these wall linings safely removed and disposed of by a licensed asbestos company in Adelaide. With the rising costs of labour and disposal, these costs will likely rise throughout 2026.

How much longer will asbestos be around in Adelaide?

This is a hard question to put an exact number on, but as more people continue to renovate their existing houses instead of moving homes due to rising house costs and stamp duty in South Australia, the rate at which asbestos is being removed across Adelaide is increasing.

Typically, waiting periods for asbestos removal can be as long as 2 months, which further backs up the demand for its removal in Adelaide. There is no doubt that there will always be asbestos left somewhere in an old home if not renovated, but it is certainly being removed at a good pace across the state. In most cases, as long as the asbestos is left untouched and not tampered with, it does not cause harm to humans or animals in its vicinity.

enclosed outdoor area

Enclosing Your Outdoor Space – Your Options

Enclose an outdoor area with screens to create a porch or use glass panels for a sunroom. You can construct a fence for total privacy. Plant dense hedges or shrubs to form a natural wall. For flexible options, install retractable awnings or hang heavy outdoor curtains to define the space.

You can screen in a patio, sure. Or use glass for a sunroom. Fences offer privacy, and hedges are a natural way to do it. For something less permanent, there are always retractable awnings or even heavy outdoor curtains. But that’s the ten-thousand-foot view. The reality of transforming an open deck or patio into a truly functional, enclosed area is a far more involved process.

What you’re really doing is expanding the livable footprint of your home. You’re creating a buffer zone, a protected environment where you can enjoy the outdoors without dealing with bugs, bad weather, or blistering sun. The decision on how to get there involves a serious look at materials, what your existing structure can actually support, your budget, and the climate you live in. There’s a huge spectrum of options, from a basic screen system to a fully climate-controlled four-season room that’s basically a home addition. This guide is designed to walk you through the methodologies, the materials science, and the critical thinking needed to plan and execute one of these projects correctly.

an enclosed outdoor area

Image source: https://www.apollopatios.com.au/patio-enclosure-options/

First Principles: What Exactly is an “Enclosed Patio”?

Fundamentally, an enclosed patio is a structure that turns an outdoor area, a deck, porch, or concrete slab, into a protected, usable room. It’s the architectural bridge between your living room and your backyard. Unlike an open patio that’s at the mercy of the elements, an enclosed space has walls (or screens, or windows) and a solid roof.

This isn’t just a minor tweak; it fundamentally alters how you interact with your property, potentially turning a spot you use three months a year into a year-round extension of your home. The level of “enclosure” is the key variable, ranging from a simple screen room that just keeps the mosquitoes out to a fully insulated sunroom that’s as comfortable as any other room in the house.

Defining the Space

At its heart, the goal is to create a controlled environment. You want the good parts of being outdoors, the light, the views, without the bad parts. The definition really hinges on having some kind of permanent or semi-permanent vertical barrier.

Key characteristics that really define it:

  • A Solid Roof Structure: This is your primary shield from sun and rain. No getting around this.
  • The perimeter walls or panels… this is where the variation comes in. Could be screen, vinyl, or full-on glass.
  • Controlled Access: It needs doors, connecting it to the house and the yard.
  • Architectural integration. A tacked-on box looks like a tacked-on box. The design has to feel like it belongs to the rest of the house.

This new space isn’t just a deck, but it’s not quite an interior room, either. It’s its own category of living space, and the materials you choose will dictate how much protection it offers and when you can actually use it.

Functional Classifications: More Than Just a “Sunroom”

The term “enclosed patio” gets thrown around a lot, but in practice, it covers several distinct types of structures. Knowing the difference is the first step. The choice really boils down to your climate, how you plan to use the space, and what you’re willing to spend.

  • Screen Room / Screened Porch: This is the entry-level option. It’s all about airflow and views while keeping bugs out. It provides some shade and protection from a light drizzle, but it does nothing for temperature. A great, cost-effective choice for moderate climates.
  • Three-Season Sunroom: A big leap from a screen room. Here you’re using single-pane glass or, more commonly these days, vinyl panel windows. This gives you real protection from rain, wind, and pollen, stretching its usability from spring through fall. But, and this is a big but, it has zero insulation. It’s not meant for the dead of winter.
  • Four-Season Sunroom: This is a true home extension. The engineering is completely different. We’re talking thermally engineered frames (with thermal breaks to stop heat transfer) and double-pane, insulated glass units (IGUs) with fancy Low-E coatings. This type of room is fully insulated and can be tied into your home’s HVAC, making it livable 365 days a year.
  • Solarium: A highly specialized version of a sunroom with a glass roof as well as glass walls. They look incredible and are amazing for growing plants, but they require very high-performance glass to manage solar heat gain, or you’ll have a beautiful oven in the summer.
  • Lanai: You hear this term a lot in places like Florida. It’s basically a ground-level patio under the home’s main roofline, enclosed with screens. Functionally, it’s a screen room, but it feels more integrated because it was part of the home’s original design.

Key Architectural and Structural Gotchas

This is where people get into trouble. Enclosing a patio is a real construction project, not a weekend DIY affair. You can’t just stick some walls on an old concrete slab and call it a day, because that slab was probably never designed to carry the weight—what we call the ‘dead load’—of a full roof and wall system.

A few things to obsess over:

  • Foundation Integrity: A four-season sunroom is heavy. The double-pane glass and insulated roof require a serious foundation, usually a monolithic concrete slab with frost-proof footings in colder climates. That existing 4-inch slab? It needs to be professionally assessed. A deck? It almost certainly needs more posts and bigger footings to handle the load.
  • Roof Design and Load: The new roof has to be engineered for your local snow and wind loads. This is non-negotiable. Whether it’s a single-slope “shed” roof or a gabled “A-frame,” the connection point to the house is a critical failure point. Improper flashing here means you’re funneling water directly into your house. A nightmare scenario.
  • Wall System Integration: The new walls have to be securely anchored to the foundation and the existing house. This connection provides stability and creates the weather-tight seal.
  • Building Codes and Permits: Most of these projects, and all sunrooms, are considered home additions and require building permits. Don’t skip this. The permit process is what forces you and your contractor to prove the design is safe and meets code for structural, electrical, and energy efficiency. Failing to get a permit can lead to fines, a tear-down order, and a massive headache when you try to sell the house.

The Real Payoff: Core Benefits of a Screened Enclosure

A screened enclosure is often the most popular and practical solution. It hits a sweet spot of cost and function. By stretching a high-quality screen across a sturdy frame, you create a space that feels open but is protected from the worst outdoor annoyances.

Enhanced Protection from the Elements

This is the most obvious win. It’s a barrier.

  • Insect Control: No more mosquitoes. This alone is worth the price of admission in many climates.
  • Debris Management: Forget sweeping leaves and pollen off the patio furniture every day. The screens catch most of it.
  • UV Reduction: This is an underrated benefit. You can get specialized solar screens that block up to 90% of harmful UV rays. This protects you, and it stops your outdoor furniture from fading and degrading.
  • Mild Weather Shield: It can take the edge off a stiff breeze or a light misting rain, making the space usable in marginal weather.

More Livable Space, Less Cost

You’re essentially adding a new room to your house for a fraction of what a conventional, stick-built addition would cost. This new room becomes a flexible, transitional zone. It can be your outdoor dining room, a safe play area for the kids, or just a quiet place for a morning coffee. You’re maximizing the utility of your property.

Increased Home Value and Curb Appeal

A professionally installed screened patio is a feature that buyers love. It screams “lifestyle.” It adds to the functional square footage and signals that the home is well-maintained. In many markets, you’ll see a significant return on your investment when you sell. Beyond the money, it just looks good. It adds structure and a finished look to the back of a house.

Preserving the Outdoor Experience

Here’s the key distinction between a screen room and a sunroom. Screens protect you without isolating you. You still get the breezes, the sounds of birds, and an unobstructed view of your yard. Modern high-visibility screens are designed to be almost invisible from a few feet away. For people who want to feel like they’re outside without the downsides… this is the perfect compromise. It’s the best of both worlds.

Options For Materials and Systems

The choice of materials is the single most important technical decision you’ll make. It dictates durability, maintenance, thermal performance, and cost. Let’s break down the core components.

The Skeleton: A Comparative Analysis of Framework Materials

The frame holds everything together. It has to be strong and stand up to whatever your climate throws at it.

Aluminum Frame Systems

Extruded aluminum is the industry standard for a reason. It’s incredibly strong for its weight and requires almost no maintenance.

  • The Material Itself: We’re talking about architectural aluminum alloy. It’s engineered for structural integrity and corrosion resistance.
  • The Finish is Everything: Raw aluminum oxidizes. So, these systems come with a factory-applied finish, usually a powder coat or baked-on enamel that conforms to Australian standards (look for AS/NZS 1866 or variations). This finish is the armor.
  • Smart Design: The extruded profiles are not solid; they have internal webbing for strength and channels for screws, making assembly clean and strong. For four-season rooms, they incorporate “thermal breaks”—a strip of non-conductive polymer that physically separates the inside and outside aluminum surfaces. Without this, the frame would be a thermal bridge, conducting cold straight into the room and causing condensation.
  • Maintenance: Hose it down. That’s about it. It won’t rot, warp, or get eaten by termites.

Wood and Timber Frames

Wood has a classic look that aluminum can’t always match. But it comes with a maintenance commitment.

  • Wood Species Matters: Pressure-treated pine is the budget option. For looks and natural rot resistance, you’d step up to cedar, redwood, or Douglas fir. For really long spans, you might need engineered lumber like LVL or glulam beams.
  • Protection is Mandatory: Wood needs to be sealed, stained, or painted. And this isn’t a one-and-done job. You’ll be re-applying that finish every few years to protect it from moisture and UV damage.
  • Structural Notes: Wood is heavy. It may require a more substantial foundation than a lightweight aluminum system.
outdoor kitchen with a roof

Vinyl and Composite Framing

Vinyl (PVC) and composites are the newer players, offering a low-maintenance alternative with great thermal properties.

  • The Science: Vinyl frames are natural insulators, they don’t conduct heat or cold well at all. This makes them a fantastic choice for sunrooms. They are often built with hollow, multi-chambered profiles for added strength and insulation.
  • Durability: Like aluminum, vinyl is impervious to rot and insects. The color is integral, so it can’t scratch off.
  • Limitations: Vinyl isn’t as rigid as aluminum. For large window openings or in high-wind areas, vinyl frames often need internal steel or aluminum reinforcement to keep them from flexing.

The “Walls”: From Screens to High-Performance Glass

The infill material defines what the room is.

  • Screen Materials:
    • Fiberglass Screen: The standard. It’s cheap, flexible, and easy to work with. Charcoal is the most popular color because your eye looks right through it.
    • Aluminum Screen: Stiffer and a bit more durable than fiberglass.
    • Pet-Resistant Screen: This is a vinyl-coated polyester mesh that’s about seven times stronger than standard fiberglass. If you have dogs or cats with claws, this is a must.
    • Solar Screen: A specialized mesh that blocks a huge percentage of solar heat gain. A game-changer in hot, sunny climates, though it does darken the room slightly.
  • Vinyl Panel Systems: You might hear this called “memory vinyl.” It’s a tough, flexible PVC film in a window frame. If it gets pushed or dented, the sun’s warmth makes it shrink back to its original shape. It’s a great three-season option that’s cheaper and lighter than glass.
  • Glass Systems (Single-Pane): The baseline for a three-season sunroom. It’s usually 1/8-inch tempered safety glass (which is required by code in doors and near the floor). It stops the wind and rain perfectly but has terrible insulating properties (think of an old window in a cabin).
  • Glass Systems (Double-Pane Insulated): This is what makes a four-season room possible. An Insulated Glass Unit (IGU) is two panes of glass hermetically sealed with a spacer, trapping air or an inert gas like Argon in between.
    • Low-E Coatings: The magic ingredient. A microscopically thin metallic coating is applied to one of the glass surfaces inside the IGU. It reflects infrared heat—keeping heat in during the winter and out during the summer.
    • Performance Metrics: The two numbers to care about are the U-factor (how well it prevents heat loss; lower is better) and the Solar Heat Gain Coefficient or SHGC (how much solar heat it lets through; lower is better in hot climates).

The Roof: Your Primary Shield

The roof does more than keep the rain out; it’s a huge part of the room’s thermal performance.

  • Solid Insulated Roof Panels: The best and most common choice for sunrooms. These are Structural Insulated Panels (SIPs), which are a core of foam insulation (usually EPS) sandwiched between two skins of aluminum. They are strong, lightweight, provide excellent insulation (R-15 to R-30+), and often have built-in channels for running electrical wiring for lights and fans.
  • Polycarbonate Roofing: A translucent plastic that lets in diffused natural light. It’s great for patio covers but less common for full sunrooms. Look for “multiwall” polycarbonate, which has internal chambers that give it better insulating properties than a solid sheet.
  • Tying into the Existing Roofline: This is the most architecturally seamless option, but also the most complex and expensive. It involves building a conventional stick-framed roof and matching your home’s existing shingles. The flashing and waterproofing work at the connection point has to be absolutely perfect. This is a job for a very good roofer, not just a sunroom installer.

Comparison of Patio & Outdoor Area Enclosure Methods

This table is a rough guide. Costs are highly variable based on location, contractor, and the specifics of your site. But it gives you a starting point for thinking about budget and performance.

Enclosure MethodTypical Cost (AUD per sq. m.)Protection from Weather & ElementsKey Benefits for HomeownersMaterial & Space Considerations
Screen Enclosure$8 – $20Great for bugs; some protection from sun/wind. Rain will get in.The most affordable way to make a space more usable. Keeps the outdoor feel.Aluminum or wood frames. Perfect for moderate climates where temperature isn’t the main issue.
Vinyl Panel Windows$15 – $35Good protection from rain, wind, pollen. Some UV blocking.Flexible three-season use. Lighter and often cheaper than glass.“Memory vinyl” is tough but not as clear as glass and can scratch. A solid mid-range option.
3-Season Sunroom$100 – $300Excellent protection from everything except the cold.Adds significant living space and value (ROI can be around 50%). Great for entertaining.Single-pane glass and non-thermally broken frames. Not meant for winter use in cold climates.
4-Season Sunroom$200 – $400+Total, year-round protection. A true extension of your home.A fully climate-controlled room that maximizes your home’s value and usability.This is a major construction project requiring double-pane insulated glass, thermal breaks, and a proper foundation.
Motorized Screens$40 – $100On-demand protection from bugs, sun, and light rain.The ultimate in flexibility. An open patio when you want it, a screen room when you need it.The hardware is more complex. High-end screens offer excellent UV blocking.
Australian ‘Alfresco’$70 – $200+Specifically engineered to handle intense sun, wind, and insects.Creates that seamless indoor-outdoor flow that’s central to the Australian lifestyle.Often uses specialized systems like Ziptrak® blinds or aluminum shutters designed for that climate.

Sources: Data compiled from Forbes Home, HomeAdvisor, Remodeling’s Cost vs. Value Report, and Australian outdoor living specialists.

Planning Your Project

A good outcome is the result of a good plan. Winging it is a recipe for disaster.

Phase 1: Assessment and Goal Setting

First, you need to understand the problem you’re trying to solve.

  • Define Primary Use: What is this room for? A dining area? A playroom? A home office? This drives decisions about everything from electrical outlets to door placement.
  • Analyze Your Climate: What are you fighting? Intense afternoon sun? Bugs? Wind? Frequent rain? The answer points you toward the right type of enclosure.
  • Evaluate the Existing Structure: Be brutally honest about your current deck or patio. Is the concrete cracked? Is the deck wobbly? Can it support a roof? Better to know now.
  • Set a Real Budget: Figure out what you can realistically spend, and then add 15% for a contingency fund. Something always comes up.

Phase 2: Design and Material Selection

Now you translate your goals into a concrete plan.

  • Choose the Enclosure Type: Based on Phase 1, decide if you need a screen room, a three-season, or a four-season room.
  • Select Materials: This is where you decide on aluminum vs. wood, screens vs. glass. Your climate and budget are the main drivers here.
  • Aesthetics: How will it look? It needs to complement your home’s existing style, color, and roofline. Don’t let it look like a cheap attachment.

Phase 3: Permits and Codes (The Boring But Critical Part)

Do not skip this phase.

  • Check Local Zoning: Your town has rules about setbacks (how close to the property line you can build) and lot coverage. Find out what they are before you design anything.
  • Get Council Approval: Almost any structure with a roof requires a building permit. Your contractor should handle this, but it’s your responsibility to make sure it happens. The permit application will require detailed plans showing that the structure is designed to be safe and code-compliant.

Phase 4: Contractor Selection and Execution

The person you hire will make or break this project.

  • Vet Your Candidates: Get at least three bids. Look for contractors who specialize in these structures. Check their license and insurance (both liability and worker’s comp). Ask for references and actually call them.
  • Compare Detailed Bids: A real bid breaks down costs for materials, labor, and permits. A price on a napkin is a red flag. Be suspicious of a bid that’s dramatically lower than the others; they’re cutting corners somewhere.
  • Sign a Comprehensive Contract: The contract should detail the scope of work, materials to be used, payment schedule, and a timeline. Get everything in writing.

Maintenance and Longevity

You’ve invested in this space; now you have to protect it. Routine maintenance is key.

  • Screens: Wash them gently with soap and water and a soft brush. High pressure from a hose can damage the mesh. Keep an eye on the rubber spline that holds the screen in; if it gets brittle, replace it.
  • Glass/Vinyl: Use the right cleaners. Ammonia-free for glass, and something specifically for vinyl so you don’t scratch it. Vacuum the window tracks regularly to keep them sliding smoothly. A little silicone spray on the rollers once a year works wonders.
  • Frame: Wash it. Inspect it for deep scratches in the finish that could lead to corrosion. Check the sealant joints and re-caulk any that are cracked or pulling away to keep it watertight.
  • Leaks: Water leaks are an emergency. Find the source immediately. It’s often failed sealant or a problem with the flashing where the roof meets the house. Fix it fast.

What’s Next: Trends and Innovations

This space is always evolving. The future is about smarter, more flexible enclosures.

  • Smart Home Integration: We’re moving beyond simple remotes. Think motorized screens tied to a wind sensor that automatically retract in a storm, or that lower on the west side of the house when a smart thermostat detects high heat gain.
  • Advances in Glass: Dynamic or “smart” glass that can tint on demand is getting more affordable. It eliminates the need for blinds. Self-cleaning coatings that use UV light and rain to wash away dirt are also becoming more common.
  • Flexibility is King: The biggest trend is the desire for convertible spaces. Systems of folding or sliding glass walls (like NanaWall) can completely disappear, erasing the line between inside and out. This gives you the protection of a sunroom with the openness of a patio, all in one.

Common Questions (FAQs)

View common questions we get asked about this topic.

What’s the best way to enclose a patio for the Australian climate but keep the views?

In the Aussie climate, you’re fighting intense sun, insects, and sometimes heavy rain. For an unobstructed view, the top contenders are either large glass panels (if you’re creating a sunroom) or a track-guided blind system using clear PVC. A lot of people also opt for high-visibility “alfresco” screens paired with motorized solar blinds. This gives you a hybrid solution: the screens handle the bugs 24/7, and the blinds can be deployed to manage the harsh sun when needed, then retracted to open up the view.

How does a sunroom really add value beyond just more space?

It adds functional value, which is what buyers pay for. A sunroom transforms a home’s relationship with its property. It creates a comfortable, all-weather space for relaxing and entertaining that feels connected to the outdoors. It’s a huge lifestyle upgrade. From a resale perspective, it increases the perceived and actual square footage and boosts curb (or backyard) appeal. It becomes a major selling feature that distinguishes your house from others on the market.

To protect my patio from both sun and rain, are screens enough?

No. Screens are fantastic for insects and for cutting down on direct sun (especially solar screens), but they won’t stop rain. A light mist might be deflected, but any real precipitation is coming through. For true all-weather protection from sun and rain, you need a solid covering. That means a solid roof combined with either vinyl panel windows or, for a more permanent solution, a proper glass sunroom. Screens solve the bug problem; solid panels solve the weather problem.

outdoor kitchen with a roof

Weatherproofing Your Outdoor Kitchen Against Rain

You’ve made the investment in an outdoor kitchen. The core idea is to stop it from turning into a science experiment in premature decay. The strategy isn’t just one thing, it’s a multi-layered defense system. We’re talking about a combination of overhead structures, smart material science, and targeted, component-level protection. You can’t just pick one.

Fundamentally, you’re fighting constant moisture and UV radiation. Everything else stems from that.

Overhead Coverage: The First Line of Defense

The single most effective shield for an entire outdoor kitchen is, without a doubt, a roof. But what kind of roof? The choice here really depends on your budget, climate, and how you plan to use the space.

an outdoor kitchen with a roof

Image source: https://danver.com/blog/design-an-outdoor-kitchen-with-an-island/

The Fortress Approach: Pavilions and Solid Roofs

For absolute, no-compromises protection, a permanent, solid roof structure is the way to go. Think of a pavilion or a direct extension of your home’s roofline. This creates a genuine outdoor room, and what’s interesting here is that it protects not just the equipment, but the people using it, dramatically extending the usability of the space.

This approach offers:

  • Total weather immunity. Heavy rain, snow, hail… it doesn’t matter. The kitchen stays dry.
  • A shield against UV degradation. This is a bigger deal than most people realize. The sun will absolutely destroy the finish on cabinets, appliances, and even stone over time. A solid roof stops that cold.
  • The ability to safely integrate utilities. You can run proper electrical for lighting, outlets, and ceiling fans without worrying about water intrusion, which is a major safety and code consideration.

A Balance of Shelter and Sky: The Modern Pergola

Pergolas are a fantastic middle ground. On their own, they just define a space, but when you add a cover, they become a serious protective element. We’re not talking about simple lattice anymore.

  • Louvered Roof Systems: These are the gold standard for flexibility. Motorized louvers can seal completely watertight during a downpour or be angled to provide precise shade. The key thing to understand is that the motorization adds a mechanical point of failure, so you need to invest in a quality system with a good warranty.
  • Polycarbonate Panels: Fitting clear or tinted panels over a pergola’s rafters blocks 100% of the rain while still letting in that valuable natural light. This is a great way to maintain an open feel.
  • Fixed Fabric Canopies… though these are less common now with the advent of better systems.

On-Demand Protection: Awnings & Umbrellas

For those who want protection that can disappear, a retractable awning is a solid choice. These work best for shielding against harsh sun and light-to-moderate rain. Anything more, and you’ll need to retract it. A critical feature on modern motorized units is the wind sensor. This will automatically retract the awning in high winds, preventing it from turning into a very expensive kite. This is a non-negotiable feature in most installations.

Material Science: The Unseen Shield

What your kitchen is actually made of is just as important as what covers it. Beyond the roof, your material choices are your primary defense against the moisture that will inevitably get in.

Cabinetry: The Battle Against Swelling and Rot

Outdoor cabinets are constantly exposed to humidity. This is where material choice becomes critical to avoid the nightmare of delamination, corrosion, and rot.

  • Marine-Grade Polymer (HDPE): Essentially, this is a high-density plastic that is completely inert to water. It will not swell, rot, or fall apart. Period. It’s the most foolproof material for outdoor cabinetry structures.
  • 304-Grade Stainless Steel: The industry standard for a reason. It offers excellent rust and corrosion resistance. But let’s refine that: if you live in a coastal area with salt in the air, you should really step up to 316-grade stainless steel, which has added molybdenum for superior corrosion resistance against chlorides. This is a small detail that makes a massive difference in longevity.
  • Powder-Coated Aluminum: Aluminum itself won’t rust, and the powder coating provides a tough, durable barrier against the elements and UV rays.
  • Dense hardwoods like Teak or Ipe… these have natural oils that make them water-resistant, but they still require regular maintenance and sealing to look their best. They are a viable, if higher-maintenance, option.

Countertops: Repelling Water is Key

Your countertops need to handle everything from downpours to freeze-thaw cycles without cracking or staining. Porosity is the enemy.

  • Granite: A workhorse, but only when sealed properly with an impregnating sealer. Re-sealing is a maintenance task you must not skip (annually in high-sun areas).
  • Soapstone: A fantastic choice because it’s naturally non-porous. It doesn’t need sealing and is highly resistant to stains and heat.
  • Concrete: Offers a great industrial aesthetic but is porous by nature. The quality of the sealant job is everything here. A poor seal will lead to stains and potential freeze-thaw spalling.
  • Quartzite: Not to be confused with quartz (which is an engineered product not always rated for outdoor UV exposure), quartzite is a natural stone that’s even harder than granite. It’s an excellent, durable, though often pricey, option.

Protecting the Core Components

The Grill: More Than Just Stainless Steel

The grill is the heart of the kitchen and often contains electronics, igniters, and gas valves that hate water. A heavy-duty, fitted, waterproof cover is the simplest and most effective barrier when the grill isn’t in use. Make sure it’s breathable to prevent trapping condensation underneath, which can cause its own set of problems. If your grill is built into a structure, an insulated grill jacket is a critical safety component to prevent heat transfer to combustible materials. This isn’t optional; it’s often required by code.

Water Management: Drainage and Sink Integrity

Standing water is the enemy.

Proper drainage is an upfront design consideration, not an afterthought. Countertops should be installed with a very subtle slope, something like 1/8 inch per foot, to direct water away from appliances and towards an edge or sink. It’s barely perceptible but makes a huge difference.

For sinks, an undermount installation is technically superior in an outdoor setting. There’s no lip for water and gunk to get trapped under. All penetrations for faucets and the sink itself must be meticulously sealed with a high-quality marine-grade sealant (polyurethane or 100% silicone) to stop water from getting into the cabinet base below. And if you’re in a cold climate… a winterization protocol with easy-to-access shutoff valves and drain points for the plumbing is absolutely essential to prevent pipes from bursting.

A Practical Comparison of Protection Strategies

Trying to figure out where to put your money? This table breaks it down. The reality is that a combination of these is usually the best approach. Relying on just one method leaves you vulnerable.

Protection Method & StyleKey MaterialsProtection Level (Rain/Sun)Durability & Damage MitigationFunctional Impact
Pavilion / Solid Roof StructureWood, Metal, CompositeExcellent: Total protection. Creates a true all-weather space.High: Shields the entire investment from UV, rain, and debris. Drastically reduces wear on all components.Defines a dedicated “room,” maximizing usability year-round. Allows for integrated lighting and fans.
Pergola with a Waterproof TopWood, Fiberglass, Aluminum w/ Polycarbonate or Louvered SystemGood to Excellent: A solid or louvered cover provides full rain protection.High: Protects the area directly beneath. The structure itself will need maintenance depending on its material.Defines the kitchen space without the visual weight of a solid roof. Extends seasonal use significantly.
Retractable AwningAluminum Frame, Solution-Dyed AcrylicGood (in specific conditions): Great for sun and light rain. Must be retracted in wind.Moderate: The fabric is tough but is a wear item. Protects surfaces from immediate sun and light moisture.Maximum flexibility. Provides protection when needed, open sky when not. Preserves views.
Marine-Grade Polymer (HDPE) CabinetryHigh-Density PolyethyleneMaterial-Specific: The material is impervious to rain. Provides no overhead shelter.Excellent: Will not rot, swell, or delaminate. Highly resistant to UV, stains, and heat. A build-it-and-forget-it core.This is about asset preservation. Ensures the kitchen’s “bones” survive even if fully exposed to a hurricane.
304/316-Grade Stainless ComponentsStainless SteelMaterial-Specific: The material tolerates rain. Offers no user comfort or shade.High: Resists rust and corrosion. Prone to water spots, so requires cleaning to look good.The industry standard for appliance durability. Ensures the expensive parts keep working.
Fitted Waterproof CoversHeavy-Duty Vinyl, PolyesterTargeted: Excellent for individual appliances when not in use.Good: A cheap and effective way to prevent water from getting into electronics and mechanisms. Protects finishes.Requires manual effort. You have to be diligent about using them for them to work.

Sources: Technical insights compiled from manufacturer specifications, building best practices from sources like This Old House, and outdoor design publications.

The Nitty-Gritty: What to Look For Before You Buy a Cover

When you’re evaluating any kind of cover, from an awning to a simple grill tarp, look past the marketing.

  • Waterproof vs. Water-Resistant: These are not the same thing. For real protection, you need waterproof. Check for details like taped or welded seams. A double-stitched seam on its own will still leak without sealant.
  • UV Resistance: Is the fabric solution-dyed? This means the color goes all the way through the fibers and will resist fading far longer than cheaper, surface-dyed fabrics.
  • Breathability: For a fitted cover that sits directly on an appliance, it must be breathable. Trapped moisture from condensation will create a terrarium effect and can accelerate corrosion.
  • Secure Fastenings: Look for robust straps, buckles, or a drawstring that can be cinched tight. The wind will find any weakness and exploit it.

Technical Document Revision: April 15, 2025. This document outlines key technical specifications and best practices for protecting outdoor kitchen assets from weather-related degradation.

Typically Asked Questions

Read our commonly asked questions.

How much does the initial design really affect an outdoor kitchen’s defense against rain?

Immensely. It’s probably the most critical factor. The layout itself can be designed to minimize exposure and promote drainage. Where you place the kitchen, leveraging existing walls for protection, for instance, and how you grade the patio slab underneath it are foundational decisions that will either make your life easier or create constant problems with pooling water. Getting the drainage plane right from the start is the best way to prevent long-term structural damage.

Besides using the right materials, what’s the best maintenance routine for durability against sun and rain?

Active maintenance is key. You can’t just build it and walk away. This means routinely cleaning surfaces to remove debris that can trap moisture and cause stains. It means re-applying sealants to stone countertops and grout lines annually. For any wood elements, it means cleaning and re-applying a protective UV-blocking finish. Think of it as preventative care; it defends against the slow, constant damage from UV and moisture cycles.

Can I actually get decent rain protection without building a permanent roof?

Yes, absolutely, but you have to understand the limitations. A high-quality retractable awning or a large, stable cantilever umbrella can provide excellent protection for a specific area. They are perfect for shielding the cooking space during a summer shower. What they can’t do is protect the entire kitchen footprint from driving rain or withstand high winds. They are a fantastic, flexible solution for improving usability in moderate weather.

pros and cons of composite decking

Pros & Cons Of Composite Decking

Composite decking offers pros like low maintenance and high durability. This material resists rot, stains, and insect damage. Key cons include a higher upfront cost compared to traditional wood. Additionally, composite surfaces can become hot in direct sunlight and may be susceptible to scratches, scuffs, and permanent staining.

So you’re standing at a crossroads for your backyard project. On one path, there’s traditional wood, it’s classic, it’s what we know, but man, that yearly staining ritual is a real chore. On the other path, there’s composite decking. It gleams with the promise of a maintenance-free life, but you can’t shake the feeling that there has to be a catch.

There is. Several, in fact.

The choice isn’t just about wood vs. plastic. It’s a complex decision that pits upfront cost against long-term labor, aesthetics against practicality, and environmental ideals against manufacturing realities. Let’s break down what this stuff actually is and whether it lives up to the hype.

fake decking

What Are We Actually Talking About? A Look at the Material Science

At its core, composite decking is an engineered product born from a pretty simple idea: take the stuff we don’t want (sawdust, wood chips, plastic bags, milk jugs) and fuse it into something we do want. Fundamentally, it’s a blend of wood fibers and plastic, cooked together under intense heat and pressure with bonding agents. The resulting board is dense, heavy, and a whole different beast from a piece of lumber.

But here’s the first critical distinction: not all composites are created equal. The ratio of wood to plastic is everything. A board with too high a wood-fiber content might look more natural, but it can also be more susceptible to moisture absorption over time—the very thing it’s designed to prevent. A board with too much plastic can look, well, plasticky, and might have issues with thermal expansion that you need to account for during installation.

The real evolution in this space came down to one major problem with the early stuff:

  • First-Generation (Uncapped) Composites: These are the original formula. The wood and plastic are mixed all the way through, meaning the wood fibers are exposed on the surface. They were a good first step, but they were porous. They could still stain from a spilled glass of wine and were known to sometimes harbor mold or mildew in shady, damp corners.
  • Modern (Capped) Composites: This is where the industry got smart. Manufacturers took that composite core and “capped” it with a protective shell made of pure plastic, almost like the coating on a golf ball. This outer layer is non-porous and provides serious resistance to staining, fading from UV exposure, and scratching. Today, capped composites are pretty much the industry standard for any quality installation, though the quality and thickness of that cap… that’s a major differentiator between a budget brand and a premium one.

The Good Stuff: Why People Pay the Premium (The Pros)

The reasons people fork over the extra cash for composite are compelling, and they usually boil down to solving the biggest headaches of wood deck ownership.

It’s Just… Tougher.

This is the “built-like-a-tank” argument. The materials science here is sound. By encapsulating the wood fibers in a plastic matrix, you’re basically creating a shield against the elements. Water can’t get in to fuel rot and fungal growth. This is what stops the classic wood-deck failure cycle of warping, cracking, and splintering before it even starts. It’s also completely unappetizing to termites and other wood-boring insects. This isn’t just a minor benefit; it’s a fundamental shift in longevity. That’s why you see warranties stretching from 25 to 50 years, something unheard of for traditional timber.

The Maintenance Schedule is a Ghost

This is arguably the number one reason people make the switch. Forget the annual pilgrimage to the hardware store for stain, sealer, brushes, and sanding pads. Forget losing a weekend every spring to back-breaking labor. That’s all gone.

A composite deck’s maintenance routine is ridiculously simple:

  • No yearly sealing or staining. Ever.
  • The color is either baked in or protected by that cap, so it resists fading.
  • It cleans up with soap and water.
  • No splinters. A huge plus for kids and pets.

The value proposition is clear: you’re trading a higher upfront cost for decades of your own time and money back. You spend more time using the deck, less time working on it.

The Reality Check: Understanding the Downsides (The Cons)

Of course, there’s no magic material. Composite decking comes with its own set of trade-offs, and it’s crucial to go in with your eyes open.

The Upfront Cost Can Be a Gut Punch

Let’s not sugarcoat it: the initial sticker shock is real. Depending on the brand and quality you choose, composite materials can easily be 25% to 75% more expensive than standard pressure-treated pine. For a large, complex deck, that can add up to thousands of dollars.

The key, however, is to think in terms of Total Cost of Ownership. Yes, you pay more on day one. But when you factor in the cost of stain/sealer ($200-$500 per year), cleaning chemicals, and replacement boards for a wood deck over, say, 20 years… the math starts to look very different. In many cases, the composite deck actually becomes the cheaper option over its full lifespan. The question is whether your budget can handle the initial hit.

Physical and Aesthetic Quirks

No matter how good the technology gets, composite doesn’t feel exactly like wood. Some people will always prefer the unique grain and organic feel of real timber. Cheaper composites can have a repetitive, obviously fake grain pattern or a plastic-like sheen.

And then there’s the heat. This is a big one. Dark-colored composite boards can get brutally hot in direct sunlight. (Seriously, try walking barefoot on a dark brown composite deck in the Australian outback or Adelaide in February, it’s a non-starter). Lighter colors are much better, but it’s a critical design consideration.

Finally, while it’s scratch-resistant, it’s not scratch-proof. Dragging heavy, sharp-edged patio furniture or a stray piece of gravel under a chair leg can leave a mark. Unlike wood, you can’t just sand out a deep scratch. It’s there to stay.

A Head-to-Head Breakdown: Composite vs. Wood

When you lay it all out, the decision becomes a balancing act of priorities. There’s no single “best” answer, only what’s best for you.

Maintenance: Composite wins, hands down. It’s a sweep and hose-down job versus an annual refinishing project. Wood is a long-term commitment.

Durability: Again, composite has the edge. It’s engineered to resist the things that kill wood: rot, insects, and moisture. That said, a properly maintained hardwood deck (like Ipe) can last a very long time, but it takes work.

Cost: Wood is the clear winner on upfront cost. Composite wins on long-term cost of ownership. It’s an investment vs. expense calculation.

Looks & Feel: This is purely subjective. Wood has a natural, unique beauty that many find irreplaceable. High-end composites do an incredible job mimicking it, but for some, it’ll never be the real thing.

Heat: Wood, especially lighter-colored species, stays much cooler underfoot than most dark composites. This is a non-negotiable factor in hot climates.

Safety: Composite doesn’t splinter. Period. This is a huge safety advantage, especially with small children running around.

The “Green” Question: Is Composite Really Eco-Friendly?

This is a complicated one. The sales pitch is strong: composites are made from up to 95% recycled materials! You’re saving trees and diverting plastic from landfills. And that’s true.

However, the manufacturing process to turn plastic bags and sawdust into a deck board is far more energy-intensive than milling a log. And at the end of its very long life, composite decking is not biodegradable. It’s likely destined for a landfill, where it will sit for… well, a very long time. Wood, on the other hand, will naturally decompose. So you’re weighing the immediate benefit of using recycled content against the long-term realities of energy consumption and end-of-life disposal.

A Few Words on Installation: Don’t Treat It Like Wood

This is a classic rookie mistake. Composite boards expand and contract with temperature changes—way more than wood does. You have to leave precise expansion gaps, not just between boards but where they butt up against the house or each other. Fail to do this, and you’ll get ugly buckling and warping on the first hot day of summer.

A few other critical notes from the field:

  • Joist Spacing is Gospel: The manufacturer will specify maximum joist spacing (often 16 inches on center, sometimes less). Don’t cheat this to save on lumber. Composites are more flexible than wood and will sag over time if not properly supported.
  • Ventilation is a Must: You need adequate airflow under the deck to prevent moisture buildup. Low-to-the-ground decks without proper ventilation are a recipe for trouble.
  • Use the Right Fasteners: Most systems are designed for hidden clips that fit into grooved boards. This looks clean and automatically sets the side-to-side gap. Face-screwing is possible but can create little pockets for water and isn’t as aesthetically pleasing.
  • Protect Your Substructure: Use joist protection tape. Your composite boards will last 30+ years, but the pressure-treated wood frame underneath them is still vulnerable. A cheap roll of flashing tape on top of the joists can add decades to the life of your deck’s foundation.

So, What’s the Verdict?

The choice to go with composite decking comes down to a simple trade-off: you’re exchanging a higher initial financial investment for a future with dramatically less work.

If you despise yearly maintenance, value extreme durability, and can budget for the upfront cost, a quality capped composite deck is one of the best investments you can make for your home.

If, however, you’re on a tighter budget, genuinely love the authentic look and feel of real wood, and don’t mind the annual ritual of upkeep, then a traditional wood deck remains a fantastic and timeless choice.

Ultimately, you need to be honest about your budget, your climate, and just how much you really want to spend your future weekends enjoying your deck versus sanding it.

Typical Questions

Read these common questions.

Okay, but does it really look like wood? Or will my deck look like a big plastic tray?

The honest answer is: it depends entirely on how much you spend. The cheap, entry-level composite boards can look pretty artificial. But the high-end product lines from brands like Trex, TimberTech, and Fiberon are genuinely stunning. They use multi-tonal streaking and deep, embossed grain patterns that are incredibly convincing, even up close. The texture isn’t identical, but visually, it’s often hard to tell the difference from a few feet away.

I live in a really hot, sunny climate like Australia. Is the heat issue a deal-breaker?

It can be if you’re not careful. The key cons for hot climates are heat retention and UV exposure. If you go with a dark color like walnut or charcoal grey, the surface can become too hot for bare feet during peak sun. The solution is to stick with lighter colors, think tans, light greys, or seashell tones. They reflect more sunlight and stay significantly cooler. Also, make sure you’re buying a quality capped composite, as the cap contains UV inhibitors that are essential for preventing fading in harsh sun.

What’s the real story on maintenance? Is it truly “zero maintenance”?

No, it’s “low-maintenance.” Zero-maintenance is a myth. You still have to clean it. Pollen, leaves, and dirt will build up, and if left in a damp, shady spot, can lead to surface mold or mildew (which is growing on the gunk, not the deck itself). A simple wash-down with soap and water once or twice a year is usually all it takes. The point is you’re cleaning, not refinishing. A crucial difference. And whatever you do, don’t hit it with a high-pressure power washer; you can damage the cap and void the warranty.