stud finder

How to Find Studs in Wall: DIY and Home Projects

To find a stud in a wall use a stud finder and slide it across the wall. Most stud finders beep or light up when they hit a stud. Or look for electrical outlets or light switches as they are usually mounted to the side of a stud. Measure 16 or 24 inches from an edge and you may find a stud as they are usually spaced that way.

Knowing where the wall studs are when renovating or when for hanging heavy objects like wall mounted shelves, TVs or mirrors safely and securely. Wall studs are the vertical beams inside your walls that provide the support to anchor these items. In this guide we’ll cover several ways to find wall studs, both high tech and low tech and no special tools required.

a yellow stud finder

What are Wall Studs and Why are they Important?

Wall studs are the vertical wooden beams that make up the back bone of your walls. Spaced 400mm apart, sometimes 600mm in older or non standard construction, these studs are the foundation of your home. They support the wall itself and are the secure anchor points for hanging heavy objects like wall mounted shelves, TVs and mirrors.

Knowing where the wall studs are is important for any homeowner or DIYer. Anchoring items to wall studs ensures they stay attached and don’t fall and cause accidents or damage. Without a wall stud to support them, heavy objects can pull out of the wall and cause costly repairs and hazards. By knowing where the wall studs are and how to use them you can tackle your home projects with confidence and safety.

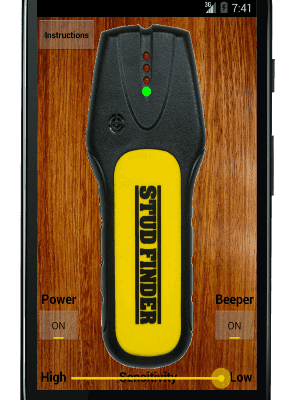
Use an Electronic Stud Finder

Using an electronic stud finder is the quickest and most accurate way to find wall studs. Stud finders detect changes in wall density so you can pinpoint exactly where a stud is.

  • Steps to Use: Place the stud finder flat against the wall, turn it on and press the calibration button. Slide it along the wall until it lights up or beeps, when it hits a stud.
  • Pro Tip: Once the stud finder finds a stud, mark both edges so you can find the center of the stud. This will ensure you’re drilling in the right spot for maximum support.
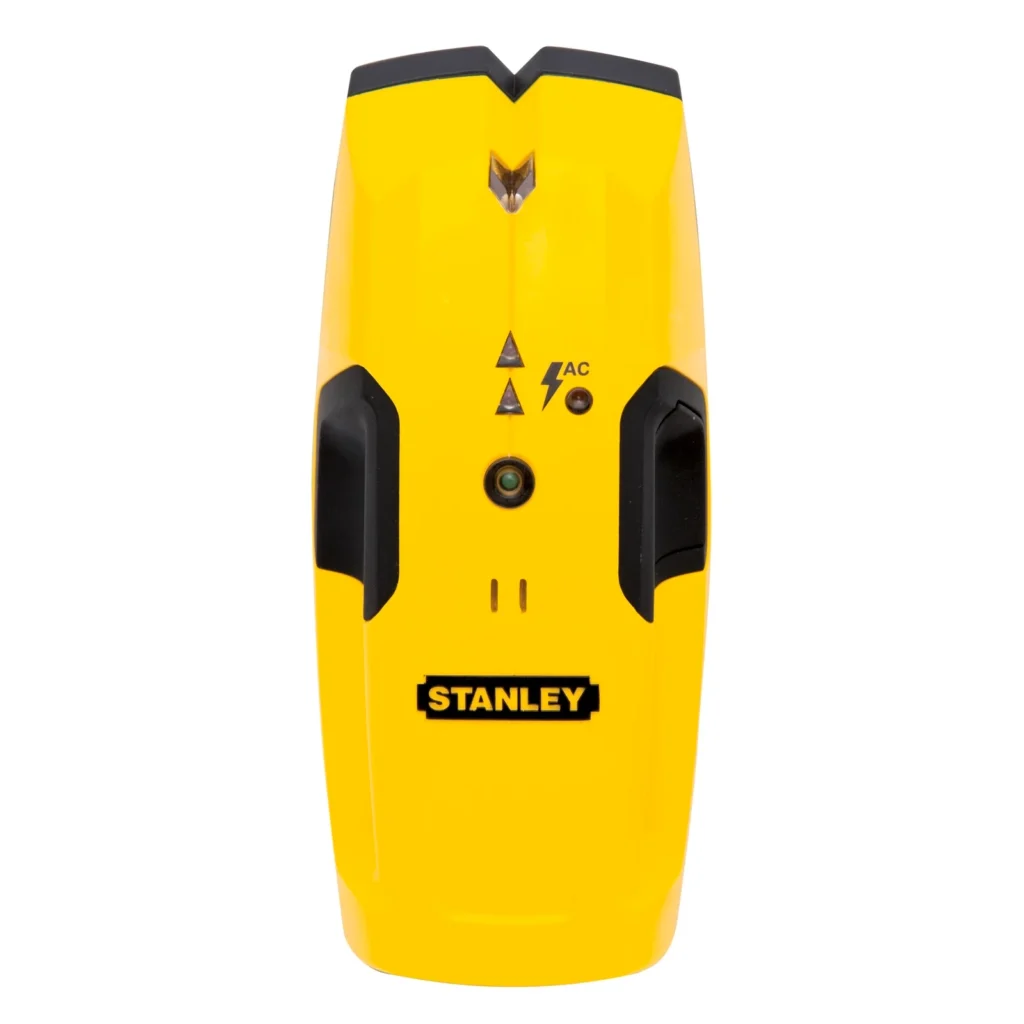
  • Popular Models: Stanley and Bosch are good brands and have models for drywall and even plaster walls. Available in stores like Bunnings and Total Tools.

This method is good for projects that require precise placement like anchoring heavy objects. Electronic stud finders are great for finding studs behind drywall and plaster walls in most homes.

Use a Magnet to Find Metal Screws in Studs

A magnet is a cheap and easy way to find studs. Studs are attached to the wall with metal screws or nails and a strong magnet can detect them among other metal objects.

  • How to Use: Slowly move a strong magnet along the wall until you feel a pull, when you’ll find a metal screw or nail within a stud.
  • Best Magnet: Neodymium magnets work best because of their strength and can detect metal screws or nails through layers of wall material.
  • Limitations: This method only detects nails or screws so you may need to check multiple spots along the wall to confirm the stud’s location.

This method works best for walls where stud finders don’t work and is good for home projects that involve anchoring items like wall mounted shelves or heavy mirrors.

Knock Test to Find Hollow and Solid Sounds

The knock test is an old school way to find wall studs by listening to the sounds. Tapping on the wall will reveal where a stud is, areas with no stud will sound hollow and areas with a stud will sound solid.

  • How to Do: Tap lightly along the wall in small increments. Areas with no stud will sound hollow and tapping directly over a stud will sound solid.
  • Where It’s Good: This method is good for finding studs in areas where you don’t have access to a stud finder or magnet.

This method is easy but not precise and good for home projects where approximate stud locations are okay, like hanging lighter items.

Measure from Light Switches and Electrical Boxes

Light switches, outlets and electrical boxes are usually attached to the side of a stud. This can give you an idea where the next stud might be.

  • Steps: Measure 400 mm from an outlet or light switch, most studs in home projects are 400 to 600 mm apart. In modern construction this spacing is consistent.
  • Warning: Don’t drill too close to these fixtures or you could damage the wiring.

This method is good for estimating stud positions in smaller rooms and can find wall studs without special tools.

Use a Wire Hanger or Small Nail to Confirm Stud Location

If other methods leave you unsure about a stud’s location, a wire hanger or small nail can confirm the stud’s location.

  • How to Do: Bend a wire hanger into an “L” shape and insert it into the wall where you think the stud is. Rotate it to feel for resistance.
  • Alternative: Use a thin drill bit to create a small hole and feel for resistance, which will indicate you hit the stud.
  • Warning: Don’t drill near electrical wires, especially near outlets or light switches.

This method is good if you’re still having trouble finding a stud with other tools and want to confirm a stud’s location before hanging heavy objects.

Look for Visual Cues on Baseboards and Wall Trim

Construction techniques often places studs near baseboards, trim and around windows for structural support. Look for these elements to give you an idea where the stud is.

  • Steps: Look for visible nails or seams in baseboards or trim, they usually line up with a stud.
  • Example Use: In rooms with windows or doors, studs are usually placed near the edges for added support.

This method is good in homes where you can see clear construction cues and is especially good for home projects in rooms with trim or molding.

Stud Finder Apps as a Supplement

Stud finder apps can be used as an additional tool, especially if you don’t have a physical stud finder. These apps uses the phone’s internal sensors to detect density changes in the wall, an alternative for those without a stud finder.

  • Best Apps: Walabot and Stud Finder Pro are popular options with easy to use interface. But accuracy depends on wall type and your phone’s sensor.
  • When to Use: Use these apps as a supplement when physical methods are not available.

This tool is good for general guidance on stud locations for lighter home projects or smaller items.

Common Mistakes to Avoid When Finding Wall Studs

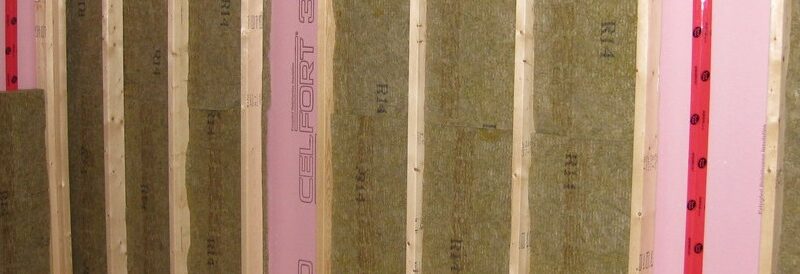
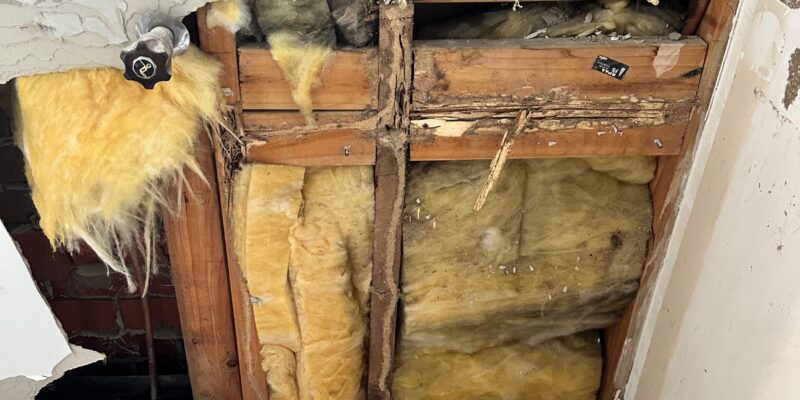
When finding wall studs, several common mistakes can lead to inaccurate results or damage. One of the most common is relying too much on the knock test. While tapping on the wall can help identify hollow and solid areas or where wall insulation is present, it’s not reliable especially on plaster walls where the sound is not as distinct.

Another mistake is using a wire hanger to fish around behind the wall. This method can damage the wall or worse, snag on electrical wires and is a big safety risk. Using a stud finder app without proper calibration can also give you false readings and make it hard to find the wall studs.

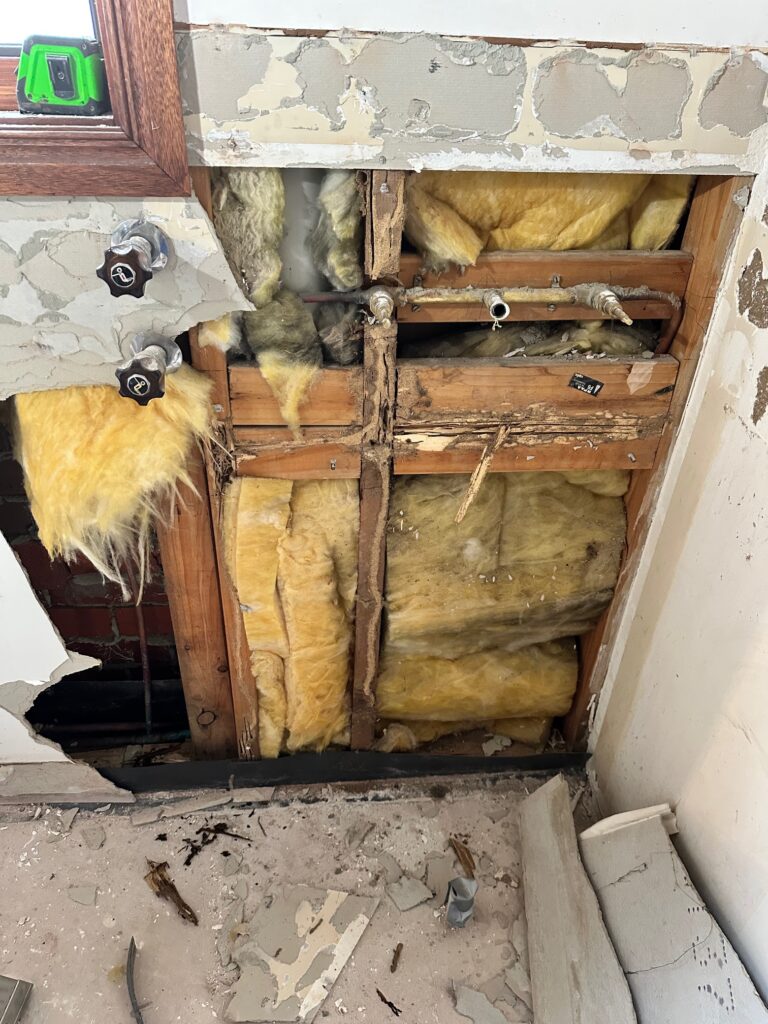
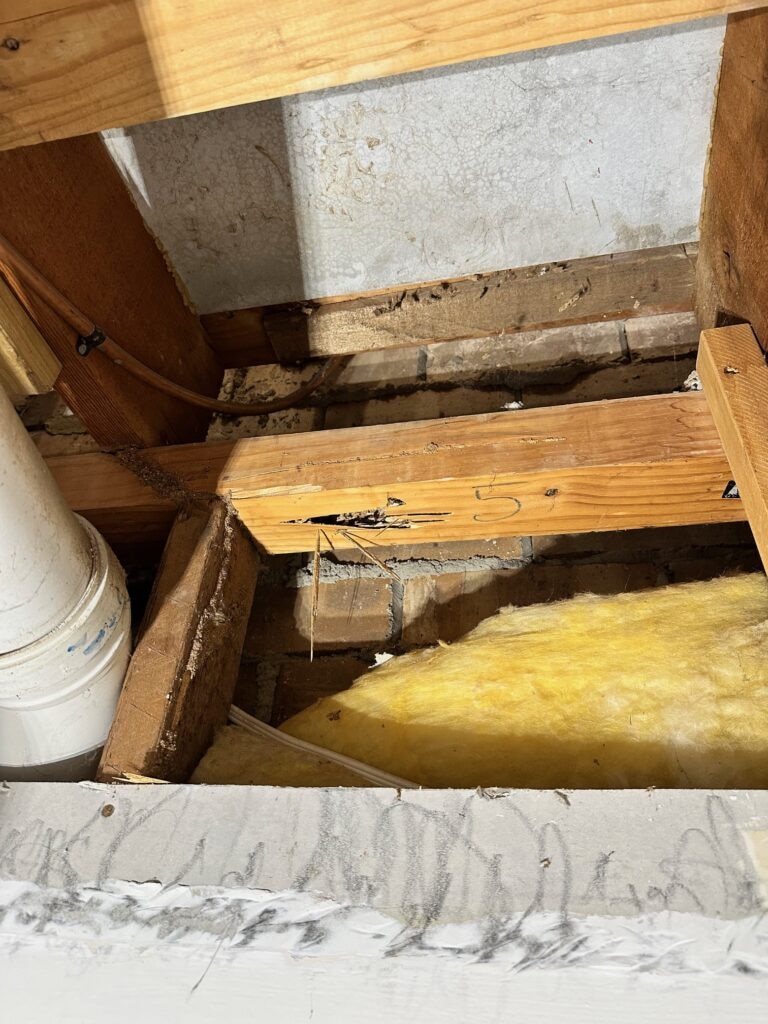
Also never drill into electrical boxes or copper pipes. These are usually hidden behind the walls and drilling into them can be a big safety hazard, electrical shock or water damage. To avoid these, always use a stud finder to double check the area before drilling and be aware of the locations of electrical outlets and plumbing.

By avoiding these mistakes, you’ll find wall studs safely and accurately and your DIY projects will be successful and secure.

Hanging Heavy Objects on Wall Studs

Once you’ve found the center of the stud, make sure to anchor heavy objects correctly so they won’t come loose. For items like TVs, heavy mirrors and wall-mounted shelves follow these tips for safe hanging.

  • Use the Right Hardware: Use heavy-duty screws or anchors for wood studs if you’re drilling into drywall. This will minimize the chance of heavy objects coming loose.
  • Drill Pilot Holes: Drill small holes before screwing. This will prevent wall damage and make it easier to screw in the hardware.
  • Safety Tip: Always find the exact center of the stud for maximum holding power, drilling too close to the edge reduces stability.

Using these tips you’ll be able to anchor heavy objects securely and fasten them properly and reduce wall damage.

Best Practices:

  • When hanging objects over 90 kgs always use the center of the stud.
  • Use a level to ensure alignment and avoid angled mounts which can put extra stress on the screws.
  • If you’re working on buildings with metal studs use specialized hardware as metal studs require different technique than wood studs.

By following these methods you can find wall studs for any home project that requires secure mounting, whether it’s hanging a mirror or installing shelves. Whether you’re using a stud finder, magnet or simple knock test, follow these tips for safe and effective mounting in your home.

Popular Questions

Below are common questions we get asked.

What are the best tools for finding studs in different wall types?

Different wall types may require different tools for stud finding. For plaster walls a magnetic stud finder is often effective since the nails and screws used in construction. For electronic stud finders they can give more precise readings by detecting changes in wall density so they are good for drywall or timber walls. Traditional methods like knock and listen can be used in any wall type but may not be as reliable in older homes with irregular stud spacing.

How can I find studs without damaging my walls?

To find studs without damaging you can use non-invasive methods like the magnet technique where a strong magnet is moved along the wall to detect metal fasteners. Or the knock and listen method where you can hear the difference between hollow and solid sounds without any tools. If you prefer a more techy approach you can use an electronic stud finder to find studs accurately with minimal wall damage.

What if I can’t find a stud where I think I should?

If you can’t find a stud where you expect one it may be due to irregular spacing or construction methods in older homes. In this case try measuring from known points like electrical outlets or corners of the room as studs are usually spaced 450mm or 600mm apart. If all else fails use a metal detector which can find screws or nails deeper in the wall structure.

Can I make a stud finder at home?

Yes you can make a simple DIY stud finder by attaching a strong magnet to a string or dental floss. Move this homemade tool horizontally along the wall and you’ll detect metal fasteners which will indicate a stud. This is cost effective and battery free and calibration free so anyone can use it to find studs easily.

a bathroom that has been waterproofed in Maylands

Waterproofing A Bathroom – How To

How to waterproof a bathroom is an important step in any bathroom renovation to prevent water damage, mold growth, and structural issues.

Failing to waterproof correctly can lead to expensive repairs and safety hazards. In this article we’ll explore the process of waterproofing your bathroom, discuss the necessary materials, and highlight areas that need special attention to ensure your bathroom remains water-resistant for years to come.

What Is Bathroom Waterproofing?

Bathroom waterproofing is the process of applying waterproof membranes and sealants to protect wet areas, such as the shower floor, walls, and entire bathroom floor, from water penetration. To effectively waterproof a bathroom, these methods form a barrier that prevents water from seeping into surfaces like tiles, concrete, and grout, protecting against mildew growth and structural damage.

Using the correct waterproofing product is important to ensure proper protection in areas like the shower walls and bathroom floor, where the most water exposure occurs. Waterproofing agents like liquid membranes or sheet membranes are commonly applied to these surfaces, providing a durable and long-lasting solution.

Why Bathroom Waterproofing is Necessary

Bathroom waterproofing is an important aspect of maintaining a safe and healthy living space. Water damage can lead to a range of issues, including structural decay, mold and mildew growth, and pest infestations. Inadequate bathroom waterproofing can also compromise the integrity of the building, leading to costly repairs and even safety hazards.

By waterproofing your bathroom, you can prevent water from seeping into the walls and floors, reducing the risk of damage and ensuring a safe and healthy environment for you and your family.

Key Areas in the Bathroom That Need Waterproofing

Proper bathroom waterproofing, including waterproofing a bathroom, targets wet areas such as the shower area, bathroom walls, and whole bathroom floor. Each of these areas is prone to water penetration and water damage if not properly sealed. In an average-sized bathroom, it is important to waterproof both the floor and walls thoroughly to meet Australian Standards.

Critical Areas Include: Shower Floor

  • Shower area: The shower floor and walls are the most vulnerable to water damage due to constant exposure to moisture. A wet room design, which lacks a separate shower enclosure, necessitates comprehensive waterproofing for the entire bathroom floor and walls to prevent water damage, highlighting its popularity in modern renovations and the importance of adhering to Australian standards.
  • Bathroom floor: Ensuring the entire floor is waterproofed prevents leaks from reaching the underlying structure, especially in a ground floor installation.
  • Bathtub edges: Water often seeps into the gaps around bathtubs if not properly sealed.
  • Plumbing fixtures: Leaks can occur around faucets, toilets, and drainage systems if not adequately waterproofed.

Materials Used for Bathroom Waterproofing

Getting your bathroom waterproofed is important for a long-lasting waterproofing job. The two main waterproofing methods are the use of liquid membranes and sheet membranes. Both have their advantages and can be used in combination, depending on the bathroom type and location.

Types of Waterproofing Membrane

  1. Liquid membranes: These are applied with a paint roller or brush to create a seamless barrier over the surface, such as an epoxy coating. A first coat followed by a second coat ensures complete coverage.
  2. Sheet membranes: Most sheet membranes are pre-formed and applied to the bathroom floor and walls, offering high durability. These membranes are often used in areas requiring extra reinforcement.

For example, liquid membranes are ideal for shower floors, while sheet membranes provide better coverage for larger areas like the whole bathroom floor.

epoxy bathroom floor

The Bathroom Waterproofing Process

Waterproofing a bathroom involves several key steps to ensure complete protection from water damage. To prevent moisture penetration, every layer of the bathroom must be properly sealed.

Step-by-Step Waterproofing:

  1. Surface preparation: Clean and prime all surfaces, including the bathroom floor, shower walls, and shower floor, to ensure a strong bond for the waterproofing product. Proper surface preparation is crucial when waterproofing a bathroom to prevent future water damage.
  2. Application of waterproof membranes: Apply a liquid membrane or sheet membrane to the bathroom’s surfaces. Ensure proper overlap of sheets if using sheet membranes.
  3. Sealing: Use silicone sealant around plumbing fixtures, joints, and the edges of the bathroom walls and floor.
  4. Testing for leaks: After waterproofing, perform a water leak test to ensure no gaps or weaknesses are present.

This process ensures that all areas of the bathroom, especially wet areas like the shower, are adequately protected. Proper waterproofing a bathroom is essential to comply with Australian standards and avoid costly future renovations due to water damage.

Common Bathroom Waterproofing Mistakes

Incorrect waterproofing can lead to significant water damage and waterproofing issues. Failing to follow building code requirements or skipping steps can result in leaks, mildew growth, and structural damage.

Avoid These Mistakes:

  • Inadequate surface preparation: Skipping cleaning and priming leads to weak adhesion of the waterproofing agent, increasing the risk of water penetration.
  • Incorrect material use: Using the wrong waterproof membrane or sealant for the surface type can result in failure over time.
  • Inconsistent application: Uneven or insufficient coating of liquid membranes can leave gaps in protection, allowing moisture to seep through.
  • Skipping corners and joints: Corners, joints, and plumbing fixtures are the most prone to leakage and must be sealed correctly with silicone or additional waterproofing agents.

Ensuring the whole bathroom floor and other wet areas are completely sealed is crucial for long-term protection.

Signs That Your Bathroom Waterproofing Has Failed

Knowing when your bathroom waterproofing has failed is crucial to avoiding further structural damage and health risks. Getting your bathroom waterproofed can prevent serious water damage. Common signs of waterproofing issues include visible water damage, mold growth, and cracks in the tiles.

Signs of Waterproofing Failure:

  • Water stains on walls or floors.
  • Mold or mildew growth along the edges of tiles and around plumbing fixtures.
  • Peeling paint or cracked tiles in the shower area.
  • Swollen walls or floors, particularly in older or improperly waterproofed bathrooms.
  • In a wet room, comprehensive waterproofing is crucial to prevent water damage to the entire bathroom floor and walls.

Immediate action is necessary to avoid worsening the damage. Hiring a licensed professional to assess and repair the waterproofing job can prevent costly renovations.

Maintenance and Upkeep

Ensuring Longevity:

To ensure the longevity of your bathroom waterproofing, regular maintenance and upkeep are essential. Here are some tips to help you keep your bathroom waterproofing in good condition:

  • Regularly inspect the bathroom for signs of water damage or leaks.
  • Check the condition of the waterproofing membrane and replace it if necessary.
  • Ensure that the bathroom is well-ventilated to prevent moisture buildup.
  • Avoid using harsh chemicals or abrasive cleaners that can damage the waterproofing membrane.
  • Regularly clean the bathroom, paying particular attention to areas around the shower and bathtub.

By following these tips, you can help extend the life of your bathroom waterproofing and prevent costly repairs.

Troubleshooting and Repair

Addressing Issues:

Despite regular maintenance and upkeep, issues can still arise with your bathroom waterproofing. Here are some common problems and solutions:

  • Leaks: If you notice water leaking from the shower or bathtub, check the condition of the waterproofing membrane and replace it if necessary. Ensure that the area is properly sealed and caulked.
  • Cracks: If you notice cracks in the walls or floors, check for signs of water damage and address the issue promptly. Apply a waterproofing agent to the affected area and seal with a liquid membrane.
  • Mold and mildew: If you notice mold or mildew growth in the bathroom, ensure that the area is well-ventilated and clean the affected area with a mild detergent. Apply a waterproofing agent to the affected area and seal with a liquid membrane.

By addressing issues promptly and taking preventative measures, you can help ensure the longevity of your bathroom waterproofing and prevent costly repairs.

Professional vs. DIY Bathroom Waterproofing

When deciding how to waterproof your bathroom, consider the complexity of the job and the potential risks of poor waterproofing. In areas like South Australia & New South Wales, waterproofing must meet specific minimum requirements set by building codes, making professional waterproofing essential for legal and safety reasons.

Pros and Cons:

  • DIY job: A DIY waterproofing job may save on labor costs, but risks include improper sealing and failure to meet the required Australian Standards.
  • Professional job: Hiring a skilled tradesperson or licensed professional ensures that all aspects of the job are completed according to regulations, with warranties provided on the work.

While a DIY job might seem more cost-effective upfront, professional waterproofing offers greater long-term protection and compliance with local laws.

Final Points

Bathroom waterproofing is essential for preventing water damage, mold growth, and structural issues. Properly waterproofing the shower area, bathroom floor, and bathroom walls with waterproof membranes like liquid membranes or sheet membranes protects your home from costly repairs in the future. Avoid common mistakes, understand when to call a licensed professional, and ensure your waterproofing meets local building codes to keep your bathroom in top condition.

Popular Questions

Below are common questions we’re asked about waterproofing a bathroom.

How long does bathroom waterproofing last?

A properly installed waterproofing membrane can last up to 10 years or more, depending on the quality of materials used and the conditions of the bathroom. Regular maintenance, like re-sealing joints and checking for signs of water damage, helps extend the lifespan.

Can I waterproof my bathroom myself?

Yes, DIY bathroom waterproofing is possible, but it requires strict adherence to the process and use of the correct waterproofing products. However, in places like New South Wales, bathroom waterproofing must meet building code standards, and hiring a licensed professional may be necessary to ensure compliance.

What are the signs of failed waterproofing in a bathroom?

Signs of failed bathroom waterproofing include visible water stains, mold growth, peeling paint, and cracks in tiles or grout. Swelling walls or floor damage also indicate water penetration and the need for immediate repair.

What is the most effective waterproofing method for bathrooms?

The most effective method combines liquid membranes for shower floors and walls, and sheet membranes for the entire bathroom floor. These materials offer durable, long-lasting protection against moisture and water damage in high-risk areas like the shower and wet rooms.

bathroom fixtures and fitting

Guide to Choosing the Best Bathroom Flooring: Options, Trends, and Installation Tips

Choosing the best bathroom flooring is important due to the unique challenges of bathrooms, including high moisture levels, standing water, and the potential for slip and fall accidents. We look at how you can navigate through the most popular flooring options available, ensuring you pick the right flooring for your needs.

Popular Bathroom Flooring Options

The following are some of the most popular choices.

Ceramic and Porcelain Tiles

Ceramic tiles and porcelain tiles are among the most popular bathroom flooring options due to their water resistance, durability, and slip resistance. Both materials offer a hard surface that withstands high traffic bathrooms and wet environments.

Bathroom renos after in Hyde Park
  • Ceramic tile is known for its affordability and versatility in design. It can mimic the look of natural stone, wood, or even linoleum floors while maintaining a waterproof surface. The material is stain resistant and easy to clean, making it a practical choice for bathrooms.
  • Porcelain tile is a type of ceramic tile but with a higher density, making it more durable and completely waterproof. It’s an excellent choice for areas with standing water. Porcelain tiles are available in larger tiles, offering a modern and sleek look, but smaller tiles can be used in smaller bathrooms for a classic design.

Porcelain and ceramic tiles both provide timeless appeal and are available in various finishes, including textured surfaces that enhance slip resistance.

Installation Tip: Proper grout sealing is necessary to prevent water infiltration, which can lead to mold and mildew growth.

Vinyl Flooring

Vinyl flooring is another excellent option for bathroom floors, particularly for those seeking affordable and waterproof flooring. This material comes in several forms, including vinyl planks and sheet vinyl, and is known for its water resistance and ease of maintenance.

  • SPC vinyl flooring (Stone Plastic Composite) is an advanced form of vinyl flooring that offers an extremely durable and completely waterproof surface, ideal for high traffic bathrooms.
  • Waterproof vinyl options, including luxury vinyl planks (LVP), are popular due to their ability to mimic hardwood floors while providing superior water resistance.

Vinyl flooring is also stain resistant, making it an ideal choice for areas prone to minor spills and excess moisture. The protective layer on the surface of vinyl flooring helps in preventing scratches and wear.

Installation Tip: Ensure the subfloor is smooth and clean before installation to prevent imperfections from showing through the vinyl.

Natural Stone

For those who prioritize natural beauty and luxury, natural stone flooring, such as stone tiles made from marble, granite, or slate, offers an unparalleled aesthetic. Natural stone is inherently water resistant and extremely durable, though it requires careful consideration due to its porous nature.

  • Stone flooring offers a timeless appeal, but it’s important to apply a polyurethane topcoat or sealant to enhance its water resistance. Without proper sealing, natural stone can absorb water, leading to potential damage.
  • Stone tiles provide a slip resistant surface when textured, making them safer for wet environments.

Installation Tip: Sealing the stone regularly is crucial to maintaining its appearance and protecting it from moisture damage.

Engineered Wood and Laminate Flooring

Engineered wood and laminate flooring bring the warmth and natural beauty of wood into the bathroom while offering better water resistance than solid wood.

  • Engineered hardwood is made from layers of wood with a waterproof surface layer, providing the appearance of hardwood floors with enhanced durability in wet environments. It’s a good option for those who want the look of wood without the risks associated with excess moisture.
  • Laminate floors consist of a photographic layer that can mimic wood, stone, or tile flooring, covered by a protective layer that offers scratch resistance and water resistance. However, it’s less waterproof than vinyl or tile, so spills should be cleaned up promptly to avoid damage.

Installation Tip: Consider using water-resistant underlayment to further protect against moisture.

Cork and Linoleum Flooring

Cork floors and linoleum floors are eco-friendly flooring options that are gaining popularity for bathrooms due to their sustainability and comfort underfoot.

  • Cork flooring is naturally water resistant and offers a soft, cushioned surface, reducing the risk of slip and fall accidents. It also provides natural insulation, making it less cold underfoot than tile or stone.
  • Linoleum floors are made from natural materials like wood flour and linseed oil, offering water resistance and stain resistance. Modern linoleum is treated with a polyurethane topcoat for added durability and ease of maintenance.

Installation Tip: For best results, choose unfinished cork or linoleum and apply a sealant on-site to ensure maximum water resistance.

Waterproof and Water-Resistant Flooring Options

In bathrooms, waterproof flooring is essential to prevent damage from standing water and excess moisture. The best options include vinyl flooring, porcelain tile, and natural stone.

Waterproof vinyl is especially effective in wet environments, providing a completely waterproof barrier that resists moisture infiltration. Porcelain tiles are also a top choice, as they are inherently waterproof and can handle the humidity and spills common in bathrooms.

For those who prefer the look of wood, engineered wood offers a water-resistant alternative to traditional hardwood floors, combining the aesthetic appeal of wood with the water resistance needed in bathrooms.

Maintenance Tip: Regular cleaning and prompt attention to spills will extend the life of your bathroom flooring.

Trends in Bathroom Flooring

The following are current trends.

Heated Flooring

Heated flooring is becoming increasingly popular in bathrooms, offering comfort and luxury. This trend is particularly effective with tile flooring such as ceramic or stone tiles, which can feel cold underfoot.

Radiant heating systems installed under floor tiles warm the surface, making bathrooms more inviting, especially during colder months. This feature is not only a luxury but also adds value to your home.

Large-Format and Patterned Tiles

Larger tiles are trending in bathroom design, offering a sleek, modern look with fewer grout lines, which makes cleaning easier. White bathroom tiles in large formats can make a small bathroom appear more spacious, while smaller tiles with bold patterns add visual interest and personality to the space.

Textured and slip resistant surfaces are also becoming more common, enhancing safety in wet environments.

Installation Tip: Ensure the subfloor is properly leveled before installing large tiles to prevent cracks and uneven surfaces.

Budgeting for Bathroom Flooring

When choosing bathroom flooring, it’s important to balance cost with durability and aesthetic appeal. Vinyl flooring is one of the most cost-effective options, offering water resistance and easy maintenance at a lower price point. Ceramic tiles are also relatively affordable, especially when compared to natural stone or engineered wood.

Stone tiles and porcelain tiles are at the higher end of the price spectrum, but their durability and timeless appeal can justify the investment. Laminate flooring and cork floors offer a middle ground, with moderate pricing and decent water resistance.

Budget Tip: Consider DIY installation for vinyl or laminate floors to save on labor costs, but leave more complex installations like stone or tile flooring to professionals.

Installation Tips for Bathroom Flooring

Proper installation is important for the longevity and performance of your bathroom flooring. Here are some general tips:

  • Subfloor Preparation: Ensure the subfloor is clean, dry, and level before installation. Any imperfections can affect the final result.
  • Waterproofing: Apply a waterproof underlayment or membrane, especially if you’re installing tile flooring or engineered wood.
  • Grout Sealing: If using ceramic tiles or porcelain tiles, seal the grout to prevent water infiltration and mold growth.

For those opting for DIY installation, vinyl planks or laminate flooring are easier to work with, while natural stone or porcelain tile may require professional expertise.

Maintenance and Longevity of Bathroom Flooring

The longevity of your bathroom flooring depends largely on proper maintenance. Regular cleaning, especially in wet environments, helps prevent issues like mold and mildew.

  • Tile flooring (both ceramic and porcelain tiles) should be swept regularly and mopped with a mild detergent. Ensure that grout lines are kept clean and resealed as needed.
  • Vinyl flooring is low-maintenance but should be cleaned with non-abrasive products to preserve the protective layer.
  • Stone flooring requires periodic sealing to maintain its water resistance and prevent stains.

For all bathroom floors, it’s important to address any minor spills immediately to avoid water damage.

Maintenance Tip: Use mats or rugs in areas prone to excess moisture, such as near the bathtub or shower, to protect your bathroom floor.

Final Points

Selecting the best bathroom flooring involves careful consideration of various factors, including water resistance, durability, and personal style. Whether you opt for the classic look of ceramic tiles, the modern appeal of vinyl flooring, or the luxury of natural stone, choosing the right material will ensure your bathroom floors stand the test of time while enhancing the overall aesthetic of your space.

Popular Questions

Below are some of the most common questions we get asked.

What is the best flooring option for a bathroom?

The best bathroom flooring option depends on your priorities, such as water resistance, durability, and style. Porcelain tile is often considered the top choice due to its completely waterproof nature, timeless appeal, and slip resistance. Vinyl flooring, especially SPC vinyl flooring, is another excellent choice for wet environments as it is extremely durable, waterproof, and more budget-friendly. For a more luxurious feel, natural stone like marble or slate offers natural beauty but requires sealing to maintain its water resistance.

Can I use hardwood floors in a bathroom?

Using solid hardwood floors in a bathroom is not recommended due to the material’s susceptibility to excess moisture and potential water damage. However, engineered hardwood is a viable alternative because it is designed to be more water-resistant while still providing the warm, natural look of wood. If you prefer a wood appearance without the risks, waterproof vinyl planks or laminate flooring that mimics wood can be excellent options for bathroom floors.

How can I make my bathroom floor less slippery?

To make your bathroom floor less slippery and reduce the risk of slip and fall accidents, consider using slip-resistant materials such as textured ceramic tiles or porcelain tiles. These options provide better traction, especially when wet. Additionally, you can add bath mats in areas prone to standing water, such as near the bathtub or shower, and regularly clean the floor to prevent the buildup of soap or water residues that can make the surface slippery.

height of a kitchen bench

Standard Kitchen Bench Height in Australia – Considerations & Specifications

The standard kitchen bench height in Australia is 900 mm (90 cm), designed to offer optimal ergonomics and comfort for most users. This measurement includes the floor cabinet carcass excluding the thickness of the benchtop, which is generally 33mm thick whereas laminate materials are typically 33mm thick whereas materials like granite and engineered stones tend to be 20mm or 40mm thick.

When installing a new kitchen or renovating and older kitchen, it’s an important consideration.

height of kitchen bench tops

Importance of Kitchen Bench Height

Ergonomics and Comfort: The correct bench height ensures that kitchen tasks are performed comfortably, reducing strain on the back and wrists. It also improves productivity by enabling a more natural posture. Proper bench height can prevent long-term injuries and contribute to overall kitchen efficiency.

User Comfort: For tasks like chopping vegetables or kneading dough, a well-measured bench height can make all the difference in ease and efficiency. It is important for both home cooks and professional chefs to work in a space that accommodates their physical needs.

Australian Standards for Kitchen Bench and Splashback Height

Standard Measurement: In Australia, the standard kitchen bench height is set at 900 mm, which accounts for the floor cabinet height plus the benchtop thickness. The standard floor cabinet height is typically 720mm, excluding the kickboard, and the benchtop height can vary between 850mm and 1050mm to accommodate different user preferences. This standard is designed to meet the needs of the average user, ensuring a balance between functionality and comfort.

Building Codes: These standards are in place to ensure uniformity and ease of use across various kitchen designs. Compliance with these codes ensures that kitchens are safe and functional, minimizing the risk of injury and maximizing efficiency.

Materials and Thickness: The choice of materials, such as engineered stone, can affect the final height of the bench. Benchtop thickness varies, and it’s important to consider this when planning your kitchen layout.

Measuring the Ideal Benchtop Height

Measuring Tape: Use a measuring tape to determine the height from the floor to the top of the benchtop. Ensure that the measurement is taken accurately to avoid any discrepancies during installation.

Personal Adjustments: Depending on the user’s height, the bench height can be adjusted slightly, but maintaining the standard ensures compatibility with appliances like bench ovens and gas cooktops. A common adjustment might involve raising the bench slightly for taller users or lowering it for shorter individuals. The standard cabinet height is 720mm, which is a baseline for both floor and wall cabinets, with minor variations allowed.

Kickboard Depth: The kickboard depth can also impact the overall comfort and usability of the kitchen. Ensuring the right depth allows for better posture while standing at the bench. When measuring, consider the carcass excluding the door to provide precise guidelines for cabinetry design.

Factors Influencing Bench Height

User Height: Taller individuals may require a slightly higher bench height to avoid stooping, while shorter users might need a lower bench. Customizing the height based on user preferences can enhance the kitchen’s functionality. Additionally, it is crucial to consider the minimum height requirements for rangehoods and splashbacks, which generally range between 650mm and 750mm for rangehoods and must meet the minimum industry fire safety standards of 600mm for electric cooktops and 700mm for gas cooktops.

Kitchen Tasks: The type of tasks performed, such as using a bench oven or preparing meals, can influence the ideal height. Additionally, incorporating breakfast bars or an island bench may require varying heights for different sections. Specific tasks, such as baking, might benefit from a lower bench for ease of rolling dough.

Appliance Integration: The installation of appliances such as gas cooktops and bench ovens must be considered when determining the bench height. Proper integration ensures that all elements of the kitchen work seamlessly together.

Built-Up Edge: Some designs feature a built-up edge for aesthetic or practical reasons, which can add to the overall height. It’s important to factor this in during the planning phase.

Customising Bench Height for Specific Needs

Lifestyle and Habits: Customizing the bench height to fit specific cooking habits can improve kitchen workflow. For example, a home baker might prefer a lower bench for easier dough preparation. When planning, consider the overall dimensions inclusive of door thickness and the standard tall cabinet height, such as 2073mm or 2100mm, to ensure proper alignment and functionality.

Additional Space: Including features like an island bench or breakfast bars can provide additional workspace at varying heights. These can be tailored to serve multiple functions within the kitchen, such as seating areas or extended prep spaces.

Breakfast Bars: These are often at a different height than the main kitchen bench, providing a space for casual dining or additional preparation area. Ensuring that these are at a comfortable height for sitting is essential for functionality.

Benchtop Thickness: The thickness of the benchtop also affects the final height. Opting for a thicker material can add to the overall height, which might need adjustment in the cabinet heights to maintain ergonomic standards.

Comparing Standard Bench Heights Internationally

Height Differences: Comparing Australian standards with those in other countries, such as the US (which typically uses 36 inches), highlights the importance of local standards. This comparison can be useful for expatriates or those designing kitchens with international influences.

Kitchen Design Trends: Understanding these differences can help in designing kitchens that cater to international preferences, especially for expatriates. Knowing the trends and standards in different regions can also inspire innovative design solutions.

Same Height: While some countries prefer uniform heights throughout the kitchen, others might vary the heights for specific tasks. Understanding these preferences can guide the design process to suit user needs.

Future Trends in Kitchen and Island Bench Design

Adjustable Benches: Future trends include adjustable benchtops that cater to different tasks and user heights. These can be manually adjusted or feature motorized systems for ease of use.

Smart Kitchens: Integration of smart technologies that allow for height adjustments at the touch of a button. This innovation caters to multi-user households where members have different height requirements.

Sustainability: Using sustainable materials and designs that promote longevity and reduce environmental impact. Innovations in materials like engineered stone offer both aesthetic appeal and durability.

Case Studies of Australian Kitchens

Custom Kitchens: Examples of Australian kitchens that have implemented varying bench heights to accommodate multiple users, showcasing the flexibility and practicality of custom solutions. These case studies highlight the importance of personalized design in enhancing kitchen functionality.

Engineered Stone: Use of durable materials like engineered stone for benchtops, ensuring longevity and style. These materials not only add to the aesthetic appeal but also offer practical benefits such as ease of maintenance and durability.

Square Metre Efficiency: Maximizing the use of available space by designing multifunctional areas. Efficient use of each square metre ensures that the kitchen remains functional without feeling cramped.

Expert Tips on Choosing the Right Bench Height

Consultation: Seeking advice from kitchen designers can help in selecting the right height, ensuring both functionality and comfort. Professionals can offer insights into the latest trends and best practices in kitchen design.

Standard Width: Alongside height, considering the standard width of cabinets and kickboard depth ensures a cohesive design. Proper width and depth measurements contribute to the overall usability and aesthetics of the kitchen.

Door Thickness: The thickness of cabinet doors can affect the final look and feel of the kitchen. Ensuring that door thickness is compatible with the overall design is crucial for a seamless appearance.

Gas Cooktop Integration: Proper integration of appliances like gas cooktops ensures safety and functionality. The height of these appliances should align with the bench height for ease of use.

By adhering to the standard bench height of 900 mm, Australian kitchens can achieve a balance of comfort, efficiency, and aesthetic appeal. For personalized designs, adjustments can be made to cater to specific needs and preferences, ensuring an optimal kitchen experience. The inclusion of modern innovations and consideration of individual requirements can further enhance the usability and enjoyment of the kitchen space.

Popular Questions

Below are common questions we get asked.

What is the standard kitchen bench height in Australia?

The standard kitchen bench height in Australia is 900 mm (90 cm). This measurement includes the floor cabinet carcass excluding the benchtop thickness, which typically ranges from 20 mm to 40 mm. This height is designed to provide optimal ergonomics and comfort for most users, ensuring ease of use and reducing the risk of strain or injury during kitchen tasks.

How do I measure my kitchen bench height correctly?

To measure your kitchen bench height accurately, follow these steps:

  • Use a measuring tape to measure from the floor to the top of the benchtop.
  • Ensure the measurement includes the height of the floor cabinet carcass plus the benchtop thickness.
  • For personalized adjustments, consider the height of the primary users and any specific tasks that might require different heights, such as baking or using a bench oven.

Can I customise my kitchen bench height?

Yes, you can customize your kitchen bench height to suit your specific needs and preferences. While the standard height is 900 mm, adjustments can be made to accommodate taller or shorter users. Customizing the bench height can enhance comfort and efficiency, particularly if you frequently perform specific tasks like baking or cooking with a gas cooktop. Consider factors such as benchtop thickness, kickboard depth, and the integration of appliances when customizing your kitchen bench height.

What materials affect the kitchen bench height, and how?

The material chosen for your benchtop can significantly affect the final height of your kitchen bench. Common materials include engineered stone, granite, and laminate, each with varying benchtop thickness:

  • Engineered Stone: Typically ranges from 20 mm to 40 mm in thickness, adding durability and aesthetic appeal to your kitchen.
  • Laminate: Usually thinner, around 20 mm, which might require adjustments to the floor cabinet height to maintain the standard bench height.
  • Granite and Other Stones: These materials can vary in thickness and weight, necessitating sturdy support from the floor cabinet carcass.

Considering these factors ensures that the overall bench height remains comfortable and functional, adhering to both personal needs and standard guidelines.

Hot Water Systems Have a Lifespan – How Long Do They Last?

Understanding how long hot water systems last is important for making informed decisions about maintenance, replacement, and long-term investment in your home. On average, a hot water system’s lifespan ranges from 8 to 12 years, depending on the type, usage, and maintenance.

Types of Hot Water Systems and Their Expected Lifespan

Electric Hot Water Systems

Electric hot water systems are among the most common in residential settings. Typically, these systems have an average lifespan of 10 to 15 years. The longevity of electric systems depends heavily on the quality of the heating elements and the tank itself. Regular maintenance, including flushing the tank to remove sediment buildup, is essential to prolong the lifespan of these systems.

Gas Hot Water Systems

Gas hot water systems usually last between 8 and 12 years. These systems use a gas burner to heat water and are generally more energy-efficient than electric systems. However, they require careful consideration of the installation quality and regular maintenance to avoid major problems, such as the buildup of sludge or sediment, which can significantly impact their lifespan.

Solar Hot Water Systems

Solar hot water systems have a longer average lifespan, typically between 15 and 20 years. These systems use solar panels to heat water, making them more environmentally friendly and cost-effective in the long run.

However, the lifespan of a solar hot water system can be affected by factors like water quality and the efficiency of the solar panels. Regular inspections and maintenance are IMPORTANT to ensure the system is functioning correctly and to avoid any potential issues that could shorten its life expectancy.

Tankless Hot Water Systems

Tankless systems, also known as continuous flow systems, can last up to 20 years. These systems provide hot water on demand, which reduces wear and tear compared to storage tank systems. However, the longevity of tankless systems depends on regular maintenance and timely repairs. Hard water can cause buildup inside the system, so ensuring good water quality is vital.

Factors Influencing Hot Water System Lifespan

Quality of Installation and Materials

The installation quality of your hot water system plays a significant role in its lifespan. Poor installation can lead to issues such as leaks, inefficient heating, and premature failure of components. It is essential to hire a licensed plumber to ensure the system is installed correctly. The materials used in the system, such as enamel-lined tanks and high-quality heating elements, also impact longevity.

Water Quality

Water quality is another critical factor that affects the lifespan of hot water systems. Hard water, which contains high levels of minerals, can lead to sediment buildup in the tank and pipes, causing corrosion and reducing efficiency. Installing a water softener can help mitigate these issues and extend the useful life of your hot water system.

Usage Patterns

Usage patterns significantly impact the lifespan of hot water systems. Systems in larger households or those with high hot water demand where bathrooms are used very regularly or kitchens with a dishwasher for example. will experience more wear and tear than those in smaller households. Additionally, colder climates can put more strain on the system, as it has to work harder to heat the water.

Maintenance Tips to Extend Lifespan

Regular Maintenance

Regular maintenance is crucial for extending the lifespan of your hot water system. This includes flushing the tank annually to remove sediment, checking and replacing the anode rod, and inspecting the system for leaks or other issues. Regular inspections by a licensed plumber can help identify and address potential problems before they become major issues.

Timely Repairs

Addressing issues as soon as they arise is vital for maintaining the efficiency and longevity of your hot water system. Ignoring problems like strange noises, leaks, or inconsistent water temperature can lead to more severe damage and costly repairs. Timely repairs ensure that the system continues to function correctly and efficiently.

Signs of a Failing Hot Water System

Common Indicators

Several signs indicate that your hot water system may be nearing the end of its life. These include rusty or discoloured water, which can indicate corrosion inside the tank, and strange noises, which may suggest sediment buildup or other internal issues. Other signs include inconsistent water temperature, reduced hot water supply, and increased energy bills.

When to Replace

Determining when to replace your hot water system requires careful consideration of its age, condition, and performance. If your system is over 10 years old and experiencing frequent issues, it may be more cost-effective to invest in a new system rather than continuing to pay for repairs.

Comparing Lifespan of Different Brands

Brand-Specific Lifespan

Different brands of hot water systems offer varying levels of reliability and longevity. Researching and comparing the lifespan and performance of various brands can help you make an informed decision. Consumer reviews and expert opinions can provide valuable insights into the most reliable hot water heaters on the market today.

Warranties and Customer Service

When selecting a hot water system, consider the warranties and customer service offered by different manufacturers. A good warranty can provide peace of mind and protect your investment, while responsive customer service can help address any issues that arise during the system’s lifespan.

Cost Analysis and Replacement Considerations

Replacement vs Maintenance

Deciding whether to replace or maintain your hot water system involves weighing the costs and benefits. While regular maintenance can extend the system’s lifespan, there comes a point when replacement is more cost-effective. Consider the long-term savings of an energy-efficient model, which can reduce operating costs and provide better performance.

Financing Options and Rebates

Investing in a new hot water system can be expensive, but various financing options and rebates are available to help offset the cost. Many energy companies and government programs offer incentives for installing energy-efficient systems, such as solar systems or heat pumps.

Environmental Impact of Hot Water Systems

Sustainability Considerations

Hot water systems can have a significant environmental impact, particularly in terms of energy consumption and greenhouse gas emissions. Choosing an energy-efficient system, such as a solar hot water system, can reduce your carbon footprint and contribute to a more sustainable future.

Reducing Carbon Footprint

There are several ways to reduce the environmental impact of your hot water system. Installing a heat pump or solar panels can significantly decrease energy usage. Additionally, ensuring proper maintenance and addressing issues like sediment buildup can improve the system’s efficiency and reduce waste.

Final Notes

Summary of Key Points

In summary, the lifespan of hot water systems varies depending on the type, installation quality, water quality, and maintenance. Electric hot water systems typically last 10 to 15 years, while gas hot water systems have a lifespan of 8 to 12 years. Solar hot water systems and tankless systems can last 15 to 20 years or more with proper care. Regular maintenance, timely repairs, and addressing key factors such as water quality and usage patterns are essential for extending the system’s lifespan.

Making Informed Decisions

When considering whether to repair or replace your hot water system, it’s important to evaluate its age, condition, and performance. Investing in a new, energy-efficient system can provide long-term savings and environmental benefits.

By understanding the factors that affect the lifespan of hot water systems and taking proactive steps to maintain and care for your system, you can ensure reliable hot water and make informed decisions that benefit both your home and the environment.

installing a kitchen range hood r exhaust fan

Steps For Installing / Replacing A Kitchen Exhaust Fan

Kitchen exhaust fan installation, also known as installing a range hood or vent hood, is an essential task to ensure proper ventilation and air quality in your cooking space. This guide will provide you with detailed steps on how to install a kitchen exhaust fan, covering everything from selecting the right location to testing and troubleshooting the installation. Follow these steps to ensure a successful and safe installation. See also our article on kitchen bench top heights.

Key Points

  • Importance of an Exhaust Fan: A kitchen exhaust fan is essential for removing smoke, odors, and moisture, improving air quality, and reducing fire hazards.
  • Tools and Preparation: Gather all necessary tools and materials, and ensure proper preparation before starting the installation.
  • Installation Steps: Follow detailed steps for mounting the fan, connecting electrical wiring, and securing ductwork to ensure proper ventilation.
  • Testing and Maintenance: Test the fan for proper operation and regularly maintain it to ensure long-term efficiency and safety.
  • Safety and Compliance: Adhere to safety guidelines and local building codes to prevent potential hazards and ensure a safe installation.
a person using a kitchen exhaust fan

Overview Of Exhaust Fan Installation

A kitchen exhaust fan is crucial for removing smoke, odors, and moisture from your cooking area, thus improving indoor air quality and reducing the risk of fire hazards. Ensuring proper ventilation is essential to prevent the accumulation of grease, which can be a fire hazard when installing a range hood. The installation process involves several key steps, including choosing the right fan, preparing the installation area, and ensuring proper electrical and ductwork connections.

Tools and Materials Needed

Before you begin, gather all the necessary tools and materials. Having everything ready will make the installation process smoother and more efficient.

Tools:

  • Drill
  • Screwdriver
  • Measuring tape
  • Pencil
  • Power drill
  • Screws
  • Wall anchors
  • Duct tape
  • Safety gear

Materials:

  • Exhaust fan (ducted range hood or ductless range hood)
  • Ductwork (for ducted range hoods)
  • Mounting brackets
  • Vent cap
  • Caulking / silicon
  • Exterior vent cover
  • Exterior vent pipe hole

Below is a relevant video from the USA. The process is not identical to what we lay out, but there are some good tips.

Choosing the Right Location

Selecting the optimal location for your kitchen exhaust fan is important for its effectiveness. Here are some considerations to keep in mind:

  • Proximity to the Cooking Surface: The exhaust fan should be installed directly above the cooking range or stove to capture smoke and odors efficiently.
  • Exterior Wall Access: For ducted range hoods, choose a location that allows easy access to an exterior wall for venting.
  • Even Surface: Ensure the installation surface is even to prevent any gaps or misalignment.

There are various types of kitchen exhaust fans, including under-cabinet range hoods, wall-mounted range hoods, island range hoods, downdraft range hoods, and built-in range hoods. Each type has its benefits, such as removing smoke, steam, and grease from the air to maintain a healthy cooking environment.

Pre-Installation Preparation and Vent Hole

Proper preparation is essential for a successful installation. Follow these steps to prepare your kitchen for the exhaust fan installation:

  1. Measure and Mark: Use a measuring tape and pencil to mark the exact location where the exhaust fan will be installed. Ensure the measurements are accurate to avoid any misalignment.
  2. Cutting Openings: Depending on the type of exhaust fan, you may need to cut openings for ductwork. For ducted range hoods and vent hoods, cut a vent hole in the exterior wall. Use a power drill to make locator holes before cutting the final opening.
  3. Shut Off Power Supply: Turn off the power supply to the kitchen. You likely can do this via your fuse box. However follow the recommendation in red below.

Installing the Exhaust Fan and Electrical Wiring

Follow these detailed steps to install the kitchen exhaust fan:

  1. Attach Mounting Brackets: Secure the mounting brackets to the wall or ceiling using screws and wall anchors. Ensure the brackets are level and sturdy.
  2. Position the Exhaust Fan: Place the exhaust fan onto the mounting brackets. Make sure it is securely fastened and aligned with the marked location.
  3. Connect Electrical Wiring: Call your electrician if new wiring is required. DO NOT complete this yourself. The only exception is if the exhaust fan has a 240volt standard plug that you can safely plug into an existing outlet.
  4. Secure the Fan Unit: Once the fan is wired, secure it in place using screws. Double-check that all connections are tight and the fan is stable.

Connecting the Ductwork

For ducted range hoods, connecting the ductwork is an important step to ensure proper ventilation. Here’s how to do it:

  1. Attach the Ductwork: Connect the ductwork to the exhaust fan’s outlet. Use duct tape to secure the connections and prevent any air leaks.
  2. Run the Ductwork: Route the ductwork through the wall to the exterior vent hole. Ensure the ductwork is straight and free from any obstructions.
  3. Install the Exterior Vent Cap: Attach the vent cap to the exterior wall. Use screws and caulking to seal the edges, preventing any backdrafts or moisture from entering the house.

Testing and Troubleshooting

After the installation is complete, it’s important to test the exhaust fan to ensure it is functioning correctly.

Follow these steps:

  1. Power On: Turn on the power supply and switch on the exhaust fan. Check for proper operation, including airflow and noise levels.
  2. Airflow Check: Place your hand near the exhaust fan’s intake to feel the airflow. Ensure it is drawing air effectively from the cooking surface.
  3. Noise Level: Listen for any unusual noises that might indicate a problem with the installation.
  4. Troubleshooting: If the fan is not working correctly, check the electrical connections, ductwork, and mounting brackets. Refer to the manufacturer’s instructions for troubleshooting tips.

Maintenance Tips

Regular maintenance of your kitchen exhaust fan will ensure it continues to operate efficiently and safely. Here are some maintenance tips:

  1. Cleaning: Clean the exhaust fan and ductwork regularly to remove grease and debris. This will improve airflow and reduce fire hazards.
  2. Filter Replacement: If your exhaust fan has a filter, replace it according to the manufacturer’s recommendations. Clean reusable filters with soap and water.
  3. Performance Check: Periodically check the fan’s performance. Ensure there are no obstructions in the ductwork and that the fan operates quietly and effectively.
  4. Inspection: Inspect the exhaust fan and ductwork for any signs of wear or damage. Address any issues promptly to prevent potential hazards.

Final Points

Installing a kitchen exhaust fan is a straightforward process that can significantly improve the air quality and safety of your kitchen. By following these steps and ensuring proper preparation, installation, and maintenance, you can enjoy the benefits of a well-ventilated kitchen. Whether you are installing a new range hood or replacing an old one, the key to success lies in careful planning and attention to detail.

Additional Tips for Specific Installations

  • Ductless Range Hoods: If you are installing a ductless range hood, ensure the recirculating filters are in place. These filters trap grease and odors before releasing the air back into the kitchen.
  • Kitchen Island Installations: For exhaust fans installed above a kitchen island, ensure the ductwork is routed through the ceiling and to an exterior wall. Use PVC pipes if necessary for longer duct runs.
  • Vent Covers: Choose vent covers that match your kitchen’s aesthetic and provide adequate protection from the elements.

Safety Considerations

  • Electrical Safety: Always turn off the power supply before working. CALL YOUR ELECTRICIAN.
  • Fire Hazards: Regularly clean and maintain the exhaust fan and ductwork to reduce the risk of grease fires. Ensure proper ventilation to prevent the buildup of flammable vapors.
  • Local Building Codes: Adhere to local building codes and regulations for electrical work and ventilation systems. This ensures your installation is safe and compliant with standards.

By adhering to these guidelines and taking the necessary precautions, you can install a kitchen exhaust fan that enhances your cooking environment and promotes a healthier, safer home.

Popular Questions

1. What tools are needed to install a kitchen exhaust fan?

To install a kitchen exhaust fan, you’ll need a drill, screwdriver, measuring tape, pencil, power drill, screws, wall anchors, electrical wires, wire connectors, duct tape, and safety gear.

2. How do I choose the right location for the exhaust fan?

The exhaust fan should be installed directly above the cooking range or stove for efficient smoke and odor capture. Ensure the location allows easy access to an exterior wall for venting, if necessary.

3. How do I connect the ductwork for a ducted range hood?

Attach the ductwork to the exhaust fan’s outlet, secure the connections with duct tape, route the ductwork through the wall to the exterior vent hole, and attach the vent cap to the exterior wall, sealing the edges to prevent backdrafts.

4. What maintenance is required for a kitchen exhaust fan?

Regular maintenance includes cleaning the exhaust fan and ductwork to remove grease and debris, replacing or cleaning filters, checking performance, and inspecting for wear or damage.


a wall ready for insulation

How to Install Wall Insulation in Australia: A Step-by-Step Guide

Installing wall insulation in Australia is important for maintaining comfortable indoor temperatures throughout the year. Proper insulation helps keep your home warm in winter and cool in summer, significantly improving energy efficiency. Below are steps on how to install wall insulation, focusing on practical steps and important considerations.

Introduction

Wall insulation plays a significant role in enhancing the energy efficiency of homes. By installing wall insulation batts, you can reduce heat transfer, ensuring a more comfortable living environment and lower energy bills. This guide covers everything you need to know about installing wall insulation in Australia.

Types of Wall Insulation

Different types of insulation materials are available, each with its unique properties. The most common types include:

  • Fiberglass Insulation Batts
  • Foam Board Insulation
  • Spray Foam Insulation
  • Cellulose Insulation
  • Glass Wool (wall insulation batt – pink batts)

Each material has a specific R-value, representing its thermal resistance. The higher the R-value, the better the insulation performance. The material R-value represented specifies the R-value of the product material at a certain mean temperature according to industry standards.

Preparing for Installation

Assessing the Wall Structure

  • Inspect the stud cavity and identify any obstructions such as electrical wiring, plumbing, or ventilation ducts.
  • Determine the material R-value required for your location’s mean temperature and climatic conditions. The material R-value is independent of heat flow direction, meaning that the same R-value is achieved in both summer and winter conditions.

Measuring and Cutting Insulation

  • Measure the dimensions of the wall cavities (and external wall) and cut the insulation batt to fit using a sharp knife or utility knife.
  • Use a cutting board to protect surfaces and ensure straight cuts.

Tools and Materials Needed

  • Insulation batts
  • Dust mask and safety glasses
  • Utility knife and cutting board
  • Staple gun
  • Tape measure
  • Long sleeve shirt and gloves for protection

Safety Precautions: Using a Dust Mask

Safety is paramount during insulation installation. Here are key precautions:

  • Wear a dust mask, safety glasses, and protective clothing like a long sleeve shirt.
  • Turn off power to the work area to prevent power accidents. Attach a warning tag to the fuse box to ensure the power is not restored prior to completion.
  • Handle insulation materials carefully to avoid skin irritation or respiratory issues.

Installing Fiberglass Insulation Batts

Preparing the Wall Cavity: Managing Electrical Wiring

  • Ensure the cavity is clean and free from debris.
  • Install a vapour barrier if required, especially for external walls.

Placing the Insulation

  • Insert the insulation batts into the wall cavity, starting from the bottom plate and working your way up to the top plate.
  • For interior walls, R-13 batt insulation is recommended to shield from extreme heat and cold.
  • The insulation should be a friction fit between the studs, ensuring it stays in place without sagging.
  • Make sure the insulation is completely covered and fits snugly around obstacles like electrical cables and plumbing.

Securing the Insulation

  • Use a staple gun to attach the insulation to the studs, ensuring it remains secure and does not shift.
  • Seal any gaps with tape to prevent air leaks and ensure the insulation is completely surrounded.

Installing Glass Wool (Pink Batts)

What is Glass Wool?

Glass wool, commonly known as Pink Batts in Australia, is a popular insulation material made from recycled glass. It offers excellent thermal and acoustic insulation properties.

Benefits of Using Pink Batts

  • High R-value providing efficient thermal insulation.
  • Non-combustible and safe to use in residential buildings.
  • Effective in reducing noise levels due to its acoustic properties.

Installation Process for Pink Batts

  1. Measure and Cut the Batts:
    • Similar to other insulation materials, measure the wall cavities and cut the Pink Batts using a sharp knife.
    • Ensure the batts fit snugly within the studs without any gaps.
  2. Place the Batts:
    • Insert the Pink Batts into the wall cavity, ensuring they are properly aligned and extend from the bottom plate to the top plate.
    • Ensure the batts fit around any electric cables and plumbing without compressing them.
  3. Secure the Batts:
    • Use a staple gun to secure the Pink Batts to the studs. Make sure the batts are held firmly in place.
    • Seal any joints or gaps with appropriate tape to ensure no air leakage.
  4. Safety Precautions:
    • Always wear a dust mask, safety glasses, and a long sleeve shirt to protect against irritation from the glass fibers.

Sealing and Finishing

Sealing Gaps and Seams

  • Use caulking or sealing tape to close any gaps around windows, doors, and other penetrations.
  • Ensure the insulation is completely covered and all seams are sealed to prevent air leaks.

Installing the Interior Lining

  • Once the insulation is securely in place and all gaps are sealed, install the internal lining such as plasterboard or drywall.
  • Ensure the lining is properly fixed to the studs, creating a neat and secure finish.

Maintenance and Inspection

Regular Inspections

  • Periodically check the insulated walls for any signs of damage or moisture intrusion.
  • Ensure the insulation remains in place and is not compressed or dislodged.

Addressing Issues

  • Repair any damaged areas promptly to maintain the insulation’s effectiveness.
  • Upgrade insulation if necessary to maintain optimal thermal performance.

Ensuring Ventilation

Proper ventilation is crucial to prevent moisture buildup and ensure the longevity of the insulation. Proper ventilation in the roof space is also essential to prevent moisture buildup and ensure the longevity of the insulation.

Ensure exhaust fans and other ventilation systems are functioning correctly.

Final Points

Installing wall insulation (insulation installation) in Australia involves careful planning, the right materials, and attention to detail. By following this guide, you can ensure your home is well-insulated, energy-efficient, and comfortable year-round. Proper installation not only improves thermal performance but also contributes to significant energy savings, making it a worthwhile investment for any homeowner.


pink batt roof insulation

What Are Common Roof Insulation Option In Australia

In Australia, ensuring your home has adequate insulation is essential for comfort and energy efficiency. Roof insulation plays an important role in regulating your home’s temperature, reducing heating and cooling costs, and enhancing overall thermal performance. By understanding the different types of insulation and their benefits, you can make an informed decision on the best insulation for your roof.

Also see our article on how to install wall insulation.

Types of Roof Insulation

Bulk Insulation

Bulk insulation works by trapping pockets of air within its structure, resisting heat flow, and is commonly used for ceiling insulation. This type includes insulation batts, loose fill insulation, and rigid foam. Bulk insulation is effective in both cooler and warmer climates, providing excellent thermal resistance.

  • Insulation Batts (Pink batts): Typically made from glass wool, polyester, or natural fibers, batts are easy to install between roof rafters and ceiling joists. They offer high R-values, important for resisting heat flow and improving thermal efficiency.
  • Loose Fill Insulation: Made from materials like cellulose, fiberglass, or recycled paper, this insulation is blown into roof spaces, ideal for irregularly shaped areas.
  • Rigid Foam: Rigid foam panels, often used in flat ceiling installations, offer high thermal resistance and can be installed under roofing materials.

Reflective Insulation

Reflective insulation, such as reflective foil insulation, consists of aluminum foil laminated onto paper or plastic. This type reflects radiant heat away from your home, making it particularly effective in warmer climates where heat gain is a concern. Reflective insulation is often installed under metal roofs and sheds, and can be combined with bulk insulation for enhanced performance.

  • Reflective Foil Insulation: This thin layer of aluminium foil reflects up to 95% of radiant heat, reducing cooling costs significantly. It’s commonly used in roof spaces and installed alongside other insulation products to maximise efficiency.
foil insulation in  shed roof

Spray Foam Insulation

Spray foam insulation is applied as a liquid that expands into a foam, filling gaps and providing a seamless barrier against air leakage and heat transfer. It offers high R-values and is effective in preventing moisture buildup and mold. Spray foam can be used in various roof configurations, including pitched roofs and cathedral ceilings.

spray foam insulation being installed in a roof

Understanding R-Values and Australian Standards

What Are R-Values?

R-values measure an insulation material’s resistance to heat flow. The higher the R-value, the better the insulation’s ability to resist heat transfer. Australian building codes, guided by the Australian Building Codes Board (ABCB), specify minimum R-values for different climate zones to ensure thermal efficiency and comfort.

  • High R-Value Insulation: Essential for achieving adequate insulation in both cooler and warmer climates, high R-value materials resist heat loss in winter and heat gain in summer.

Compliance with Australian Standards

Choosing insulation that complies with Australian standards ensures your home meets regulatory requirements and maximises energy efficiency. The ABCB provides guidelines on the appropriate R-values for different climate zones, which vary across Australia from temperate climates to tropical regions.

Installation Process of Roof Insulation

Preparing Your Roof for Insulation

Proper preparation is important for effective insulation. Installing insulation correctly is important for maximising its effectiveness and ensuring long-term performance. This involves assessing your roof space, identifying any air leakage or moisture issues, and ensuring the roof structure is sound.

  • Install Insulation Correctly: Follow manufacturer guidelines and Australian standards to install insulation effectively, whether you’re using batts, spray foam, or reflective foil. Consider the type of roof, such as pitched roofs with flat ceilings, and the climate zone when choosing insulation. Regular maintenance and checking for air leaks are also important.
  • Safety Tips: Wear protective gear, ensure good ventilation, and follow safety precautions to avoid hazards during installation.

DIY vs. Professional Installation

While DIY installation can save costs, professional installers ensure the job is done correctly and safely. Insulation specialists can provide advice on the best roof insulation options and ensure compliance with building codes.

Cost Analysis and Budgeting

Breakdown of Insulation Costs

The cost of roof insulation varies depending on the type of insulation material, the size of your roof space, and installation complexity. Here’s a general breakdown:

  • Insulation Batts: Cost-effective and easy to install, with prices varying based on material (e.g., fiberglass, polyester).
  • Spray Foam: Higher upfront cost but offers superior performance and longevity.
  • Reflective Foil Insulation: Mid-range cost, especially effective in reducing cooling costs.

Long-term Savings and ROI

Investing in high-quality insulation provides long-term savings on energy bills. Efficient insulation reduces heating and cooling costs, offering a significant return on investment over time.

Environmental Impact and Sustainability

Eco-Friendly Insulation Options

Sustainable insulation materials, such as recycled glass wool and cellulose, minimise environmental impact. Choosing eco-friendly options can reduce your carbon footprint and contribute to greener building practices.

  • Polyester Insulation: Made from recycled plastic, it’s a durable and sustainable choice.
  • Glass Wool: Often produced from recycled glass, it offers excellent thermal performance and fire resistance.

Maintenance and Longevity of Roof Insulation

Routine Maintenance Tips

Regular maintenance ensures your insulation remains effective over time. Check for signs of wear, moisture damage, or pests.

  • Signs of Wear and Tear: Look for compressed or damp insulation, which can reduce effectiveness.
  • Repair and Replacement: Repair damaged areas promptly and replace insulation when necessary to maintain thermal performance.

Final Points

Choosing the best insulation for your roof involves understanding the different types of insulation, their benefits, and compliance with Australian standards. By investing in high-quality insulation and ensuring proper installation, you can significantly reduce heating and cooling costs, enhance energy efficiency, and improve your home’s comfort.

Below You Can Find Some Additional Information On Insultation Types

Foam Insulation

Foam insulation, including spray foam and rigid foam, offers high thermal resistance and is effective in sealing gaps and preventing air leakage. It’s suitable for various roof types, including pitched and flat ceilings, and provides long-term durability.

Fiberglass Insulation

Fiberglass insulation, often available as batts or loose fill, is widely used due to its affordability and excellent thermal performance. It’s fire-resistant and suitable for both ceiling and roof spaces.

Reflective Foil

Reflective foil insulation is particularly effective in hot climates, reducing radiant heat transfer and cooling costs. It can be installed under metal roofs and combined with other insulation materials for improved efficiency.

Special Considerations for Different Roof Types

Metal Roofs

For metal roofs, combining reflective foil insulation with bulk insulation can enhance thermal performance and reduce noise from rain. Ensure the insulation material is compatible with the roofing material to prevent corrosion.

Pitched Roofs

Pitched roofs benefit from both bulk and reflective insulation. Ensure adequate ventilation to prevent moisture buildup and consider using high R-value materials to maximise thermal efficiency.

Cathedral Ceilings

Cathedral ceilings require insulation with high R-values due to their limited space for insulation materials. Spray foam is an excellent choice for these ceilings, providing effective thermal insulation and air sealing.

Climate-Specific Recommendations

Cooler Climates

In cooler climates, focus on insulation materials with high R-values to minimise heat loss. Bulk insulation, such as fiberglass or polyester batts, is effective in maintaining warmth during winter.

Warmer Climates

For warmer climates, prioritise reflective insulation to reduce heat gain and cooling costs. Reflective foil insulation combined with adequate bulk insulation can keep your home cool and energy-efficient.

Temperate Climates

In temperate climates, a balanced approach using both bulk and reflective insulation is ideal. This combination provides year-round comfort by reducing heat loss in winter and heat gain in summer.

Expert Tips for Maximising Insulation Efficiency

Preventing Moisture Buildup

Moisture can compromise the effectiveness of insulation. Ensure proper ventilation and use vapor barriers where necessary to prevent moisture buildup and mold growth.

Air Leakage

Seal any gaps or cracks in your roof space to prevent air leakage, which can undermine the effectiveness of your insulation. Use foam insulation or sealants to create a tight barrier against air infiltration.

Choosing the Right Insulation Product

Consult with insulation specialists to select the best insulation product for your specific needs and climate zone. Consider factors like thermal performance, cost, environmental impact, and ease of installation.

Investing in the best roof insulation for your Australian home can significantly enhance energy efficiency, reduce heating and cooling costs, and improve overall comfort. By understanding the different types of insulation, their benefits, and the importance of compliance with Australian standards, you can make an informed decision that will provide long-term benefits.

Whether you choose bulk insulation, reflective foil, or spray foam, ensuring proper installation and maintenance will maximise the effectiveness of your insulation and contribute to a sustainable and energy-efficient home.

mold damage to a wall

Preventing Mold After Water Damage Or Flooding In Your Home

Recently, the team at Mayfair Building Group undertook bathroom repairs on a home in Adelaide with water damage from a shower water leak into a wall.

Flooding and water damage can create a suitable environment for mold growth, posing serious health risks and structural damage to your property. Mold can cause allergic reactions, respiratory issues, and even death in severe cases.

Acting quickly is important to prevent mold and mitigate further damage. We discuss the steps for mold prevention and repair after a flood.

Below are some images of the recent damage and after a shower leaked into a wall.

Understanding Mold and Its Dangers

Mold is a type of fungus that thrives in damp areas with high humidity levels. It spreads through mold spores which can trigger allergic reactions and affect indoor air quality. Black mold (Stachybotrys chartarum) is particularly hazardous, and prolonged mold exposure can lead to severe health problems.

Health Risks:

  • Allergic reactions: Symptoms include sneezing, runny nose, red eyes, and skin rash.
  • Respiratory issues: Asthma attacks, chronic cough, and respiratory infections.
  • Toxic effects: Some molds produce mycotoxins that can cause neurological problems and even death.

Immediate Steps After Flooding

Act quickly to prevent mold growth. Here are the immediate steps to take:

  1. Ensure Safety: Wear gloves and a mask before entering the affected area.
  2. Remove Standing Water: Use a wet dry vacuum to eliminate any standing water.
  3. Dry the Area: Utilise dehumidifiers, fans, and heaters to reduce moisture and lower the relative humidity.
  4. Discard Damaged Items: Remove and dispose of wet items, wet insulation, and any porous surfaces like carpets and ceiling tiles that are water damaged.
  5. Clean and Disinfect: Clean non-porous surfaces with a solution that kills mold and prevents mildew growth.

Drying and Dehumidification

Effective drying and dehumidification is pretty important in preventing mold.

Steps for Drying:

  • Increase Airflow: Open windows and doors to promote air circulation. Use fans to enhance airflow.
  • Use Dehumidifiers: Place dehumidifiers in the affected area to extract moist air. For larger spaces, a larger model may be necessary.
  • Maintain Low Relative Humidity: Aim for low relative humidity (below 60%) to inhibit mold growth.
  • Target Hidden Areas: Ensure thorough drying of hidden areas like behind walls and under floors.

Importance of Dehumidification:

  • Reduces moisture in the air.
  • Prevents the spread of mold spores.
  • Ensures the drying process is complete, avoiding further damage.

Cleaning and Disinfecting

Thorough cleaning and disinfecting help eliminate mold spores and prevent mold growth.

Cleaning Steps:

  • Hard Surfaces: Scrub with a mixture of water and detergent. Use bleach sparingly as it can spread mold if not properly used.
  • Porous Surfaces: Remove and dispose of items like carpets and upholstery that cannot be thoroughly cleaned.
  • Disinfect: Use registered disinfectant that kills mold and prevents mildew growth.

Key Areas to Clean:

  • HVAC System: Clean and disinfect to prevent the spread of mold spores through the air.
  • Walls and Floors: Ensure all surfaces are clean and dry.
  • Wet Insulation: Replace any insulation that has become water damaged.

Repairing and Replacing Damaged Materials

Repairing and replacing water-damaged areas is essential to prevent mold growth.

Steps for Repairing:

  • Assess the Damage: Conduct a thorough inspection to identify visible mold and hidden areas of damage.
  • Remove Damaged Materials: Safely remove water-damaged drywall, flooring, and other building materials.
  • Replace and Repair: Install new materials to replace those that were removed. Ensure all replacements are dry and mold-free before installation.
  • Improve Ventilation: Add vents or windows to improve air circulation and reduce humidity levels.

Materials to Focus On:

  • Ceiling Tiles: Replace any that show visible discoloration or damage.
  • Walls: Check for mildew growth and replace affected drywall.
  • Flooring: Remove and replace water-damaged carpets and floorboards.

Professional Mold Remediation

In severe cases, hiring a professional mold remediation company is necessary. Talk to us on how we can provide this service.

When to Hire Professionals:

  • Extensive Mold Growth: If the mold problem covers a large area or is particularly severe.
  • Health Concerns: If you or your family are experiencing health issues related to mold exposure.
  • Insurance Claims: When dealing with significant water damage that may involve your insurance company.

Choosing a Professional:

  • Request Mold Testing: Professional mold inspectors can conduct mold inspection and mold testing to determine the extent of the infestation.
  • Get Multiple Quotes: Compare prices and services to select the best option.

Benefits of Professional Remediation:

  • Expertise: Professionals have the knowledge and equipment to handle mold removal effectively.
  • Thoroughness: Ensures all mold is removed, reducing the risk of recurrence.
  • Peace of Mind: Professional work guarantees a mold-free home.

Prevention Tips for the Future

Long-Term Mold Prevention Strategies:

  1. Control Humidity Levels: Maintain indoor humidity below 60%. Use dehumidifiers and air conditioners to control moist air.
  2. Fix Water Leaks: Address leaks in roofs, walls, and plumbing promptly to prevent water exposure.
  3. Improve Ventilation: Ensure good ventilation in kitchens, bathrooms, and basements. Use exhaust fans to remove moisture.
  4. Regular Inspections: Conduct regular mold inspection to catch issues early. Look for signs like musty smell or visible mold.
  5. Use Mold-Resistant Products: When renovating, choose mold-resistant drywall, paint, and insulation.

Tips for Preventing Mold:

  • Keep Areas Dry: After a spill or leak, dry the area within 24-48 hours to prevent mold growth.
  • Monitor Humidity: Use a hygrometer to measure and maintain low relative humidity levels.
  • Regular Cleaning: Clean and disinfect hard surfaces and non-porous surfaces regularly.
  • Proper Storage: Store items in dry areas to avoid water damage.
  • Use Mold Inhibitors: Add mold inhibitors to paints and other coatings used in damp areas.

Seasonal Tips:

  • Summer: Use air conditioners to dehumidify and cool the air.
  • Winter: Use a dehumidifier in the basement and other damp areas.

Final Points

Preventing and repairing mold damage requires swift action and thorough methods. By understanding the dangers of mold, taking immediate steps after flooding, effectively drying and cleaning, repairing damaged materials, considering professional help, and implementing long-term mold prevention strategies, you can protect your home and health.

Regular inspections and maintenance are important to keep your living environment safe and mold-free.

How To Paint A Concrete Floor – Preparation Is Key

Painting a concrete floor is a worthwhile DIY project that can transform a dull space into an amazing area. Whether you’re revamping your garage floor or refreshing your patio, the right approach to paint concrete floors ensures a durable and visually appealing finish. Follow this comprehensive guide to learn the best practices for painting concrete floors, from preparation to the finishing touches.

We also have a great article on epoxy bathroom floors.

Introduction

Painting your concrete floor is an excellent way to refresh your space, be it a garage, basement, or an outdoor patio. With the right tools and techniques, even those with minimal experience can achieve a smooth, durable finish.

The TL;DR version can be viewed through this Bunnings DIY video:

https://www.youtube.com/watch?v=CpL7t7MDhMM

Materials Needed

To start your painting project, gather all the must-have supplies to ensure a smooth process:

  • Acrylic latex concrete paint and patio floor paint: Choose high-quality paint designed for concrete surfaces.
  • Primer: A concrete primer is essential for ensuring paint adhesion.
  • Putty knife, wire brush, and paint stripper: For removing old paint and smoothing surfaces.
  • Roller, roller covers, and paint tray: For applying paint and primer.
  • Painter’s tape: To protect edges and corners.
  • Bucket, sponge, and dish soap: For cleaning the floor.
  • Hand sander or sandpaper: For sanding rough areas.

These supplies are specifically chosen for their effectiveness on concrete flooring, emphasizing the importance of selecting the right materials for concrete surfaces.

Preparation of the Concrete Floor

Proper preparation is important for a successful paint job on concrete floors. Removing all the old paint (if any), including leftover paint or paint stains, is essential for achieving a smooth concrete surface. This step ensures that the floor is free of imperfections that could affect the final appearance. Sanding down high spots not only helps in eliminating any remaining paint but also aims to create an even concrete surface that’s ideal for painting.

Cleaning and Repairing

  1. Remove Dirt and Debris: Use a vacuum to clean the floor thoroughly. For stubborn dirt or stains, use a bucket with warm water and dish soap to scrub the surface.
  2. Strip Old Paint: If there’s peeling or flaking paint, use a paint stripper and a putty knife to remove it.
  3. Sanding & Grinding: Rough areas should be sanded or ground down to create a smooth surface. Depending on how rough your floor is, you can hire concrete grinders and sander from hire outlets like Kennards or Coates.
  4. Repair Cracks and Holes: Fill any cracks or holes with a cement filler. Use a putty knife to smooth the filler and ensure it’s level with the floor.

Moisture Test

Before applying new paint, conduct a moisture test. Tape a plastic sheet to the floor and leave it for 24 hours. If condensation forms underneath, the concrete has too much moisture for painting.

Applying Primer

Priming is essential for a long-lasting paint job. It helps the paint adhere better and last longer.

Primer Application

  1. Apply Masonry Sealer: If needed, apply a masonry sealer with a roller to block moisture.
  2. Priming: Apply a concrete primer using a roller. Start from the far corner of the room and work towards the door. Allow the primer to dry completely according to the application instructions.

Painting Concrete Floors Process

The main task of your project is the painting process. Use a roller for the best results, and follow these steps for applying acrylic latex concrete paint. For those considering an alternative finish, concrete stain might be an appealing option. Acid-based stains penetrate the concrete, offering longer-lasting coverage with a unique appearance, though they may result in some streaking and unevenness. In contrast, painting concrete provides a more uniform and richly colored finish but may not be as durable over time.

a person painting a concrete floor first coat

Base Coat

  1. First Coat: Pour the paint into a paint tray. Begin at the farthest corner of the room and use a roller to apply a thin, even coat. Use painter’s tape to protect walls and corners.
  2. Let the First Coat Dry: Allow the first coat to dry completely. This can take several hours, depending on air circulation and humidity.

Second Coat

  1. Apply the Second Coat: After the first coat is dry, apply the second coat. This ensures a durable and opaque finish.
  2. Dry Completely: Let the second coat dry completely, which can be time-consuming but is essential for a durable finish.

Finishing Touches

Applying Concrete Floor Sealer

After the paint has dried, apply a concrete sealer. This will protect your painted floor from moisture, stains, and wear, especially in high traffic areas.

  1. Sealer Application: Use a clean roller to apply the sealer. Start from the back of the room and work towards the entrance.
  2. Let the Sealer Dry: Allow ample time for the sealer to dry. Avoid walking on the floor until the sealer is completely dry.

Maintenance and Care

To maintain your newly painted concrete floor, regular cleaning and occasional touch-ups are necessary.

  • Regular Cleaning: Sweep the floor regularly and mop with a gentle cleaner.
  • Occasional Touch-Ups: For scratches or peeling, apply a small amount of paint to the affected area.

Final Points

Painting a concrete floor can significantly improve the appearance of your space. With the right preparation, materials, and techniques, you can achieve a professional-quality finish that is both beautiful and durable. Remember to allow each layer to dry completely and follow all application instructions for the best results.